Hope Tech Crankset User Manual
Page 2
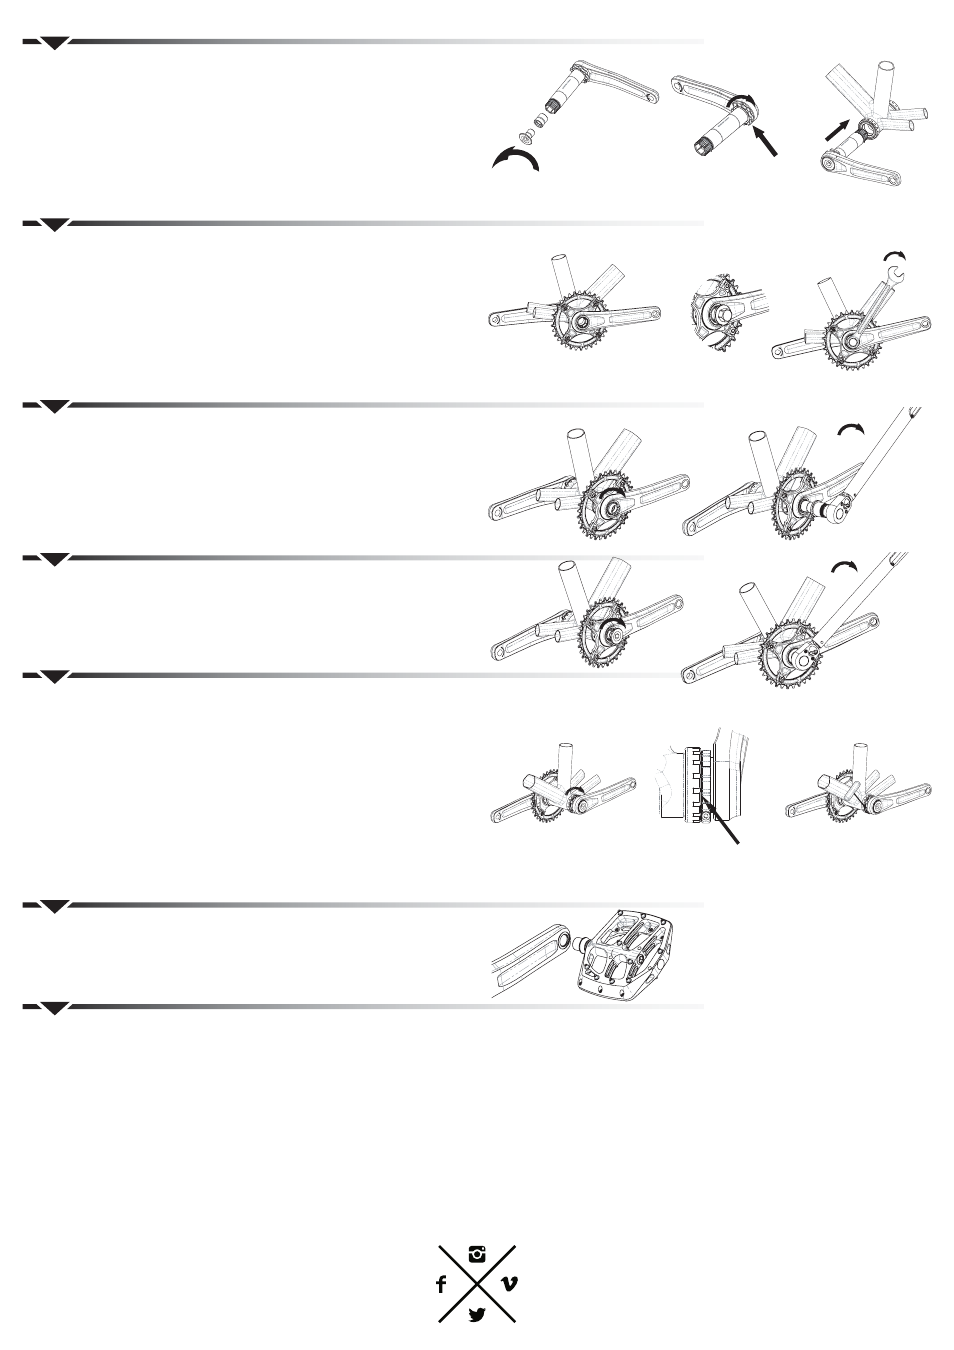
STEP 3: INSTALL NON DRIVE SIDE SUB ASSEMBLY
001: On the free end of the shaft, unscrew the shaft end cap and shaft
tapered plug. Apply grease on the bearing contact surface of the shaft
and bearing inner race.
002: Make sure the bearing preload nut is fully screwed on so that there is
no gap between the bearing preload ring and the non drive side crankarm.
003: Slide the sub assembly in to the bottom bracket from the non drive
side of the bike. The shaft should slide in easily by hand.
DO NOT USE A HAMMER!
STEP 4: INSTALL DRIVE SIDE CRANKARM
;OLUL_[Z[HNLVUS`WYLZZLZ[OLJYHURHYTPU[VP[ZÄUHSWVZP[PVU
001: Apply grease to the shaft spline and slide the drive side arm on
THRPUNZ\YLP[PZWVZP[PVULKKLNYLLZMYVTUVUKYP]LZPKLHYT
002: Screw the crankset assembly tool in.
003: Using a 19mm spanner, tighten the crankset assembly tool until
the drive side crankarm comes to a solid stop against the shaft
angled shoulder.
004: Unscrew the crankset assembly tool.
003:
002:
002:
001:
001:
STEP 5: INSTALL DRIVE SIDE CRANKARM
TAPERED PLUG
001: If not already greased, apply some grease on the tapered plug
[OYLHKHUK[HWLYLKMHJL:JYL^[OLWS\NPU[OLZOHM[I`OHUKÄYZ[
002: Fully tighten the tapered plug using the petal shaped end of the
crankset assembly tool using a 19mm socket.
9LJVTTLUKLK[PNO[LUPUN[VYX\L!5T
003:
002:
001:
hopetech.com
STEP 7: PRELOAD THE BEARINGS
IMPORTANT: Do not use the extraction spanner to tighten the bearing
preload nut at this point. This would overload the bearings and lead to
premature wear.
001: Unscrew the preload screw by hand until it comes into contact with
the bottom bracket bearing shield.
002: There should be no visible gap between the preload nut and the
bearing shield.
003: Using a 2.5mm Allen key, tighten the preload nut pinch bolt.
9LJVTTLUKLK[PNO[LUPUN[VYX\L!5T
004:*OLJR[OH[[OLYLPZUVZPKLWSH`PU[OLJYHURZL[HZZLTIS`HUK[OH[
the bottom bracket can spin freely.
STEP 8: INSTALL THE PEDALS
Install the pedals making sure you use the pedal washers provided to avoid
damaging your crankarm when tightening the pedals.
9LJVTTLUKLK[PNO[LUPUN[VYX\L!5T
TEST RIDE
.VMVYH[LZ[YPKL
STEP 6: INSTALL DRIVE SIDE SHAFT END CAP
001: If not already greased, apply some grease to the shaft end cap thread.
:JYL^[OLLUKJHWPU[OL[HWLYLKWS\NI`OHUKÄYZ[
002: Fully tighten the end cap using a 10mm Allen key
9LJVTTLUKLK[PNO[LUPUN[VYX\L!5T
002:
002:
NO GAP
003:
001:
001: