Home Easy HE414 User Manual
Page 2
C H Byron
34, Sherwood Rd
Aston Fields
Bromsgrove
B60 3DR
Contact Details:
433MHz
R&TTE
APPROVED
CH Byron Electrical United Kingdom. www.chbyron.com
A
B
DK
FIN
F
D
GR
LT
IRL
I
L
NL
P
E
S
UK
BG
CZ
EST
H
IS
LV
M
N
SK
SLO
CH
PL
RO
0560
Tel: 0845 2301231
Fax: 01527 557701
Web: www.chbyron.com
E-mail:
Contact:
Helpline: 0845 2301 231
WARNING:
You MUST install an earth cable between the origin of the installation and the earth
terminal of the outdoor socket. This must be insulated inside a sleeve protector within
the conduit.
If using metal conduit, earth continuity must be maintained between conduits. Seal
Conduit and conduit entry with a non setting conduit sealant. Purchasable form you
local electrical retailer.
Remote Socket reset:
To delete all the remote control units from the memory of the receiver socket,
hold the "Learn" button for more than 6 seconds, the LED will start to blink
continuously. Press the learn button again, the LED will blink twice to confirm
the deletion of all remote controls form the receiver memory.
Product Specification:
Remote Control: Receiver HE-410
Input: 230V ~50Hz
Range: 30 Metres (Open Distance)
Frequency: 433.92MHz
Max Load: 3000W (Resistive)
IP56 (Lid Clip closed)
Warning: Never Exceed the Product Specification
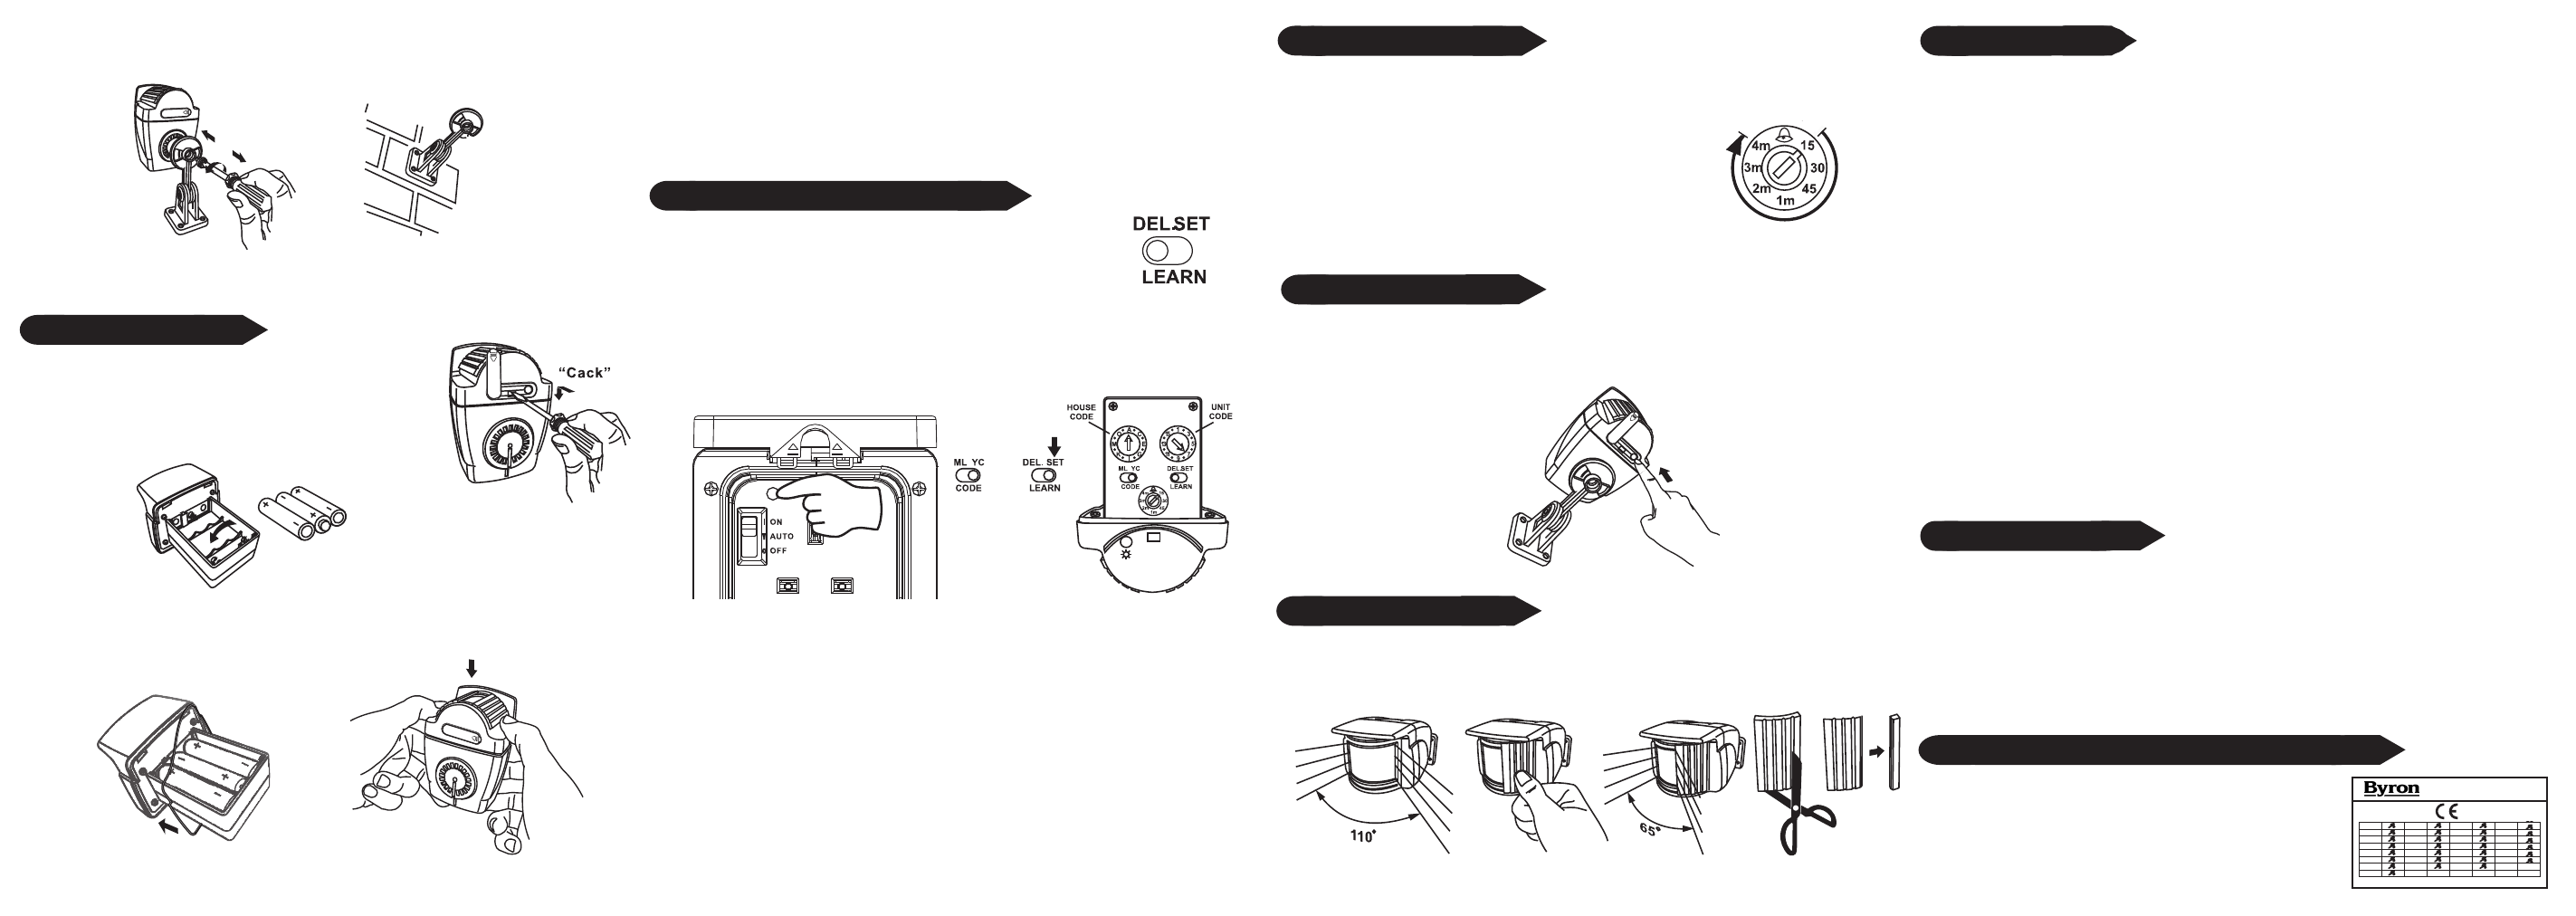
To pair the outdoor PIR with a receiver unit, remove the
battery cover and, slide the switch to DEL.
if required select a new group or unit code
(using additional PIR units).
Deleting Remote Control:
To delete the PIR from the memory of a HomeEasy receiver socket or module,
simply press the "Learn" button. The LED will start to blink; slide the "LEARN"
switch to "DEL",, the LED will blink twice to confirm that the remote control has
been removed from the receiver sockets memory.
Pairing/Deleting with Remote Control:
Up to Six remote control units can be paired with each HomeEasy Receiver
socket or module, press the "Learn" button . The LED will start to flash, now
slide the "LEARN" switch to "SET", the units are now paired together.
Detection Area:
Remote Control PIR: HE-403
Battery: 3 * AAA
Range: 25Metres (Open Distance)
Frequency: 433.92MHz
IP44 Weather Proof
Setting Timer :
The HomeEasy Outdoor PIR will active for
a predefined period of time when
activated, this can be set between 15
seconds and 4 minutes.
To select the time period, remove the
battery cover and using a small screw
driver rotate the dial to select the
required time.
Timer Setting:
1min:
15 sec:
4 min(max):
The PIR detection area is 110 degrees, this can be reduced using the clip-on
covers (included). if required the covers can be cut to size.
if required the covers can be cut to size.
N/A:
Day/Night Setting:
The PIR can operate 24Hrs a day orat night night (Low Level Conditions
<10Lux). To select night only mode, remove the cover from the bottom of the
PIR and press the "LUX" button as shown below.
RF Range:
The radio signals operating distance is reduced when the signal has
to pass through walls. The radio signals achieve a range of 25m; this can be
reduced depending on the type of material.
No Activation:
-Check the battery life and pairing with receiver socket or
module.
Receiver stays ON
-The PIR might be receiving false signals due to the
continuously:
selected location, try adjusting the angle.
Radom Activation:
-Wind/rain can cause the PIR unit to activate , try a new
location if needed.
-Small animals can activate the PIR.
-Try selecting a new address code.
-Passing traffic or pedestrian can activate the PIR, alter
the detection angle.
Help Section :
2. Remove the PIR unit form the base and using the mounting bracket as a
template mark and drill appropriate holes and fix the bracket securely using
the appropriate screws and wall plugs (included).
1. Unclip the battery cover from the bottom of the
PIR using a small screw driver.
Changing Batteries:
2. Remove the batteries and replace using 3
new 'AAA' batteries, making sure the polarity
is correct.
Always dispose of old batteries in a
environmentally responsible way
3. Replace the battery cover making sure the rubber seal is correctly
aligned and firmly push the case together.
Rubber seal