I) (ii) – Hase Merida User Manual
Page 36
36
room is well-ventilated and open the windows
and outside doors. If needed, use a fan for
faster air circulation.
If the maximum temperature is not reached during the first he-
ating operation, you may notice an odour for a short period of
time the next time the stove is used as well.
7. Lighting the Fire
The firing up phase should be as short as possible, since higher
emissions can occur during this phase.
The slider settings described in Table 1 (see figure on the right)
are recommendations that were determined under confor-
mance testing conditions, in compliance with the relevant stan-
dard. Depending on the weather conditions and the draught ca-
pability of your chimney, accordingly adjust the slider positions
for your Merida to the local conditions.
NOTE!
The Merida may only be operated when the fire
box door is closed; the fire box door may
only be opened to add fuel.
WARNING!
Never use spirits, petrol, or other flammable
fluids to light the stove.
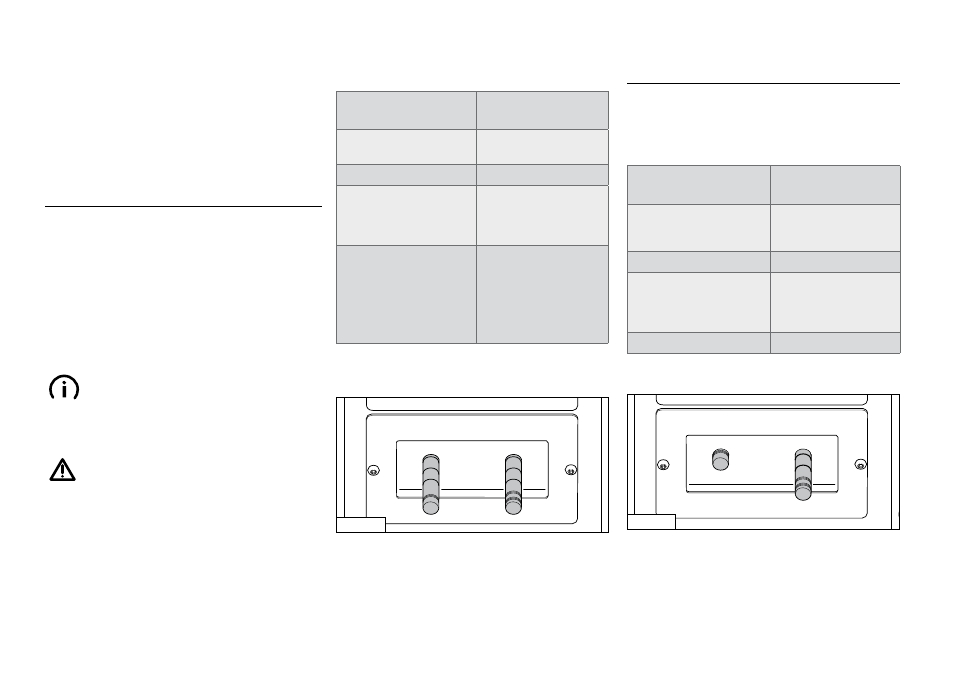
Lighting the Fire
Procedure
Position of Control
Elements
Completely open primary
and secondary air.
Pull primary and secondary air
slider all the way out. (fig. 7)
Open fire grate.
Pull out fire grate slider.
Pile up any remaining ash
and unburned Charcoal
into the centre of the
combustion chamber.
Place 2-3 small logs into
the middle of the fire box;
stack approx. 0.5 kg of dry
wood chips on top.
Light the ignition material
at several places.
Open fire box door.
Close fire box door.
Tab. 1
(I)
(II)
Fig. 7
8. Adding Fuel / Heating at Nominal Thermal Output
More fuel should be added to the fire when the flames from the
previous burning off phase have just gone out.
Adding Fuel / Heating at Nominal Output
Procedure
Position of
Control Elements
Adjust primary and
secondary air.
Close primary air slider
(I), set secondary air slider
(II) to position 3. (fig. 8)
Close fire grate.
Push in fire grate slider.
Add two logs weighing approx.
0,8 kg in total. Place logs with
one end to the front of fire box.
Only add a single layer of fuel.
Open fire box door.
Close fire box door.
Tab. 2
Fig. 8
(I)
(II)