Hanna Instruments HI 96802 User Manual
Page 5

8
9
MEASUREMENT
MEASUREMENT
MEASUREMENT
MEASUREMENT
MEASUREMENT
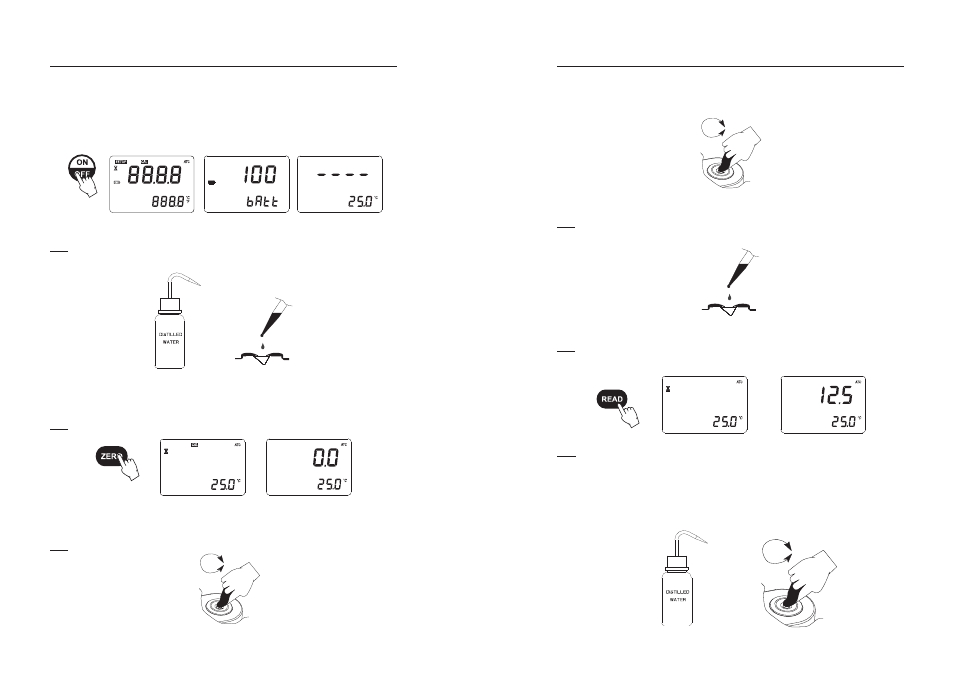
Verify the instrument has been calibrated before taking measurements.
1. Wipe off prism surface located at the bottom of the sample well.
2. Using plastic pipettes, drip sample onto the prism surface. Fill the well completely.
Note: If the temperature of the sample differs significantly from the temperature of the
instrument, wait approximately 1 minute to allow thermal equilibration.
3. Press the READ key. Measurement is displayed in units of % by weight (w/w).
Note: The last measurement value will be displayed until the next sample is measured or the
instrument is turned off. Temperature will be continuously updated.
Note: The ATC tag blinks and automatic temperature compensation is disabled if the
temperature exceeds the 10-40°C / 50-104°F range.
4. Remove sample from the sample well by absorbing on a soft tissue.
5. Using plastic pipettes, rinse prism and sample well with distilled or deionized water. Wipe
dry. The instrument is ready for the next sample.
Calibration should be performed daily, before measurements are made, when the battery has
been replaced, or between a long series of measurements.
1. Press the ON/OFF key, then release. Two instrument test screens will be displayed briefly;
a LCD segment followed by the percentage of remaining battery life. When LCD displays dashes,
the instrument is ready.
2. Using plastic pipettes, fill the sample well with distilled or deionized water.
Note: If the ZERO sample is subject to intense light such as sunlight or another strong source,
cover the sample well with your hand or other shade during the calibration.
3. Press the ZERO key. If no error messages appear, your unit is calibrated.
(For a description of ERROR MESSAGES see page 7).
Note: The 0.0 screen will remain until a sample is measured or the power is turned off.
4. Gently absorb the ZERO water standard with a soft tissue. Use care not to scratch the prism
surface. Wipe off the surface completely. The instrument is ready for sample measurement.
Note: If instrument is turned off the calibration will not be lost.
CALIBRATION
CALIBRATION
CALIBRATION
CALIBRATION
CALIBRATION
