Installation – Hall Research UVA-16X User Manual
Page 7
UV-16 Family of Mini-Cat
®
Senders
5
2. Installation
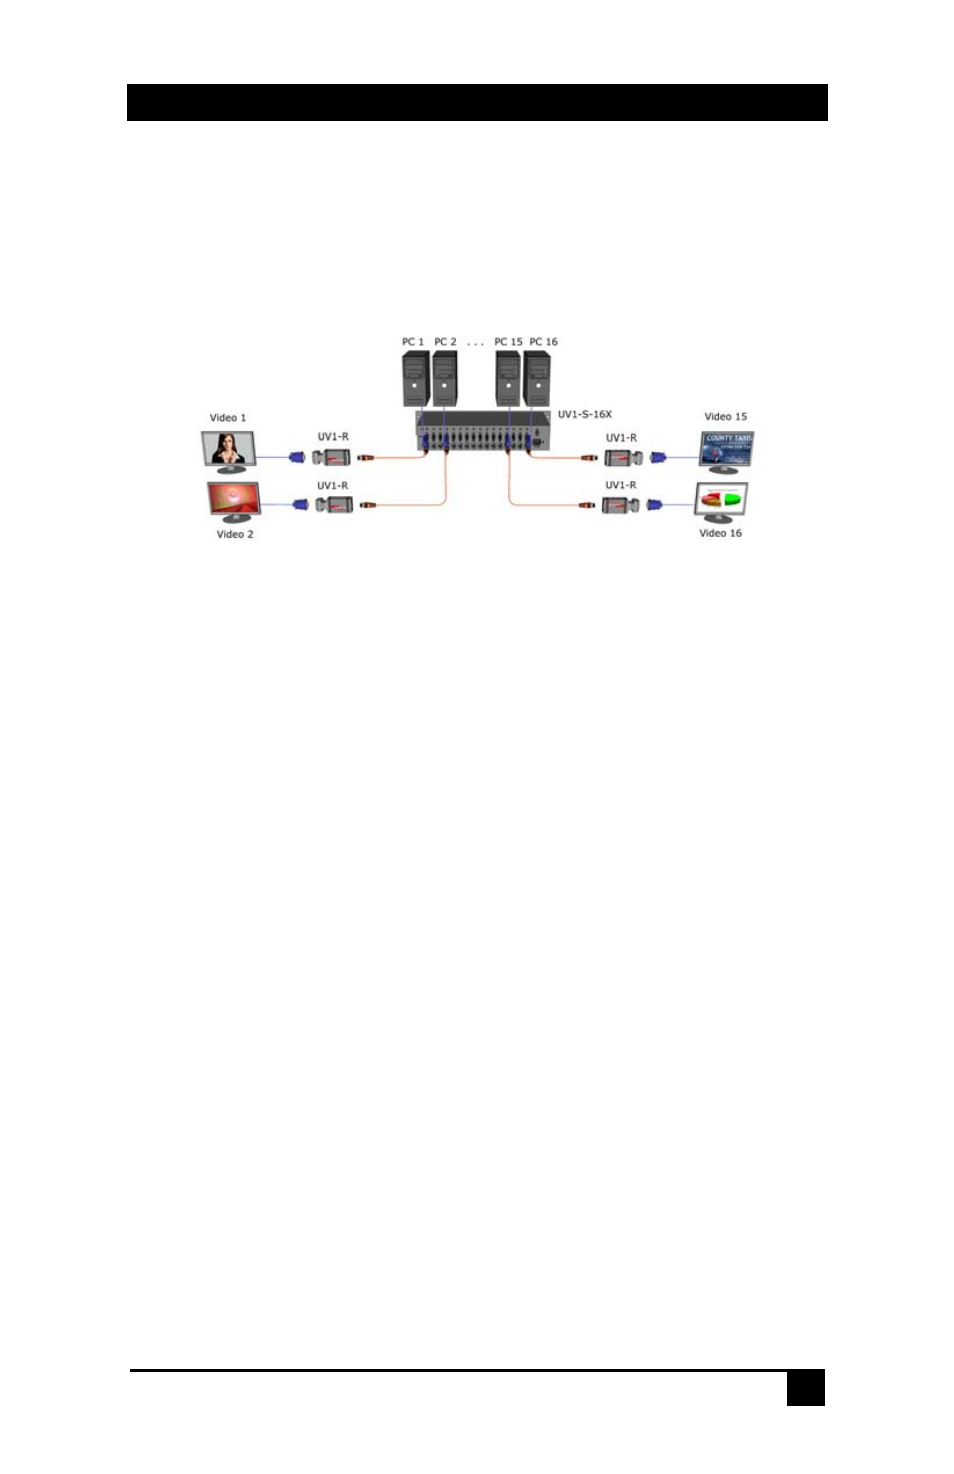
1. Connect the video source to the PC/HDTV connectors. For Model
UVA-16X, connect the audio source to the AUDIO connectors.
2. Connect the included power cord to the power input connector on
the unit.
3. Using Category-5 or higher UTP cable, connect one or more
compatible receivers to the sender’s RJ45 outputs.
4. Connect the remote display/projector and possibly the speakers to
the receiver unit.
If using the Model UV1-S-16X, the receivers can be powered from
the CAT5 cabling if desired and the cables are less than 500 feet
from the sending unit.
CAUTION
Before plugging in the remote monitor, verify that the AC line is properly
wired and that a protective ground (green) wire is established with NO
potential difference between both the sender and receiver locations. The
splitter can tolerate up to 5 v peak-to-peak ground potential between the
two locations. Failure to ensure good grounding can result in erratic
operation and possible shock hazards or damage to your equipment.
NOTICE
Do not connect this unit to any LAN device such as network cards or hubs
as this may damage the UVA/URA and/or the LAN device. Use EIA/TIA 568B
standard straight-through patch wiring as shown below. Do not use
crossover cables.