Installation frame installation, Screen fabric installation – Grandview LF-VMF(Vertical Adjustable Fixed-Frame Screen) User Manual
Page 4
3
Installation
Frame Installation
Open the packing box, check whether the components which need to be installed are complete or not according to
the Accessory Diagrammatic Sketch in the user manual, then take out all the small components carefully from the
packing box and put them at a suitable place, finally install it according to the operating method as below:
figure 1
figure 2
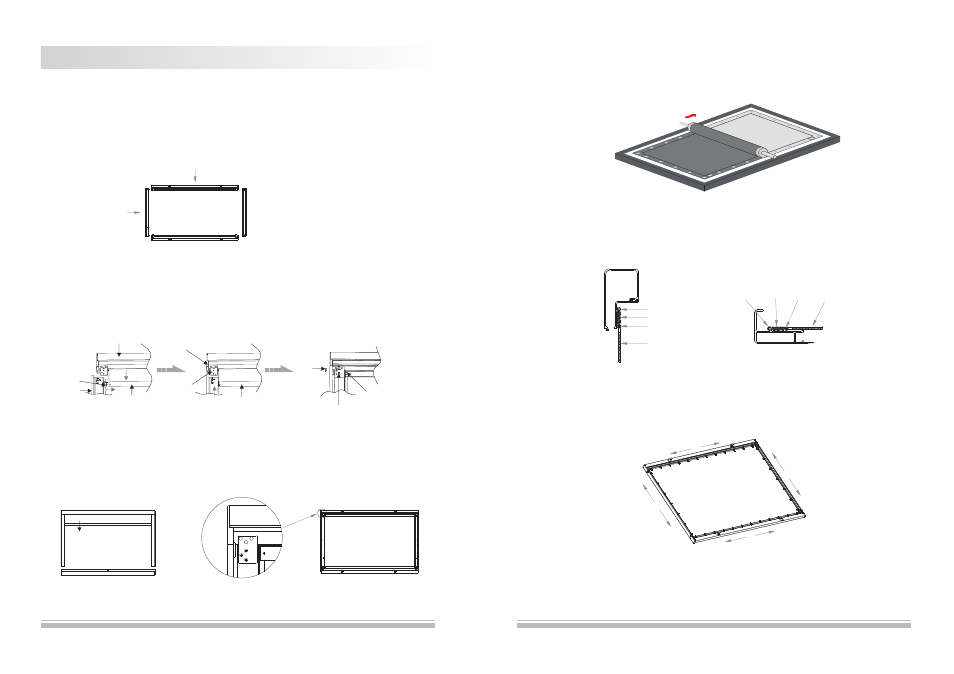
1.Put the fixing lug into the slots of top and bottom bars, taking the following table as reference (figure 1).
Side Frame Bar
Concave Frame Bar
1.Pull up the top bar to a suitable distance in order to attach the bar plug into it. And then insert the connecting
board 1 and the connecting board 2 into Side Frame Bar (please operate together in two sides). Finally, fasten
the corresponding screws: figure 2
Top Bar
Plug
Connecting
Board 2
Connecting Board 1
M4X6mm
Screw
M5x8mmScrew
M2.5x8mm
Tapping Screw
4
figure 3
3.The installation of low bar is the same as top bar. Notice: please pull up the top bar to a suitable distance and keep
it when operating this step, otherwise, the low bar can not be pulled out, and then the installation is completed
(figure 3).
figure 5
figure 6
figure 4
Screen Fabric Installation
1.Put the whole frame upside down and then unwrap the screen fabric (avoid scraping the fabric when
unwrapping) (figure 4).
2.Put the tension bars to the four slots of screen fabric (note: this is a step suggested to be completed by two
persons, one to hold the screen fabric and the other pull through the tension bar) (figure 5-7).
Installation for spring of concave frame bar
Spring
Screen Fabric
Rod
Position for Frame Hanger
Installation for spring of side frame bar
Position for
Frame Hanger
Spring
Rod Screen Fabric
figure7
Concave Frame Bar
Side Frame
Bar
Top Bar
Pull up the top bar