Screen installation, Description accessories – Grandview LF-VMF(Vertical Adjustable Fixed-Frame Screen) User Manual
Page 3
5
Screen Installation
figure 8
3
25
15
10
120
32
23
20
6
6
Lt
1
2
4
0
R
8
5
35
4
0
120
32
23
20
6
6
Lt
1
2
R
8
5
5
2
1
5
4
0
2
1
3
Front View
Front View
Side View
Side View
Top Bracket
Low Bracket
unit:mm
Specific atio n
Format
16:9
77"
80"
Lt (mm)
1000
1000
92"
100"
106"
112"
120"
1150
1150
1300
1300
1450
150"
1750
Table 2: the length of bracket (Lt)
Note: due to product updates, sizes and specifications are subject to change at any time.
2.Top bracket and low bracket are connected by a belt when delivery. The top bracket shall keep balance with the
low bracket vertically because of the universal gravitation. Please ensure the distance between the top bracket
and the low bracket is the same as the data of table shows us (if not, please measure), and then fix the frames on
the wall ( please refer the data to make sure the distance between top and low bracket) (figure 9-10)
Top Bracket
Low Bracket
figure 9
figure 10
Link
Side Frame Bar
Concave Frame Bar
幕布
Front View(16:9)
Top View
Back View
Screen
Rod
Connecting Board 2
Connecting Board 1
Spring
Screen
Front View(2.35:1)
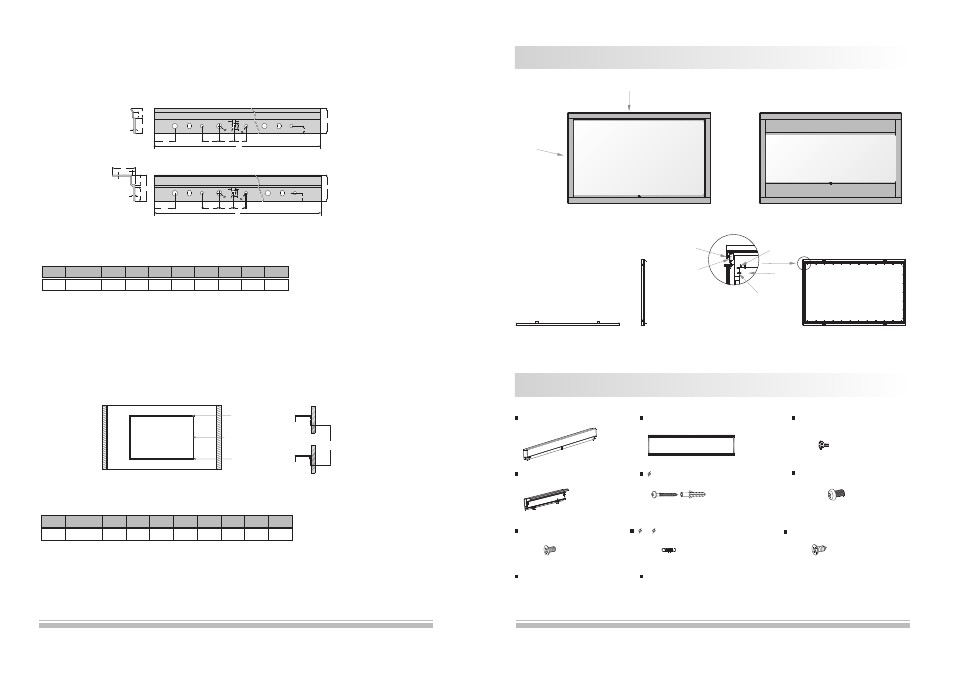
Description
Accessories
2
Concave Frame Bar (2pcs)
Side Frame Bar (2pcs)
Instruction Manual (1pc)
Warranty Card (1pc)
5×40mmTapping with Anchor(8sets)
Top& Low Bracket (1pc)
Side View
M4X6mm Screw(8pcs)
Security Fixing Screw (2pcs)
M2.5X8mmTapping Screw(4pcs)
7x 0.8x28mmSpring(A number)
M5X8mmScrew
12pcs
(
)
1489
Table 3: the safety distance between two brackets
Specification
Format
16:9
77"
80"
92"
100"
106"
112"
120"
Note: due to product updates, sizes and specifications are subject to change at any time.
1063
1101
1250
1350
1424
1499
1599
150"
1972
Distance(mm)
1.Each screen has a set of bracket. Each bracket has a number of corresponding holes and 3 holes per group,
Please refer to figure 8.