Installation, Ba c, 7 fixing – Glow-worm Climapro2 RF User Manual
Page 7: 8 electrical connections, 9 commissioning
0020094581_01 - 08/10 - Glow-worm
- 5 -
INSTALLATION
7 fixing
7.1
fixing the room thermostat
• Determine the installation location. See the "Installation
location" chapter.
A
B
1
2
4
3
5
6
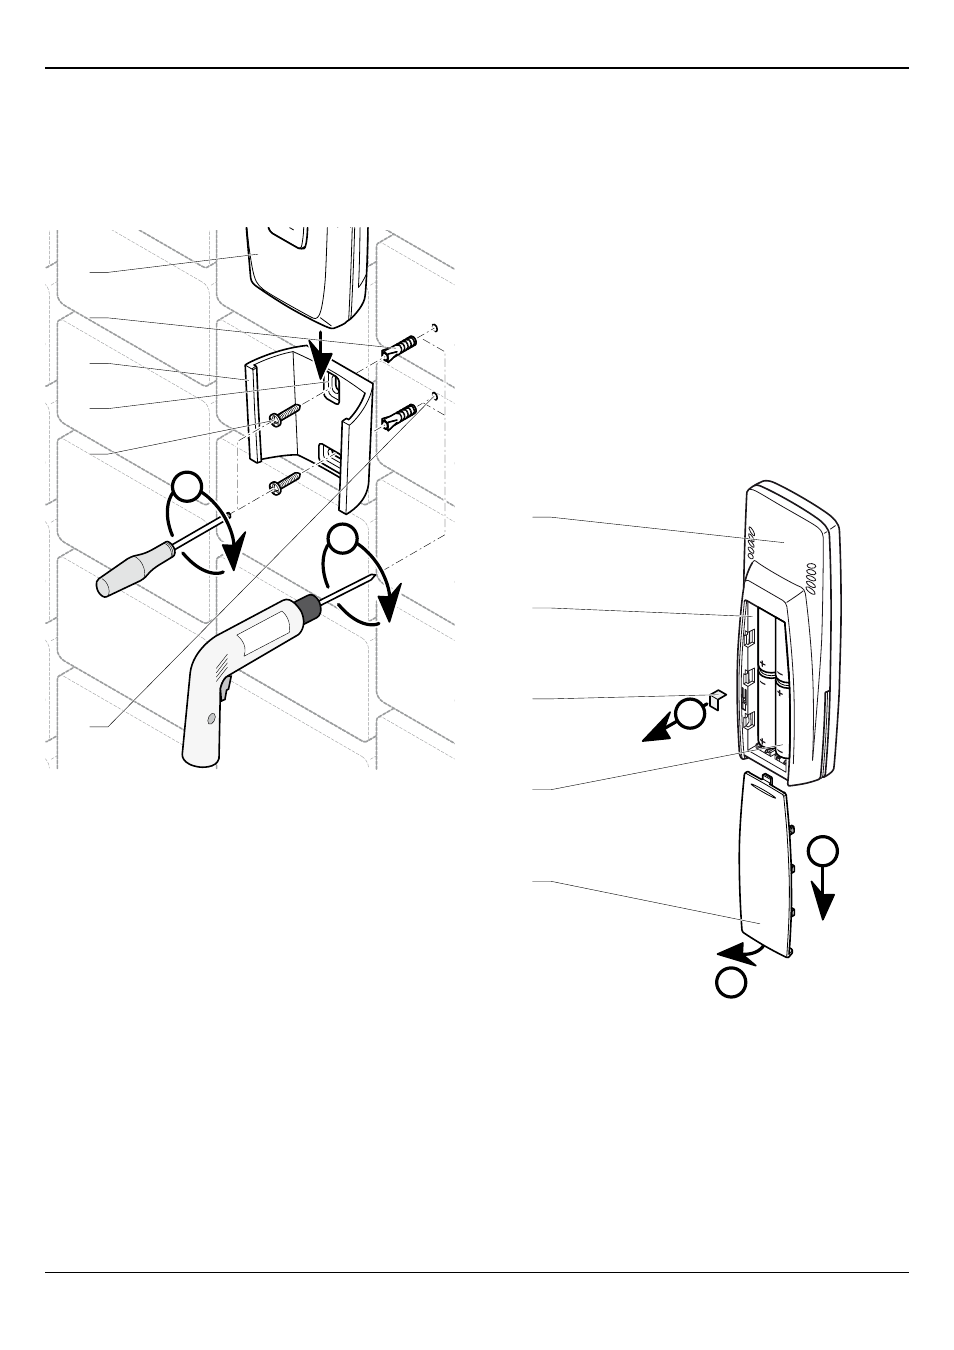
Legend
1 Drilling
2 fixing screw
3 fixing holes
4 Room thermostat support
5 Plugs
6 Room thermostat
• Position the room thermostat support (4) on a wall.
• Drill (A) the screw holes (1) in accordance with 2 mounting
holes (3) in the wall support (4).
• Insert the rawlplugs (5) in the holes (1).
• Secure (B) the room thermostat support (4) with screws (2).
• Slide the room thermostat (6) into its support (4).
8 Electrical connections
8.1
Pairing (recognition)
See the installation manual control unit.
The Climapro2 RF and the Systempro control unit must be
paired.
9 Commissioning
9.1
Appliances included in the installation
• Turn on the appliances that make up the installation (see the
installation manuals).
9.2
Room thermostat
B
A
C
1
3
2
4
5
Legend
1 battery cover
2 batteries
3 Insulating strip
4 battery compartment
5 Room thermostat
• Remove the insulating strip (3) located in the battery
compartment, respecting the order of operations (A) to (C).
The room thermostat shows it is not connected.