Project #166, Water detector project #167, Saltwater detector – Elenco Upgrade Kit SC100 to SC750 User Manual
Page 27
-26-
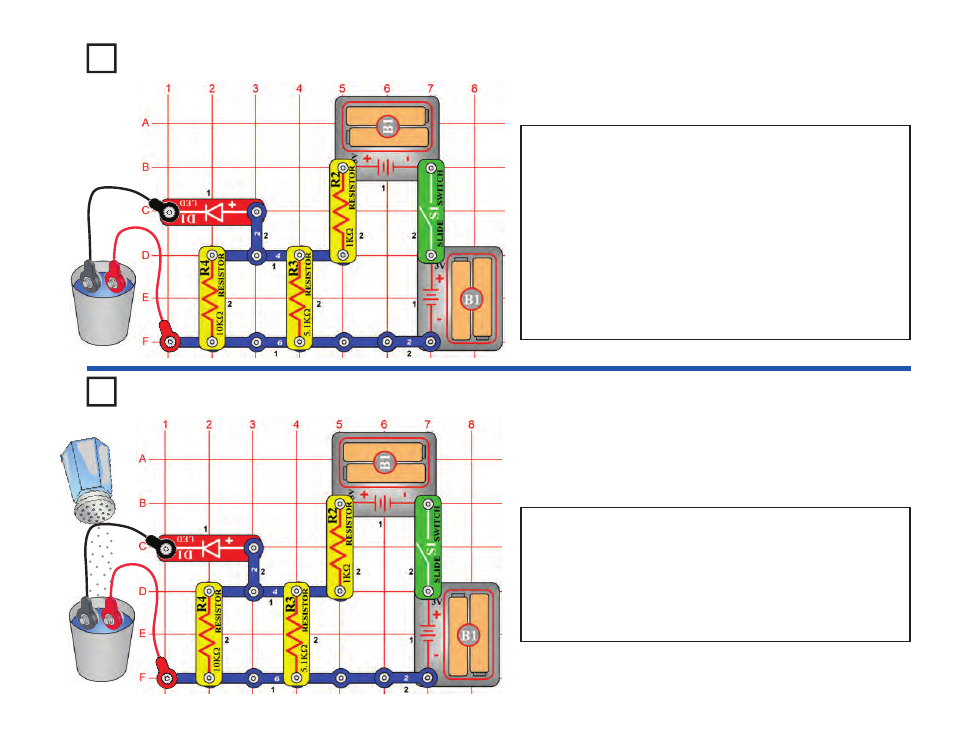
Project #166
OBJECTIVE: To show how water conducts electricity.
Build the circuit at left and connect the two jumpers to it, but leave the
loose ends of the jumpers lying on the table initially. Turn on the slide
switch (S1) - the LED (D1) will be dark because the air separating the
jumpers has very high resistance. Touch the loose jumper ends to
each other and the LED will be bright, because with a direct
connection there is no resistance separating the jumpers.
Now take the loose ends of the jumpers and place them in a cup of
water, without letting them touch each other. The LED should be dimly
lit, indicating you have detected water!
For this experiment, your LED brightness may vary depending upon
your local water supply. Pure water (like distilled water) has very high
resistance, but drinking water has impurities mixed in that increase
electrical conduction.
Water Detector
Project #167
OBJECTIVE: To show how adding salt to water changes water’s
electrical characteristics.
Place the jumpers in a cup of water as in the preceding project; the
LED (D1) should be dimly lit. Slowly add salt to the water and see how
the LED brightness changes, mix it a little so it dissolves. It will slowly
become very bright as you add more salt. You can use this bright LED
condition as a saltwater detector! You can then reduce the LED
brightness by adding more water to dilute the salt.
Take another cup of water and try adding other household substances
like sugar to see if they increase the LED brightness as the salt did.
Saltwater Detector