Project #61, Light-controlled sounds, Project #62 – Elenco Projects 1-101 User Manual
Page 32: Project #63, Project #64, Project #65, Light- controlled sounds (ii), Light- controlled sounds (iii), Light- controlled sounds (iv), Light- controlled sounds (v)
-31-
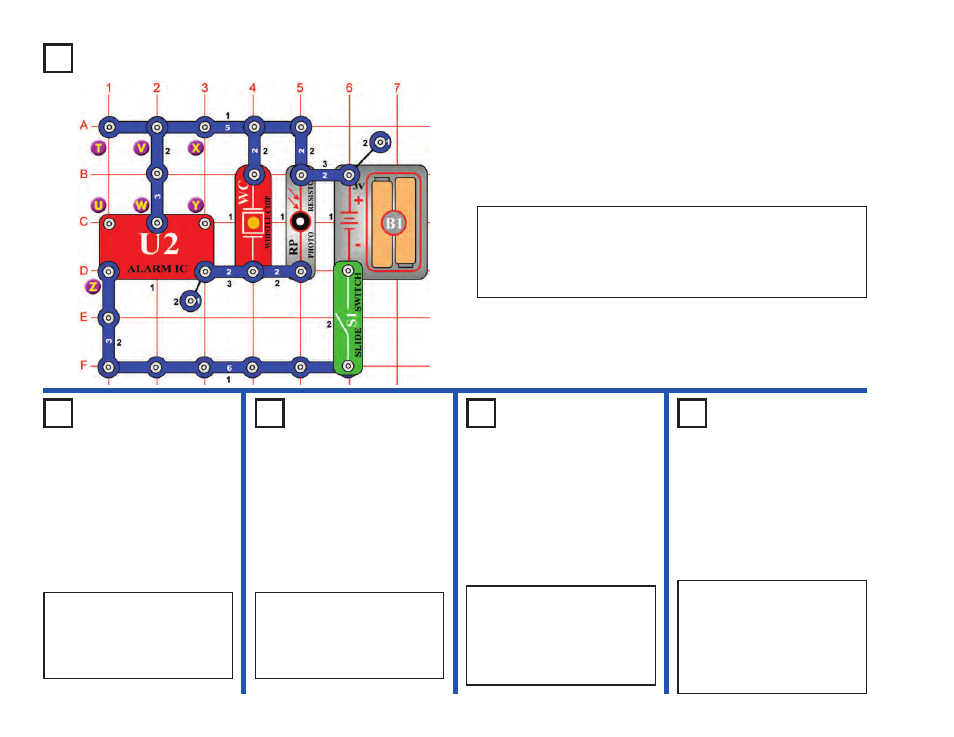
Project #61
OBJECTIVE: To give a more dramatic demonstration of using
the photosensitive resistance.
Build the circuit shown on the left.
Turn on the slide switch (S1), a police siren is heard. The loudness of
the sound depends on how much light reaches the photoresistor (RP),
try partially shielding it or placing near a very bright light, and compare
the sound.
Light-Controlled Sounds
Project #62
Light-
Controlled
Sounds (II)
OBJECTIVE: To show a
variation of the circuit in
Project #61.
Project #63
Light-
Controlled
Sounds (III)
OBJECTIVE: To show a
variation of the circuit in
Project #61.
OBJECTIVE: To show a
variation of the circuit in
Project #61.
OBJECTIVE: To show a
variation of the circuit in
Project #61.
Project #64
Light-
Controlled
Sounds (IV)
Project #65
Light-
Controlled
Sounds (V)
Modify the last circuit by
connecting points X & Y. The
circuit works the same way but
now it sounds like a machine
gun.
Now remove the connection
between X & Y and then make a
connection between T & U. The
circuit works the same way but
now it sounds like a fire engine.
Now remove the connection
between T & U and then make a
connection between U & Z. The
circuit works the same way but
now it sounds like an
ambulance.
Now remove the connection
between U & Z, add a 1-snap at Z
(on level 3), add a second 3-snap
between V & W (on level 3), and
finally place the music IC (U1)
directly over the alarm IC (U2) on
level 4. Listen to the sounds.