Da-Lite Curved Multi Format Imager User Manual
Page 11
11
Multi Format Imager Intermediate Stop Adjustment
Multi Format Imager Limit Travel Adjustment
1. To adjust intermediate stopping positions make sure both
masks are completely retracted into the frame. Press the left
mask ">" button. The mask will start to move outward. Press
the stop button at the position you want it set to. If you go
too far outward press the left mask "<" button and the mask
will retract back into the case.
2. Press the right mask"<" button. The mask will start to move
outward. Press the stop button at the position you want it set
to. If you go too far outward press the right mask ">" button
and the mask will retract back into the case.
3. Once both masks are at the desired stopping position. Press
and hold Preset 1, Preset 2, Preset 3 or Preset 4 button on
remote for 10 seconds.
4. Repeat steps 1 thru 3 for other Preset locations.
1. To make limit travel adjustments you will need the 3-button
low voltage wall switch that was shipped with your masking
screen.
2. Locate the junction box cover on bottom frame assembly.
Remove two screws holding junction box cover on the
bottom of frame.
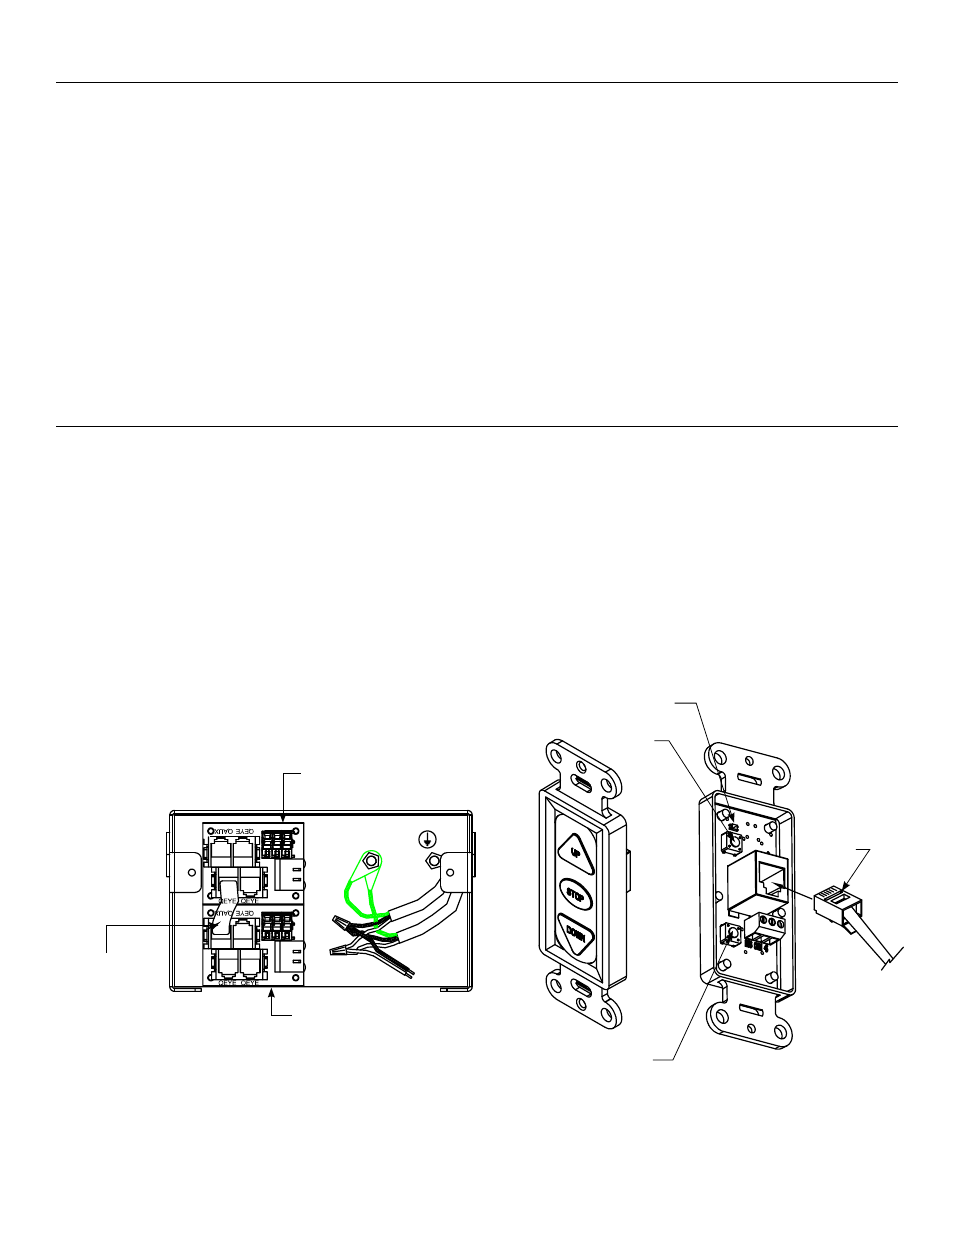
3. Unplug the 6P6C cable that goes from QEYE of primary
splitter to QAUX of secondary splitter as shown in Figure 17.
4. Unplug the IR eye end of the 6P4C cable that goes from the
QEYE of primary splitter to the IR eye.
5. To adjust travel of left mask. Plug the 6P4C cable into the
back of wall switch as shown in Figure 18. The wall switch LED
will blink green twice when the 6P4C cable is plugged in.
Primary Splitter
Switch
LED
"Up" Limit
Button
"Down" Limit
Button
RJ–22
Jack
Secondary Splitter
T6 From
Quax To Qeye
Figure 17
Figure 18