Installing and charging the battery, Installing the battery, Charging the battery – Cino M230B User Manual
Page 3: Battery status indications (led1~led4), Talling the battery
Installing and Charging the Battery
Ins
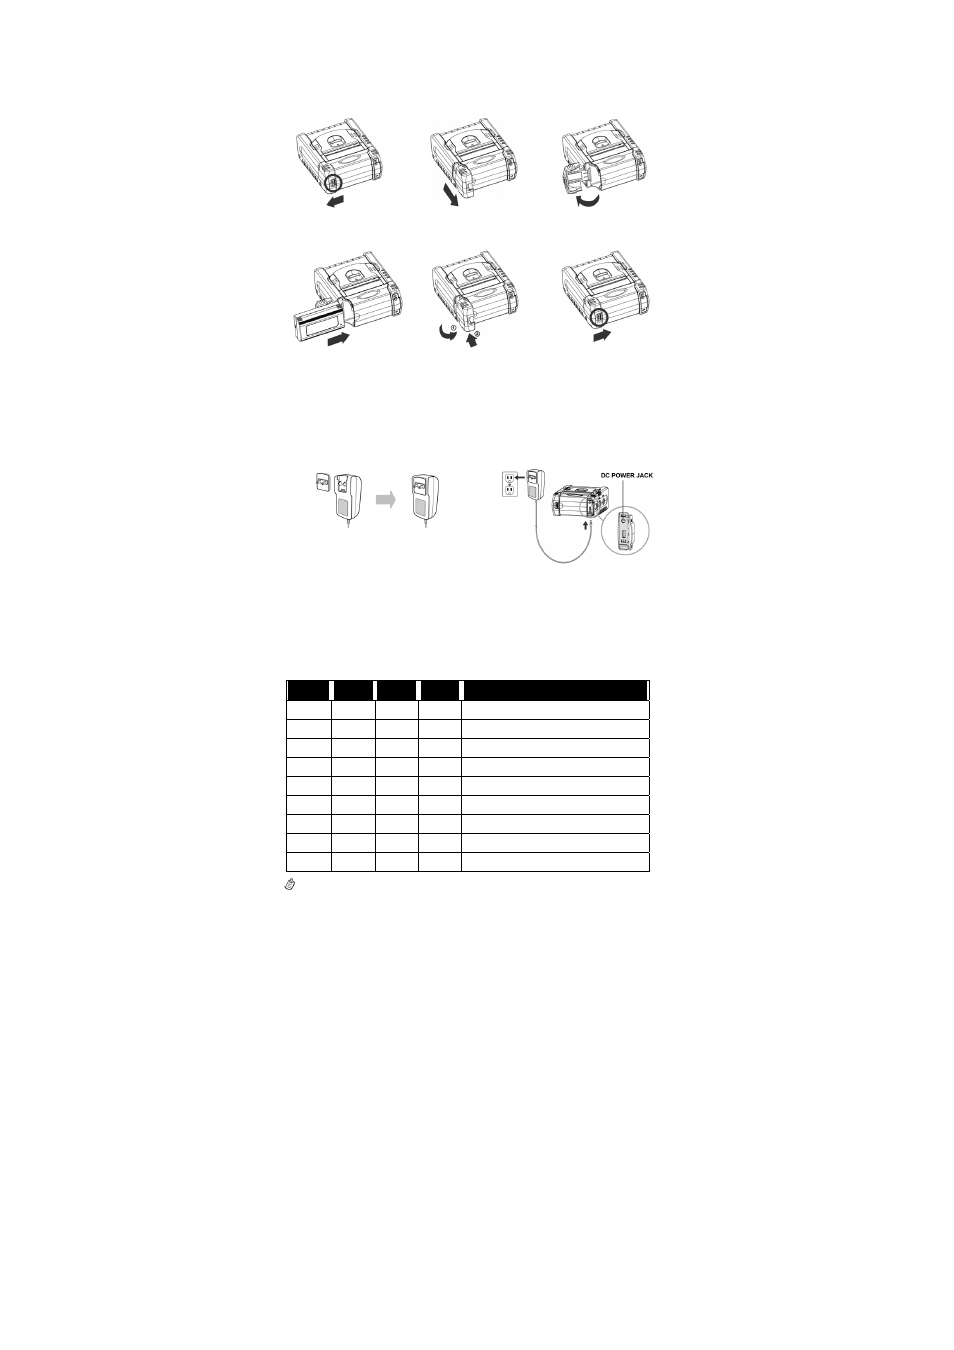
talling the Battery
2
1. 2. 3.
4. 5. 6.
Charging the Battery
1. There are four different power plugs packed in power supply kit, choose
the suitable plug for your region and stick it into the receptacle cavity until
it is locked.
1. 2~3
2. Plug the AC plug of the power supply
unit into the appropriate AC wall socket.
Push the battery
to the left.
pen the battery
Close the battery door.
Push the battery door
latch to the right.
Slide the battery pack into
the battery compartment.
door.
door latch
Pull up the battery door.
O
3. Connect the DC Plug of the power supply unit to the printer.
4. The charging indicator will go on steady red after connecting the power
supply unit if the battery hasn’t been fully charged. When the battery is
fully charged, the charging indicator will go off. Please refer to the table
below for the battery status indications by powering on Micro2.
Battery Status Indications (LED1~LED4)
LED1
LED2
LED3
LED4
Battery Status
Green Green Green Green More than 90% of battery remains
Green Green Green Red
More than 70% of battery remains
Green Green Green
More than 60% of battery remains
Green Green Red
More than 50% of battery remains
Green Green
More than 40% of battery remains
Green Red
More than 30% of battery remains
Green
More than 20% of battery remains
Orange
Less than 20% of battery remains
Red
Less than 10% of battery remains
The new battery has to be fully charged prior to the first use.