4 getting started, 1 installing a 2.5" sata drive, Chapter 4, getting started: describes the – ADLINK cPCI-R6700 Series User Manual
Page 35: Installing a 2.5" sata drive, 4getting started
Getting Started
23
cPCI-R6700
4
Getting Started
4.1
Installing a 2.5" SATA Drive
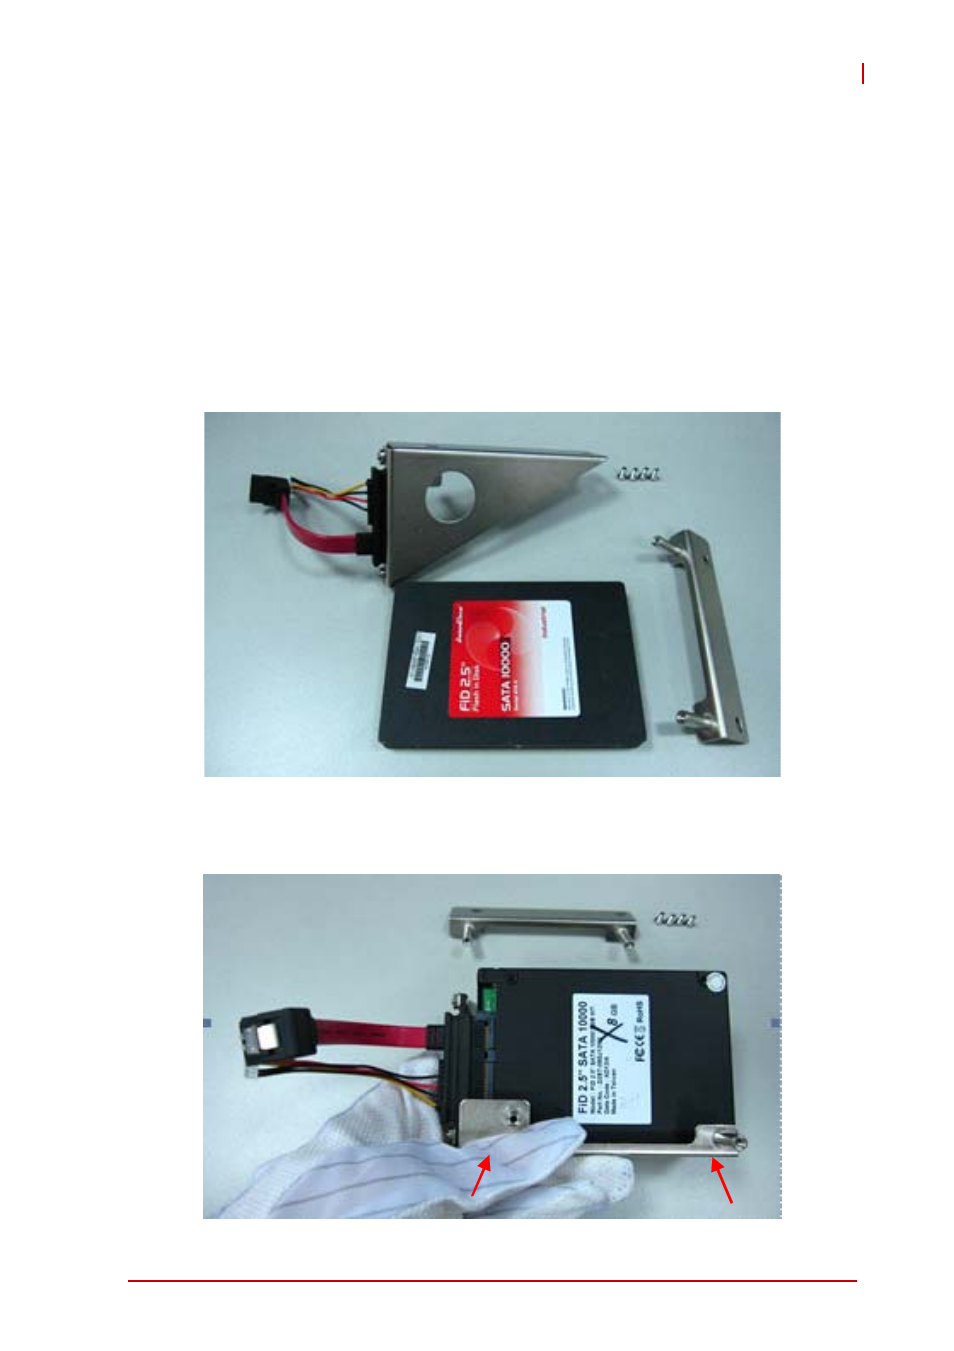
The cPCI-R6700D has space onboard to mount a 2.5" storage
device using the bracket kit provided. The kit includes 4x M3 4mm
screws and 4x M3 6mm screws. Follow the steps below to install a
SATA drive on the RTM.
1. Prepare a 2.5" SATA drive and locate the bracket kit in
the package.
2. Align the bracket with SATA power/signal connectors as
shown and mount the drive onto the bracket. Fasten the
bracket to the drive with two of the M3 4mm screws.
See also other documents in the category ADLINK Hardware:
- USB-1901 (84 pages)
- USB-1210 (54 pages)
- USB-2401 (60 pages)
- USB-7230 (50 pages)
- USB-2405 (56 pages)
- DAQe-2010 (92 pages)
- DAQe-2204 (100 pages)
- DAQe-2213 (94 pages)
- DAQe-2501 (74 pages)
- PXI-2010 (84 pages)
- PXI-2020 (60 pages)
- PXI-2501 (62 pages)
- cPCI-9116 (98 pages)
- ACL-8112 Series (93 pages)
- ACL-8112 Series (94 pages)
- ACL-8112 Series (92 pages)
- ACL-8216 (75 pages)
- ACL-8111 (61 pages)
- PCM-9112+ (94 pages)
- PCM-9112+ (10 pages)
- cPCI-6216V (47 pages)
- ACL-6126 (28 pages)
- ACL-6128A (40 pages)
- PCM-6308V+ (52 pages)
- PCM-6308V+ (4 pages)
- PCI-7444 (82 pages)
- PCI-7434 (48 pages)
- PCI-7234 (56 pages)
- PCI-7260 (66 pages)
- PCI-7258 (38 pages)
- PCI-7256 (48 pages)
- PCI-7250 (48 pages)
- LPCI-7250 (48 pages)
- PCI-7396 (65 pages)
- PCI-7296 (59 pages)
- PCI-8554 (67 pages)
- PCIe-7360 (94 pages)
- PCIe-7350 (86 pages)
- PCIe-7300A (114 pages)
- PCIe-7200 (51 pages)
- PCI-7300A (112 pages)
- PCI-7300A (83 pages)
- PCI-7200 (96 pages)
- cPCI-7300 (83 pages)
- cPCI-7300 (82 pages)