Delta 14-65l User Manual
Page 9
9 - English
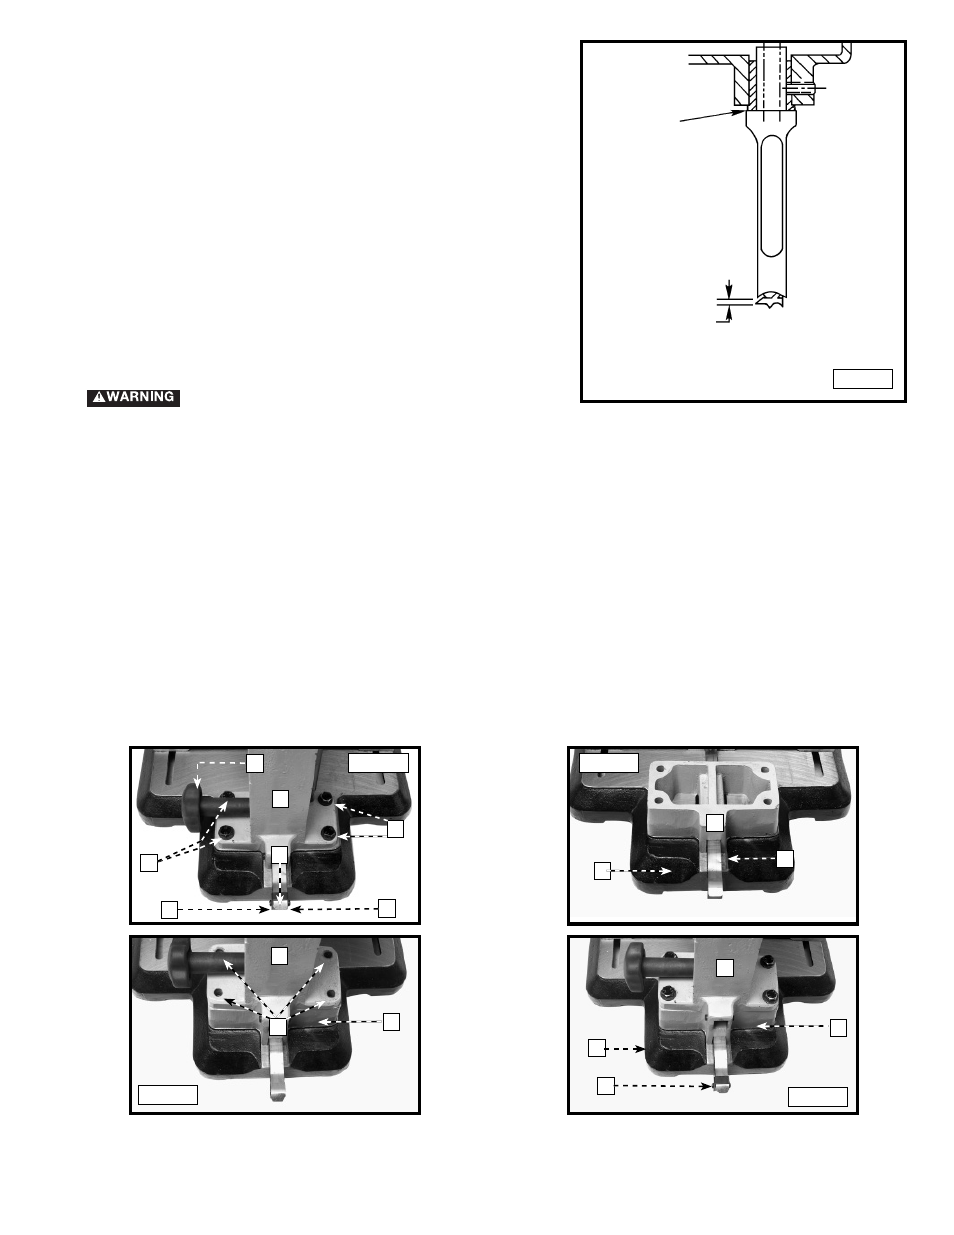
5. Adjust the flat portion of the bit to a minimum of
1/16" below the bottom of the chisel. Certain types
of wood may require an increase in this gap up to a
maximum of 3/16".
You can extend the column to mortis taller workpieces.
To extend the column:
1. Take out the two screws (B) Fig. 14 and remove the rack cover bracket (D).
2. Remove the four screws and flat washers (A) Fig. 14.
3. Rotate handle (E) until the column assembly (C) Fig. 14 moves off the back of the rack and base.
4. Place the column extension (A) Fig. 15 on top of the rack (B). Align the four holes in the column extension (A) Fig. 15
with the four holes in the base (C).
5. Place the column assembly (C) Fig. 16 on top of the column extension (A) and align the four holes (B) in the column
assembly with the four holes in the column extension (A).
6. Place a flat washer that was removed in STEP 2 on an M8x1.25x80mm hex head screw.
7. Insert the screw through the hole in the column assembly (C) Fig. 17 and the column extension (A). Thread it into the
base (B). Repeat this process for the three remaining holes.
8. Replace the rack cover bracket (D) Fig. 17 that was removed in STEP 1.
9. Loosen the holddown knob (B) Fig. 18 and remove the hold-down. Loosen the set screw (C) and remove the holddown
rod (A) and replace with the extended hold-down rod. Tighten the set screw (C). Place the hold-down (B) on the hold-
down rod and tighten the hold-down handle (B).
Fig. 13
ATTACHING THE COLUMN EXTENSION
B
D
C
A
A
E
Fig. 14
Fig. 15
B
C
A
Fig. 16
A
B
C
C
B
A
D
Fig. 17
PUSH THE
CHISEL AGAINST
THE BUSHING
ADJUST THE BIT IN
THE CHUCK TO GIVE
CLEARANCE
1/16" to 3/16"
CLEARANCE DEPENDING ON
THE TYPE OF WOOD
B
Disconnect the machine from the power source!