Changing the door hingeing – ASKO 7003 User Manual
Page 10
Attention! The text in this document has been recognized automatically. To view the original document, you can use the "Original mode".
Changing the door hingeing
Switch off the main power supply first!
Tools: Phillip screwdriver, 10 mm wrench.
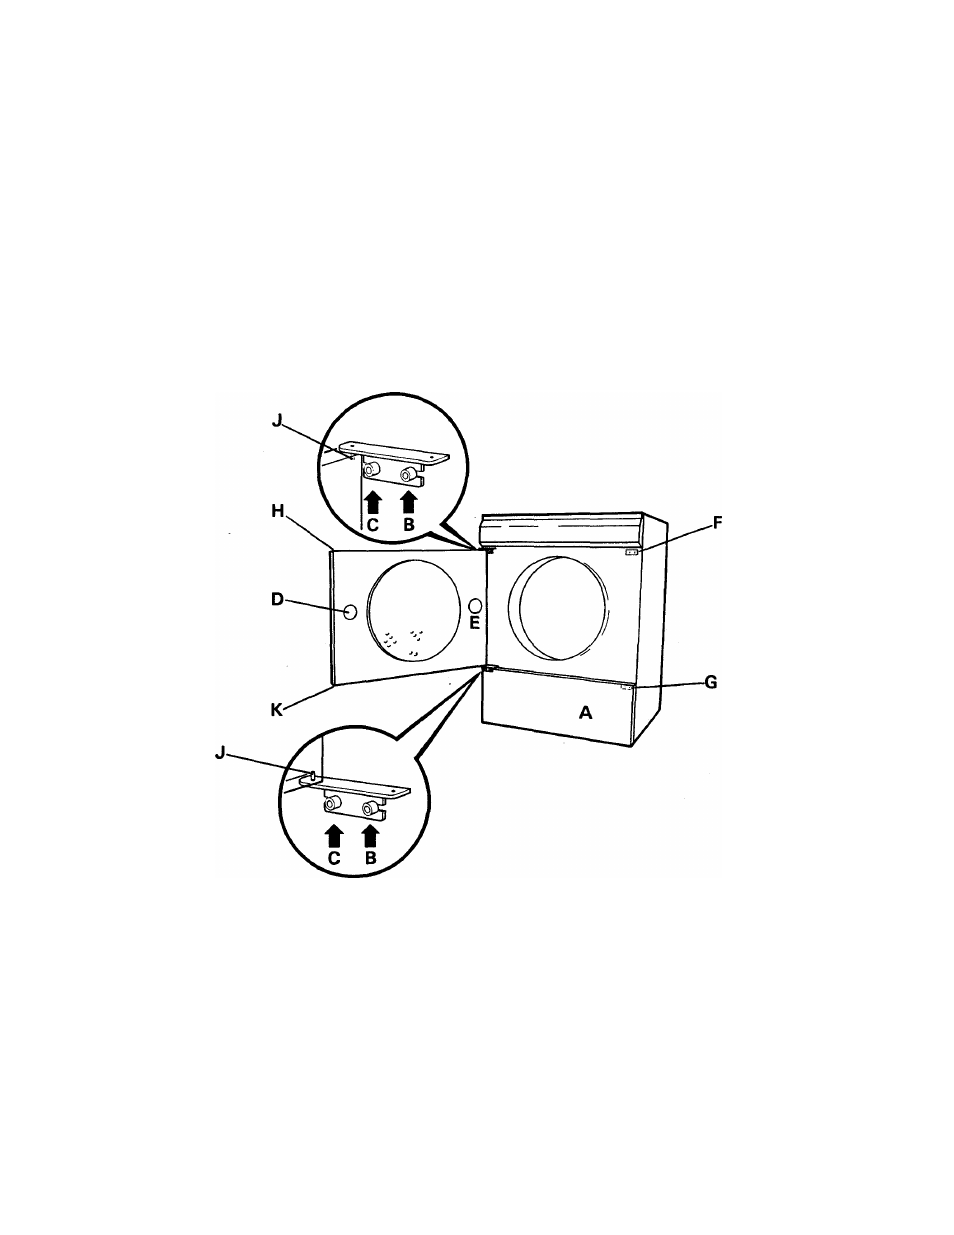
1. Remove the lower panel A.
2. Unscrew the upper screw B + C.
3. The upper hinge is now loose. Raise the door a little so that it comes away from the bottom hinge.
Remove the top hinge.
4. Move the hinge pin J to the other hole in the hinge using 10 mm wrench.
5. Push out the hinge bearings from the old holes in the door.
6. Take the door apart by removing all screws which are around the edge of the door.
7. Undo magnet cap D.
8. Remove the cover washer from the magnet position E on the other side.
9. Screw the magnet tight at E (spring plus washer plus screw) and insert cover washer in the hole at D.
10.
Screw the door together.
11.
Remove the plug from the new hole for the hinge at the upper edge of the door at H. Insert this plug in
the old hinge hole
12.
Knock out the hole at the lower hinge hole K using a screwdriver. Insert the plug supplied in the old
hinge hole.
13.
Fit the hinge bearings in the new hinge hole.
14.
Unscrew the lower hinge and move the hinge pin as shown in Item 5 above.
15.
Remove the plastic protection at F and G and place this where the hinge was previously fitted.
16. Tighten the top hinge.
17.
Screw in screw B for the bottom hinge a few turns.
18.
Insert the lower hinge pin in the door hole. Place the door's top hinge hole on the upper hinge pin. Place
the door and the lower hinge in position in screw B that has already been fitted. Screw in screw C.
19.
Adjust the lower hinge so that the door hangs straight. Tighten screws B and C.
20.
Refit the lower panel.
10