Chuck & key – Black & Decker 9013 User Manual
Page 7
Attention! The text in this document has been recognized automatically. To view the original document, you can use the "Original mode".
Squeezing the switch just far enough so
that the tool runs yields 300 RPM.
Squeezing a little farther until you hear
the drill speed up produces 600 RPM.
NOTE: There is a slight pause between
the two speeds. Keep squeezing the
trigger and the drill will start again.
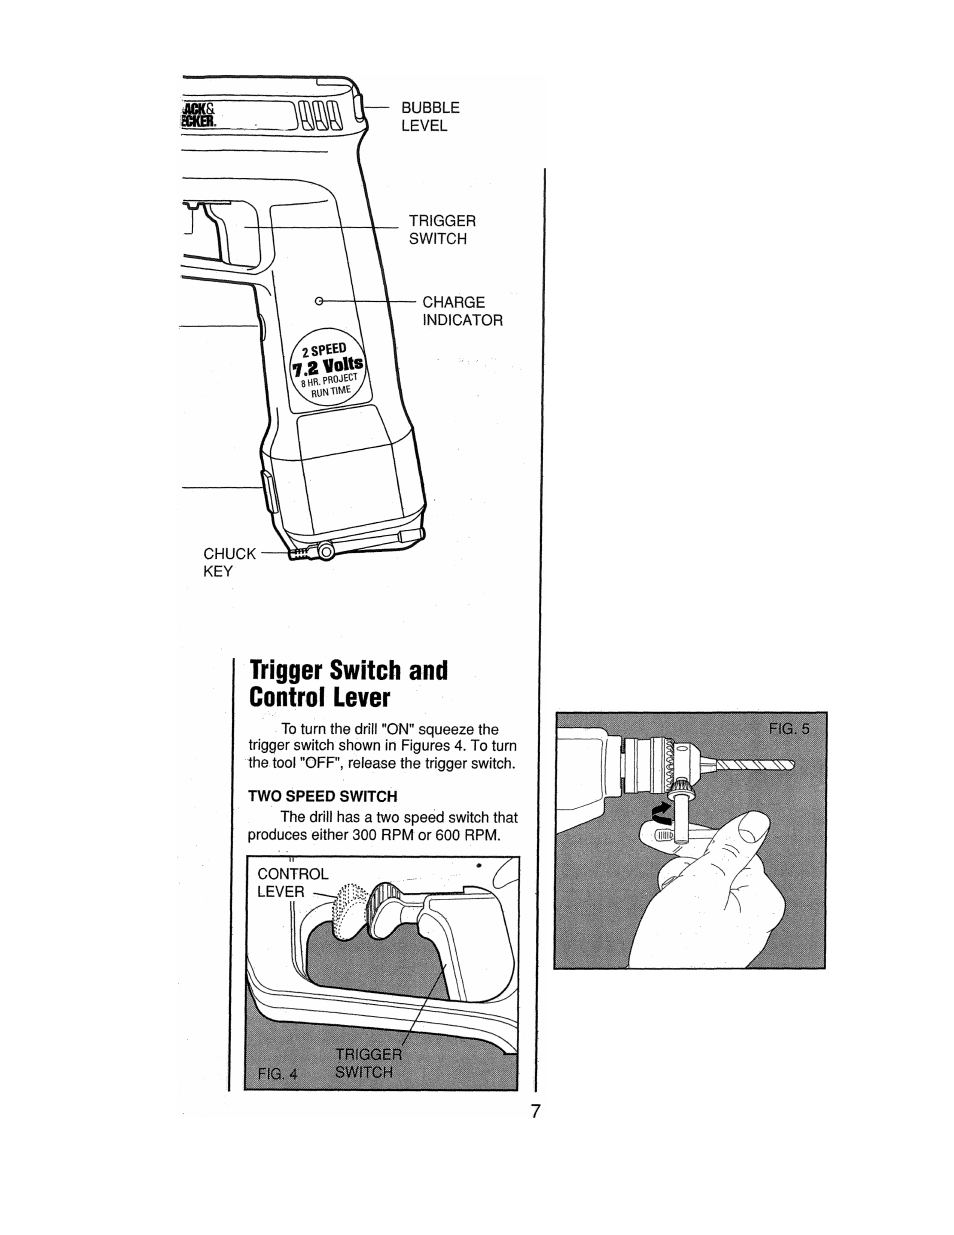
The two position Control Lever
switches the drill from Forward for drilling
holes and driving screws to Reverse for
backing out broken drill bits and removing
screws.
To run the drill in Forward, pull the
Control Lever forward toward the chuck,
as shown in Figure 4. To run the drill in
Reverse, push the lever back toward the
trigger switch.
Chuck & Key
Turn Chuck collar to open Chuck
jaws. Place bit in Chuck as far as it will go.
Tighten Chuck collar by hand. Place
Chuck Key in each of the three holes, and
tighten in clockwise direction (Figure 5).
It's important to tighten Chuck with all
three holes to prevent slippage. To
release bit, turn the Chuck Key counter
clockwise in just one hole, then loosen
Chuck by hand.
'
When not in use, the Chuck Key can
be stored in the tool. To remove the Key,
place thumb as shown in Figure 5 and push
key firmly downward out to its holding clip.
To replace Key, push firmly and completely
up into the socket. (Figure 7.)