Removing flail screen, Servicing chipper blades, Service & adjustments – Bolens 247.77763 User Manual
Page 15
Attention! The text in this document has been recognized automatically. To view the original document, you can use the "Original mode".
SERVICE & ADJUSTMENTS
Removing Flail Screen
If the discharge area becomes clogged, remove the
flail screen and clean area as follows.
•
Stop the engine. Make certain the chipper-
shredder vacuum has come to a complete stop.
Disconnect the spark plug wire before
unclogging the discharge chute.
•
Remove the catcher bag from the unit.
•
Remove hex bolt and lock nut from the top side
section of the discharge chute. See Figure 18.
•
Remove the four self-tapping screws from the
bottom of the discharge chute. (Be careful not to
drop the hardware into the chute.) Remove the
discharge chute. See Figure 18.
Figure 18
•
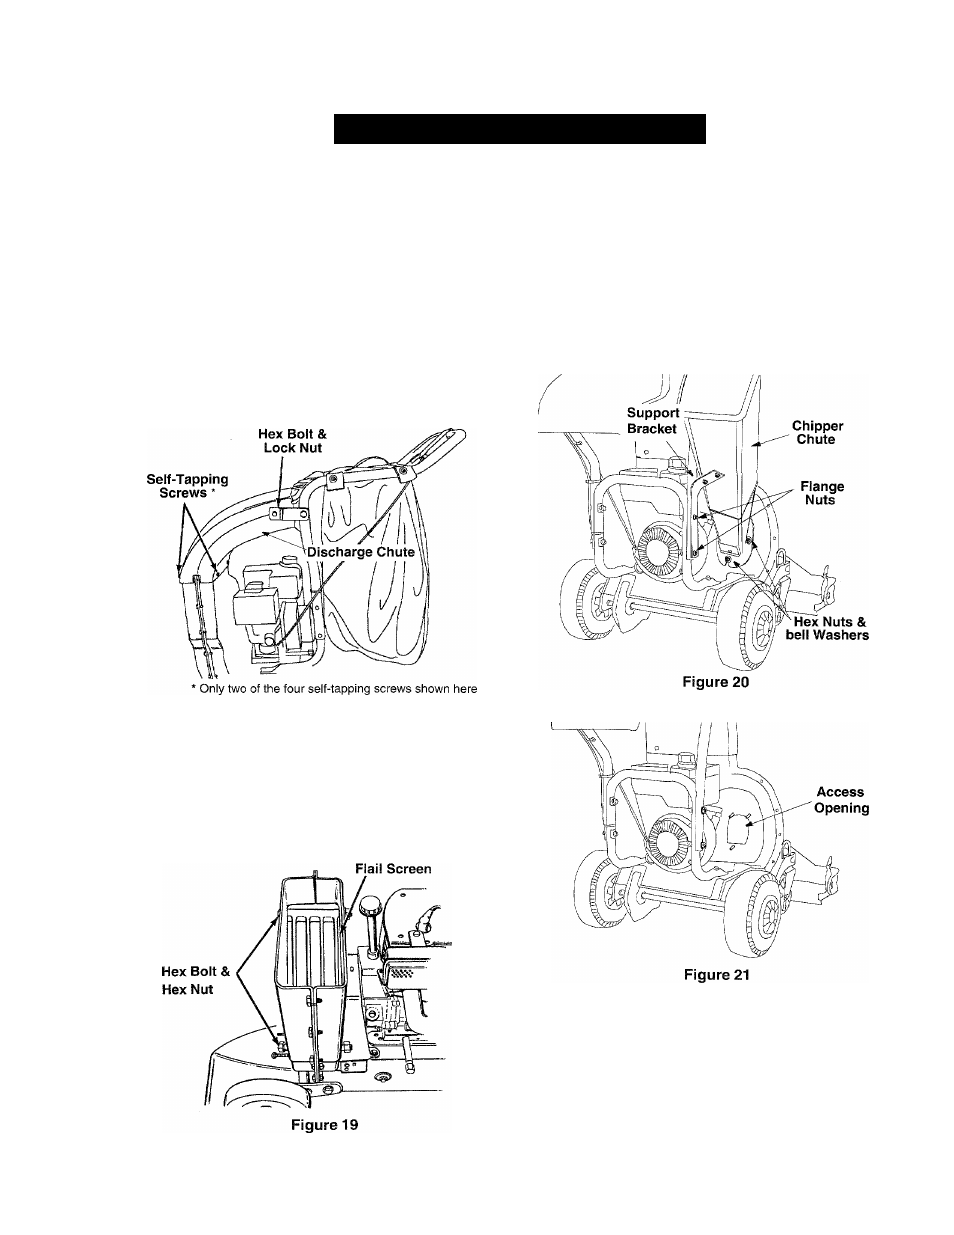
Remove the two hex bolts and hex nuts which
extend through the housing. Lift the flail screen
from inside the housing. See Figure 19.
•
Clean the screen by scraping or washing with
water. Reinstall the screen.
NOTE:
Be certain to reassemble the flail screen with
the curved side DOWN.
Servicing Chipper Blades
•
Disconnect the spark plug wire and move it
away from the spark plug. Remove the flail
screen as instructed in the previous section.
•
Remove the two flange nuts which secure the
support bracket to the handle assembly. Follow
by removing the three hex nuts and bell washers
which secure the chipper chute to the impeller
housing. See Figure 20
•
Remove the chipper chute to allow access to the
impeller assembly. See Figure 21.
A
WARNING: Make sure to wear heavy duty
gloves for this job. While accessing the
chipper blade, you may have to clean the
screw head of dust and shredded particles to
enable the alien wrench to operate. Handle
the wrench carefully so that you do not
cut your hand on the chipper blade.
15