Hunter SRC User Manual
Page 14
10
11
NOTE: Any extension of the wiring on the remote
harness may result in an error message in the
controller display and possible malfunction of the
remote unit due to radio interference. In some
situations, lengthening of the harness may work
fine, in others it may not work at all (it is site
specific). In either case, extending the wiring
harness should be done using shielded cable to
minimize the possible effects of electrical noise.
For easiest installation, order a new Hunter SRR-
SCWH SmartPort
®
wiring harness with a full 25 feet
of shielded cable.
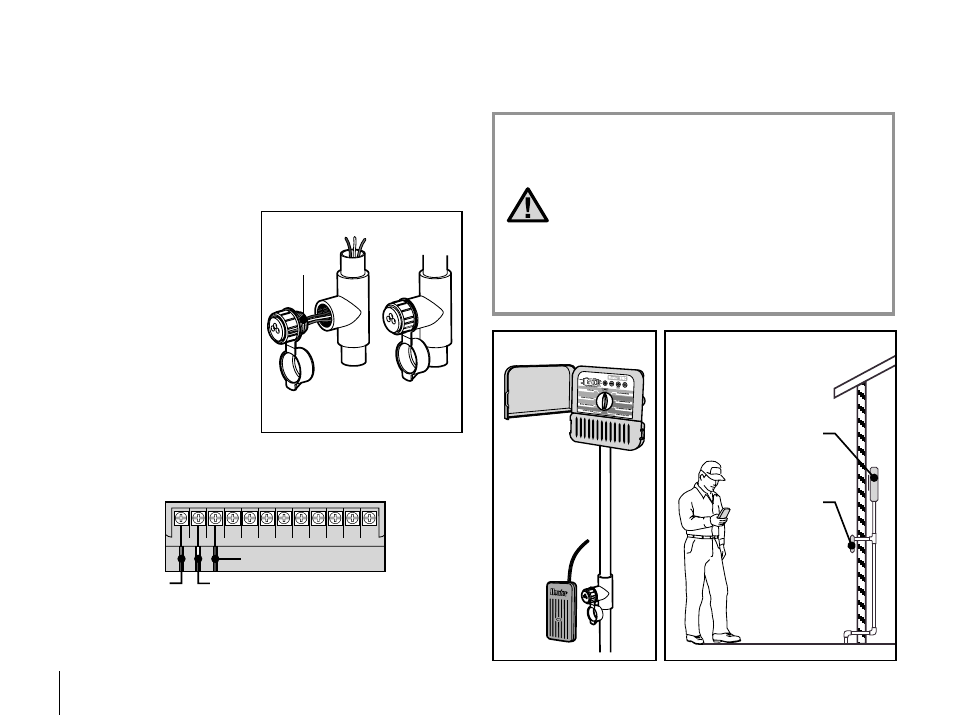
The Hunter SRC is remote-ready for use with the SRR or ICR remote
control system. The remote makes it possible for contractors and
end-users alike to operate an system without having to walk back and
forth to the controller.
To utilize the SRR or ICR Remote Control System you must install the
SmartPort
®
outlet.
1. Install a 1⁄2" female threaded
PVC “Tee” in the field
wiring conduit (PVC pipe)
approximately 12" below
the SRC.
2. Feed the red, white, and blue
wires of the harness through
the base of the “Tee” and into
the wiring compartment as
shown in Figure 1.
3. Screw the harness housing
into the “Tee” as shown
in Figure 1.
4. Access the terminal strip area and attach the red wire to the left AC
screw slot, attach the white wire to the next AC screw slot and attach
the blue wire to the screw slot marked “R”.
AC AC R RS C MV 1 2 3 4 5 6
White
Blue
Red
The wiring harness is now ready for remote control use. Please refer to
the SRR or ICR owner manual for further information or contact your
local Hunter distributor for ordering information.
CONNECTING AN SRR OR ICR REMOTE CONTROL (NOT INCLUDED) .........................
Figure 1
1
/
2
" Thread
To Controller
Pre-assembled
Assembled
Controller
Receiver
Outdoor Installation
(Temporary Connection
of Receiver Only)
Indoor Installation