Section 5: maintaining your chipper shredder, Lubrication, Maintenance – MTD 465 User Manual
Page 9: Removing the flail screen, Maintaining your chipper shredder
Attention! The text in this document has been recognized automatically. To view the original document, you can use the "Original mode".
SECTION 5: MAINTAINING YOUR CHIPPER SHREDDER
Customer Responsibilities
MAINTENANCE
SCHEDULE
cr q? <0 o
/ / / / / /
SERVICE
DATES
F—
Ü
3
Q
O
cr
o.
Lubricate Release Bracket
4
Lubricate Hopper Assembly
Lubricate Discharge Chute
4
^
Check Chipper Blade
4
LU
z
o
z
UJ
Check Oil
Change Oil
4
>
Clean Air Filter
4
Clean Engine
4
Check Spark Plug
4
▲
WARNING: Always stop engine, discon
nect
spark
plug,
and
ground
against
engine
before
cleaning,
lubricating
or
doing any kind of maintenance on your
machine.
Lubrication
Release Rod:
Lubricate the on the release rod and
spring with light oil once a season.
Hopper Assembly:
Lubricate the pivot points on the
hopper assembly with light oil once a season.
Discharge Chute:
Lubricate the pivot points on the
chute deflector with light oil once a season.
Engine:
Follow the separate engine manual packed
with you unit for lubrication instructions.
Maintenance
Engine
Refer to the separate engine manual for all engine
maintenance instructions.
•
Check
engine oil level
before each use as
instructed in the separate engine manual packed
with your unit. Read and follow instructions
carefully.
•
Clean
air cleaner
every 25 hours under normal
conditions or once a season. Clean every few hours
under extremely dusty conditions. To service the air
cleaner, refer to the separate engine manual
packed with your unit.
•
The
spark plug
should be cleaned and the gap
reset once a season. Check engine manual for
correct plug type and gap specifications.
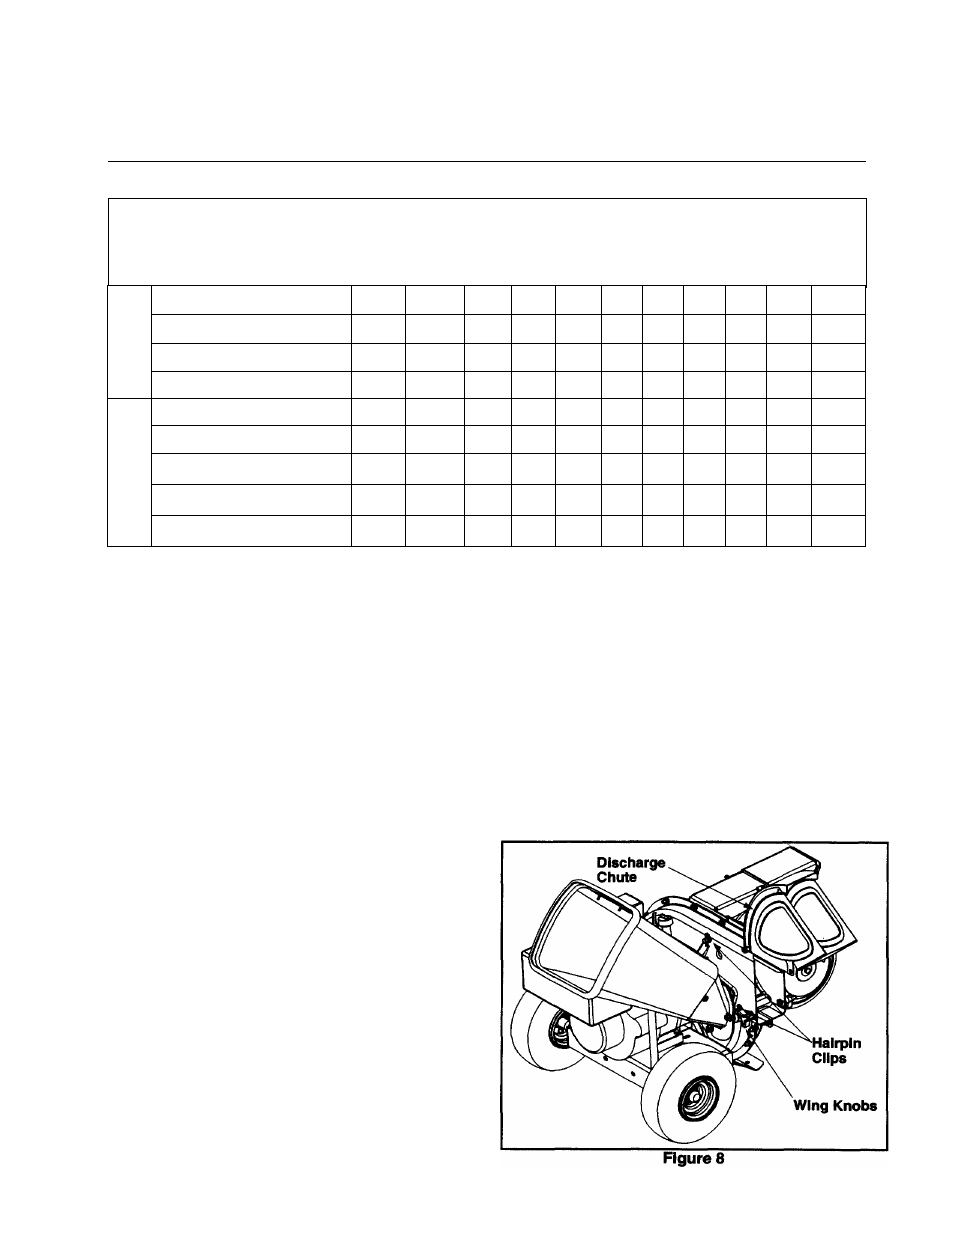
Removing The Flail Screen
If the discharge area becomes clogged, remove the flail
screen and clean area as follows:
•
Stop the engine and make certain the chipper
shredder has come to a complete stop.
•
Disconnect spark plug wire from spark plug and
ground against the engine.
•
Remove the two wing knobs on each side of the
discharge chute and lift the discharge chute up to
keep it out of the way. See Figure 8.