Unpacking, Ahaching the handle assembly (hardware a), Assembly instructions – MTD White 315E646F190 User Manual
Page 4
Attention! The text in this document has been recognized automatically. To view the original document, you can use the "Original mode".
ASSEMBLY INSTRUCTIONS
IMPORTANT: This unit is shipped WITHOUT
GASOLINE or OIL. After assembly, see separate
engine manual for proper fuel and engine oil rec
ommendations.
NOTE: Reference to right or left side of the snow
thrower is from behind the unit In the operating
position.
Toois Required for Assembly:
(2) 1/2" Wrenches*
(2) 7/16" Wrenches*
(1) Pair of Pliers
*or Adjustable Wrenches
Cupped Washer
Hex Nut
UNPACKING
1. Remove staples or break glue on the top flaps of
the carton. Remove any loose parts included with
unit (i.e., owner’s manual, etc.).
2. Cut along dotted lines and lay end of carton down
flat. Remove packing material.
3. Roll unit out of carton. Check carton thoroughly
for loose parts.
Loose Parts in Carton:
(1) Right Handle
(1) Left Handle
(1) Handle Panel Assembly and Chute Assembly
(Attached by Cable)
(1) Chute Crank Assembly
(1) Shift Rod
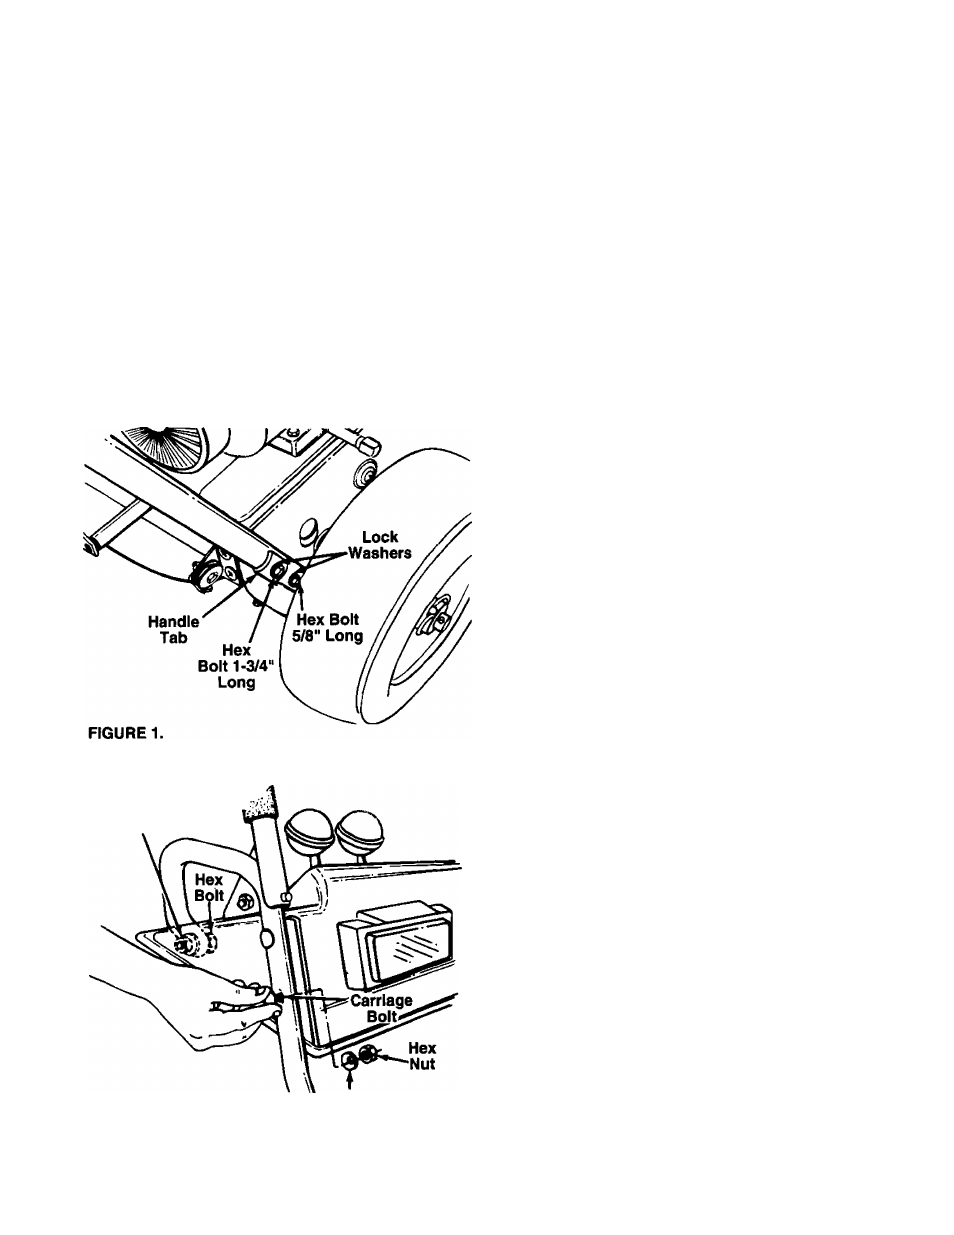
AHACHING THE HANDLE ASSEMBLY
(Hardware A)
1. Place right handle in position against the snow
thrower so the flat side of the handle Is against
the snow thrower. Secure bottom hole in handle
to snow thrower using hex bolt 5/8" long and lock
------washer. See figure 1. Do not tighten at this time.
2. Place handle tab over the upper hole in handle so
the curve in the handle tab matches the curve in
the handle. Secure to the snow thrower using hex
bolt 1-3/4" long and lock washer. Do not tighten
at this time.
3. Attach the left handle in the same manner. Do not
tighten at this time.
NOTE: If the handle panel is already assembled to
the handles, skip steps 4, 5 and 6. Go to step 7.
Cupped Washer
FIGURE 2.—Model 646F Shown
4. Place handle panel in position between the han
dles so the ends of the handle go through the
slots in the handle panel. See figure 2.
5. Secure front of handle panel with four carriage
bolts, cupped washers (cupped side against the
— handle panel) and hex nuts as shown in figure 2.
6. Secure rear of handle panel with two hex bolts,
cupped washers (cupped side against the handle)
and hex nuts.
7. Tighten the four hex bolts used to attach the bot
tom of the handles to the snow thrower frame.