Assemi3ly instructions, Attaching the upper handle (hardware a), Ahaching the directional discharge (hardware b) – MTD 692 thru 699 User Manual
Page 4: Operation, Gas and oil fill-up, To start engine
Attention! The text in this document has been recognized automatically. To view the original document, you can use the "Original mode".
ASSEMI3LY INSTRUCTIONS
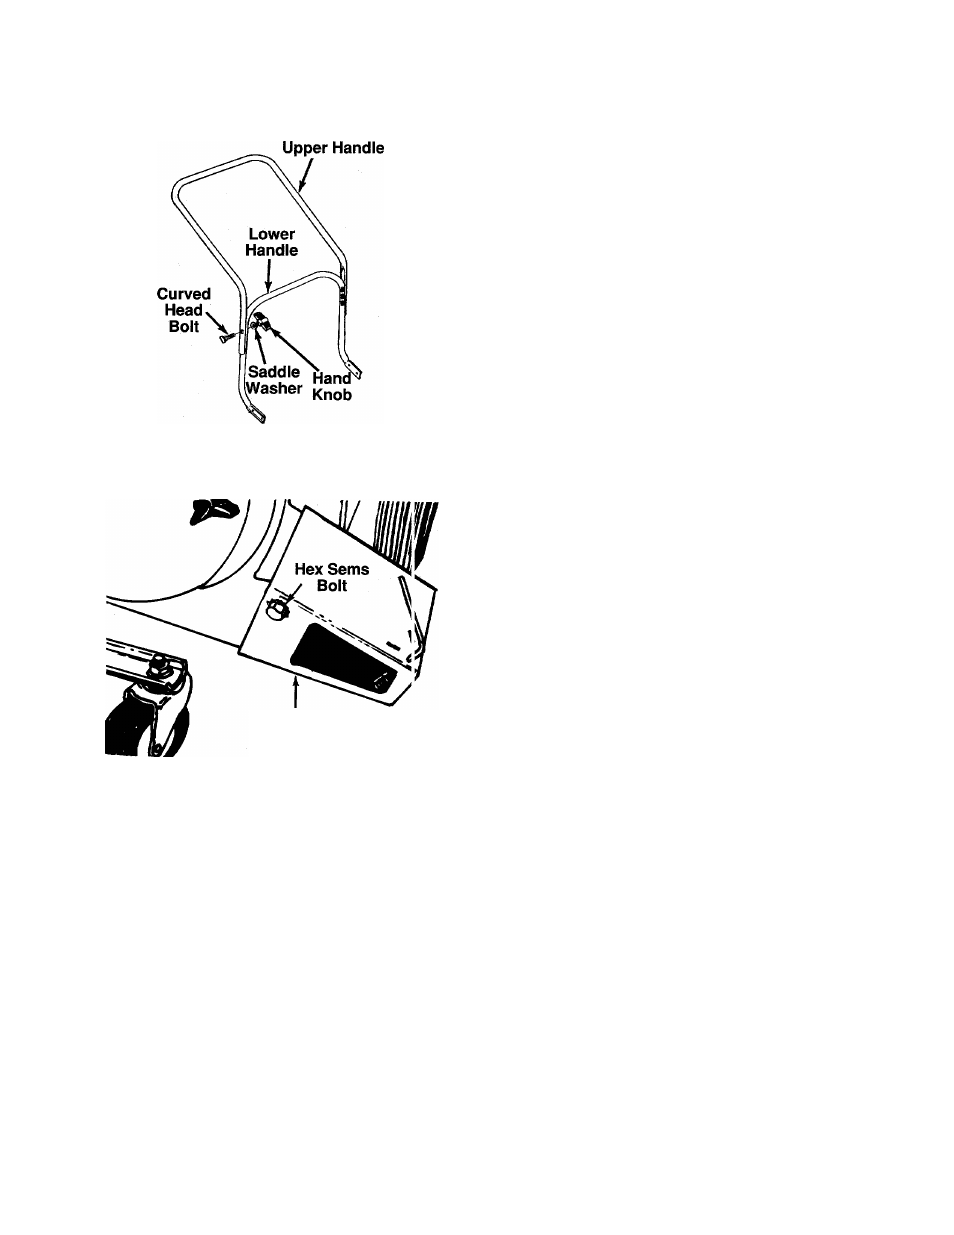
FIGURE 1.
Directional
Discharge
IMPORTANT: This unit is shipped WITHOUT
GASOLINE or OIL. After assembly, service engine
with gasoline and oil as instructed in the separate
engine manuai packed with your unit.
NOTE: Reference to right or left hand side of the
leaf blower is observed from behind the unit in the
operating position.
ATTACHING THE UPPER HANDLE (Hardware A)
Place the upper handle over the lower handle, lining
up the holes in the upper handle with the
middle
holes in lower handle. Secure with curved head bolts
-and hand knobs. See figure 1.
AHACHING THE DIRECTIONAL DISCHARGE
(Hardware B)
Slip end of directional discharge over chute opening.
-Secure in position with hex sems bolts. See figure 2.
FIGURE 2.
OPERATION
GAS AND OIL FILL-UP
Service the engine with gas and oil
as insti ucted in
the separate engine manual packed with your leaf
blower.
Read instructions carefully.
A
WARNING: Never fill fuel tank i idoors,
with engine running or until the engine
has been aliowed to cooi for at least two
minutes after running.
TO START ENGINE
A
WARNING: Revolving blades -- keep
hands away from all openings.
1. Attach spark plug wire securely to spark plug.
2. Move choke lever on engine to CHOKE position.
(A warm engine may not require choking.)
3. Move throttle control lever on engine to FAST
position.
4.
Grasp starter handle and pull rope out slowly until
engine reaches start of compression cycle (rope
will pull slightly harder at this point). Let the rope
rewind slowiy.
Pull rope with a rapid, continuous, full arm stroke.
Keep a firm grip on starter handle. Let rope
rewind siowiy. Do not let starter handle snap back
against starter.
Repeat instructions 4 and 5 until engine fires.
When engine starts, move choke control gradual
ly to RUN position.
5.
6
.