MTD 114-050-000 User Manual
Page 8
Attention! The text in this document has been recognized automatically. To view the original document, you can use the "Original mode".
Hex
Nut (O)
Shouldei
Belt (J)
(2V4" Long)
FIGURE 12—Model 050 Shown
Frant
Wheel
Rear
Wheel
H'ix
Nut (O)
-Bell£ ville
Wash ?r (N)
-Spac sr (L)
Shoulder
■;-^Bolt K)
',(2-5/8" long)
FIGURE 13—Model 050 Shown
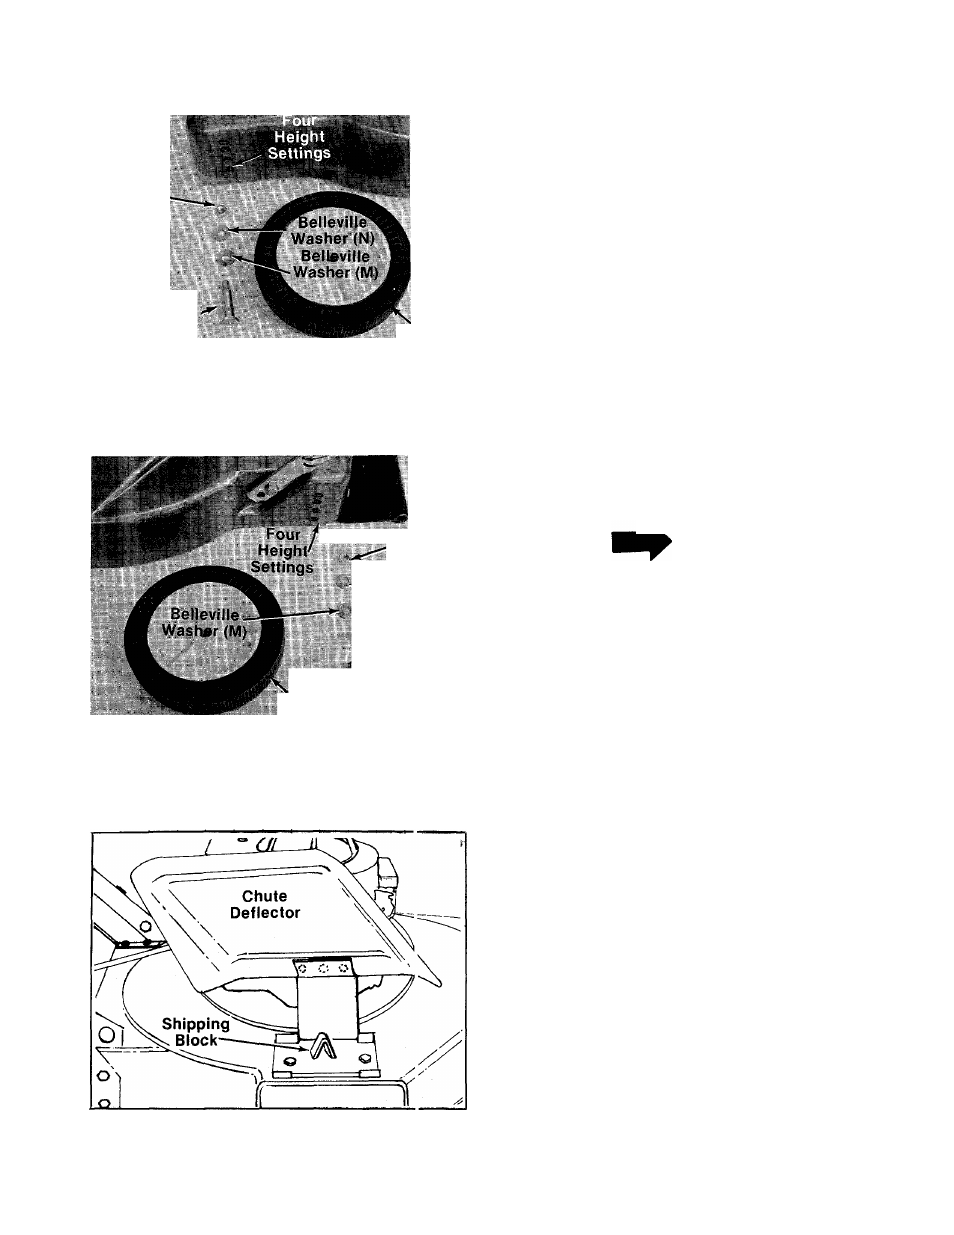
INSTALLATION OF WHEELS
If the wheels on your
mower are not already
assembled, proceed as follows.
The four holes provide four cutting heights for
your mower. Use the same hole location for all
four wheels when assembling. On Model 050 if
wheels are to be assembled in the lowest cutting
position (highest hole in the deck), refer to the
note below.
-To assemble the front wheels; (See figure 12)
1.
Place shoulder bolt (J)
(2V
a
"
long) through
wheel.
2.
Place one belleville washer 7/8" O.D. (M) on
shoulder bolt, with the cupped side of washer
toward the deck (away from wheel).
3.
Model 060—
Secure wheel to deck, using a
3
/
4
" wrench.
Model 050—
Secure wheel to deck with one
belleville washer 1-1/8" O.D. (N) on the inside
of the deck (cupped side against the deck) and
hex nut (O).
NOTE
If the lowest cutting position (high
est hole in the deck) is used, it is
necessary to place the 1-1/8" washer
on the outside of the deck and the
7/8" washer on the inside.
■To assemble the rear wheels: (See figure 13)
1.
Place shoulder bolt (K) (2-5/8" long) through
rear wheel.
2.
Place spacer (L) on shoulder bolt, next to
wheel.
3.
Place one belleville washer 7/8" O.D. (M) on
shoulder bolt, with the cupped side of washer
toward the deck (away from spacer).
4.
Secure rear wheel in same manner front wheel
was assembled.
FINAL CHECK
Check
all
nuts and bolts for correct tightness.
A
CAUTION
■ Please note that the chute deflector
on your mower is in an upright posi
tion. It is held in the position by a
shipping block. This block is used
for shipping purposes only. It must
be
removed
and
discarded
before
your mower is put into operation.
See figure 14.
figure
14.