Uaiiy mainienance, Weekly maintenance, Monthly maintenance – Husqvarna 140R User Manual
Page 4: Replacement of saw blade guard, Sharpening with a round file
Attention! The text in this document has been recognized automatically. To view the original document, you can use the "Original mode".
uaiiy mainienance
1. Clean the saw on the outside.
2. Check that there are no damages on the harness.
3. Check that there are no damages or crackings on the blade
guard. In case of impacts or crackings, the blade guard shall be
replaced.
4. Check that the saw blade is properly centred and without
crackings. An off-centred blade induces heavy vibrations that
may damage the saw.
5. Clean the air filter.
6. Check tightening of the blade nut.
7. Make sure that the transport protection of the saw blade is
undamaged and that it can be securely mounted.
Weekly maintenance
1. Lubricate the links and the bearing places of the throttle
control with thin engine oil.
2. Check the starter unit, cord and return spring.
3. Clean the spark plug on the outside and check the gap
between the electrodes. This should be adjusted to 0.5 mm
or replace the spark plug.
4. Clean the cylinder cooling fins and check that the air intake
by the starter unit is not stopped up.
5. Check that the angle drive is sufficiently lubricated. If
necessary, refill with lubricant.
Monthly maintenance
1. Clean the fuel tank with petrol.
2. Clean the carburettor and the space around it. Clean
around the ignition coil with extra care.
3. Clean the fan and the space around it.
4. Check that nuts and screws are properly tightened. Check
especially the screws, that they retain carburettor and air
filter holder.
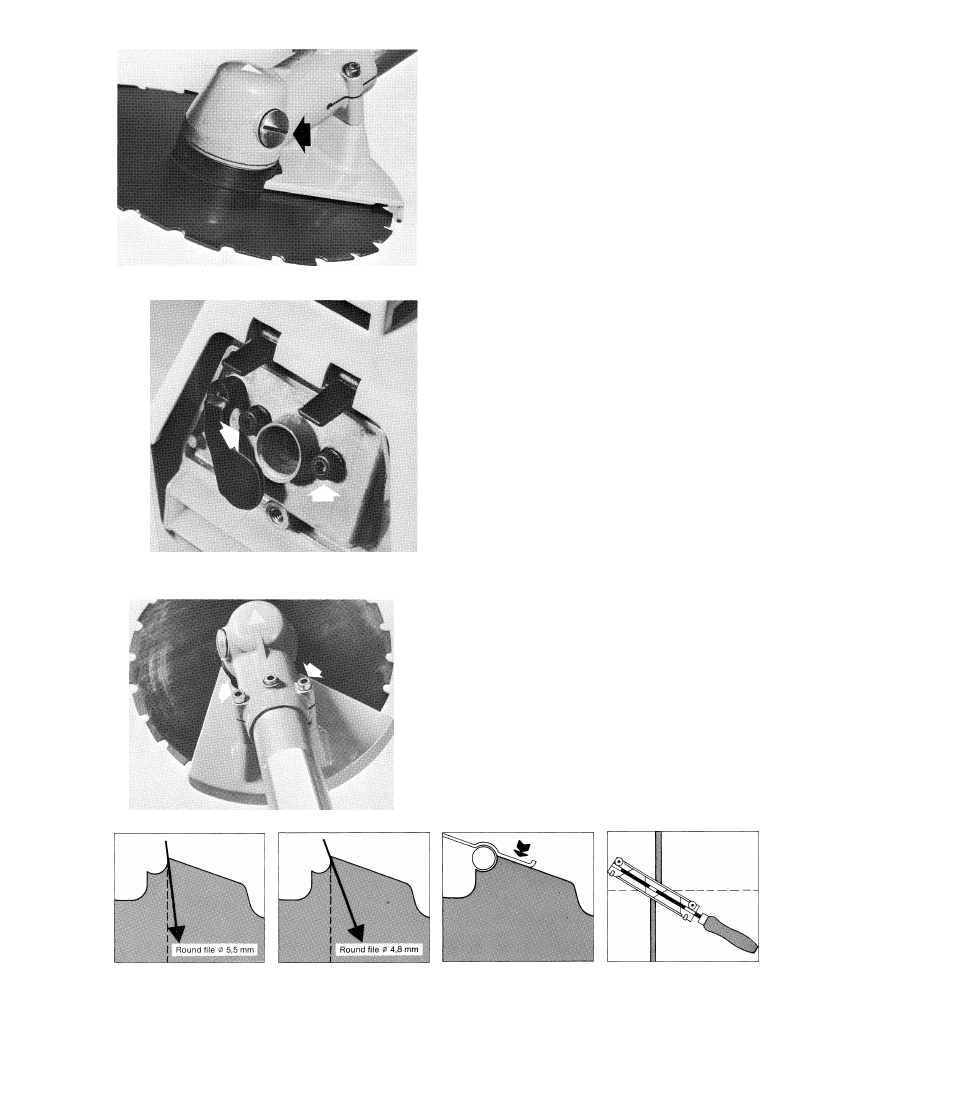
REPLACEMENT OF SAW BLADE
GUARD
The saw blade guard may easily be removed by undoing the
two outer screws. When fitting the blade guard again, we
recommend to use Loctite on the screw threads.
SHARPENING WITH A ROUND FILE
Always use a round file together with a file holder. Suitable sizes are 4.8 mm (3/16") and 5.5 mm (7/32"). By using a file holder
you may be sure of getting a correct filing depth and front edge angle. A thin file gives a more positive front edge angle. Make
sure that the file holder lies on properly to the back of the tooth. See also our filing instruction No. 10 13 384-26.