Adjustments, Engine belt – Ariens SNO-THRO 937 User Manual
Page 14
Attention! The text in this document has been recognized automatically. To view the original document, you can use the "Original mode".
Adjustments
Ariens Company recommends that
y o u
have
adjustments made by your Ariens dealer. He has
tools and the know-how to properly perform
adjustments which may be required to keep your
Sno-Thro operating at peak efficiency. Should you
decide to make the following adjustments on your
Sno-Thro yourself, Ariens Company recommends
that you call your dealer for answers to any questions
that might arise.
A
A
WARNING:
Gasoline is highly
flammable and Its vapors are explosive.
Handie with care. Never aiiow smoking
materials, sparks or flame (match, pilot
light,
etc.)
near
equipment
or
fuel
container.
CAUTION: When unit is tipped up onto
housing, remove enough fuel so that no
spillage will occur.
Scraper Blade
A
CAUTION: DO NOT use this machine on
loose gravel. Gravel may be picked up
and
thrown
from
discharge
chute
resulting in damage to nearby property
and/or injury to bystanders.
1. Scraper Blade
2. Carriage Bolts
and Nuts
Figures-. Scraper Blade
Scraper Blade is adjustable to compensate for wear
and to control auger traction (auger propels unit).
Adjust scraper blade equally its full length if machine
does not scrape cleanly or if machine does not drive
forward properly.
To adjust scraper blade, tip unit back and rest unit on
handlebar. Loosen nuts on carriage bolts along
scraper support. If unit does not scrape cleanly,
move scraper blade forward. If unit does not drive
forward and scraper blade drags, move scraper blade
to the rear.
NOTE:
Tighten hardware and test unit. Repeat
adjustment as required until proper operation is
obtained.
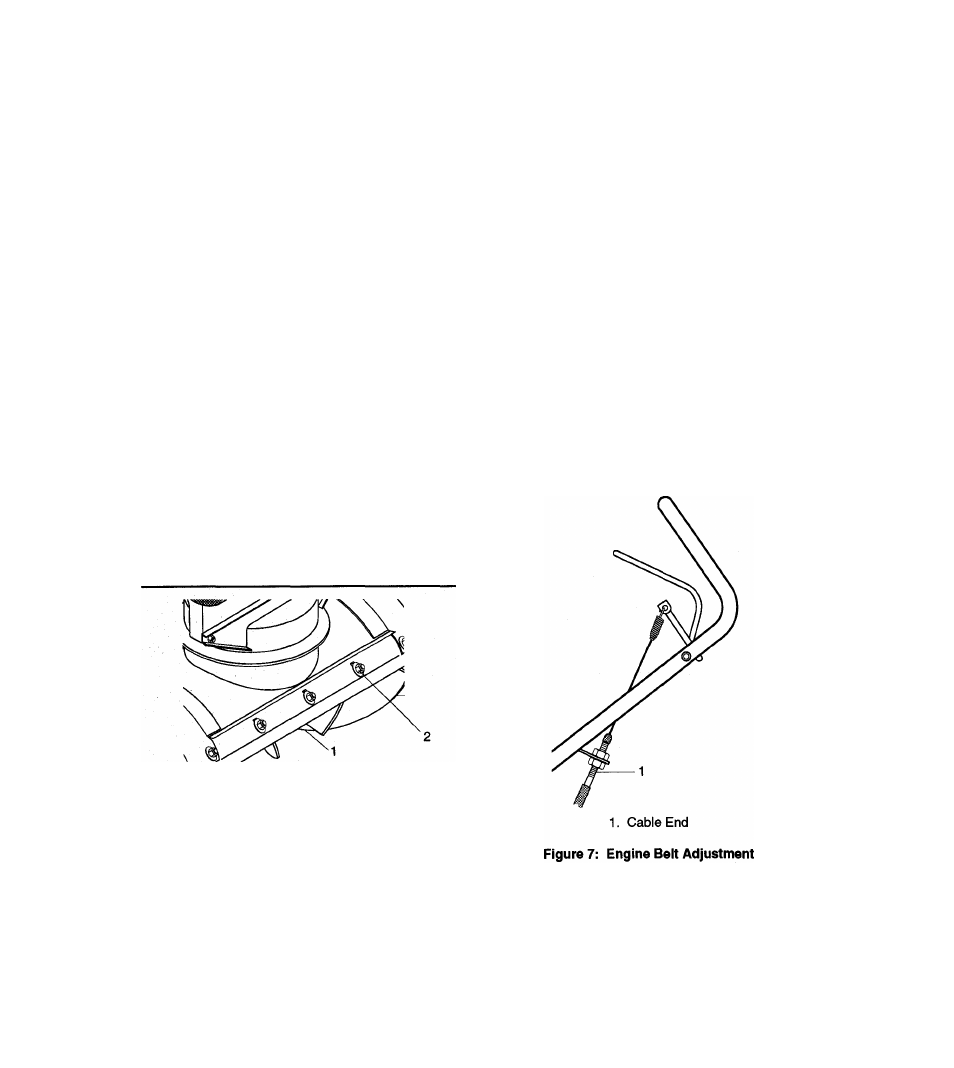
Engine Belt
A
CAUTION:
For
proper
braking
and
engine belt engagement, with Clutch
Bail disengaged, there must be slack in
cable. There should be 3/16" to 1/4"
extension of cable spring when Clutch
Bail Is held against handlebar.
To adjust, turn nuts on upper cable end until there is
the proper spring extension and lock in position by
locking nuts against bracket.
12