Starting to sew, Turning a square corner, Fait r.o?b"rr;irt:”or;rsr„.'t'.iii – SINGER W1505 User Manual
Page 20: D“r a?,ratch™err;hrr.ro7““ mar ’"í
Attention! The text in this document has been recognized automatically. To view the original document, you can use the "Original mode".
4. STARTING TO SEW
Below are some good habits to follow each time'you s'^or^toTew"^'^
'■ thrcir:ecrst%'or^rL^ic^2
P°-- 't Should be
needle frequently. Many of the
new f h •
^^''aid to change your
needres more easily than fabrics made of oaLTfiLrs.
“f the
d“r a?,ratch™err;hrr.ro7““ mar ’"Í
T
Of the first 3 or 4 stitches of the seam.
™
°
threads during the sewing
thickness. AÍlrAhrm^'chinVfo?^
Tsthch *and^^■
me lengtn of stitch and tension suitable to your fabric.
4. Fabric should be placed under the presser font with th«» h ii, x i.
of the needle and the right edqe of the matori i
u
'tiaterial to the left
for desired seam edge."® ‘
appropriate seam marking
5. Run the machine at a slow even soeprl The
«
the faster the machine will sew.
Pressure you put on the foot control,
6- Fasten each seam by back tacking at the beginning and end of the seam.
7. Always finish sewing each seam with the needle at its highest point.
" fait r.o?b"rr;irt:”or;rsr„.'T'.iii-
-
9. When turning the hand wheel manually, always turn it toward you.
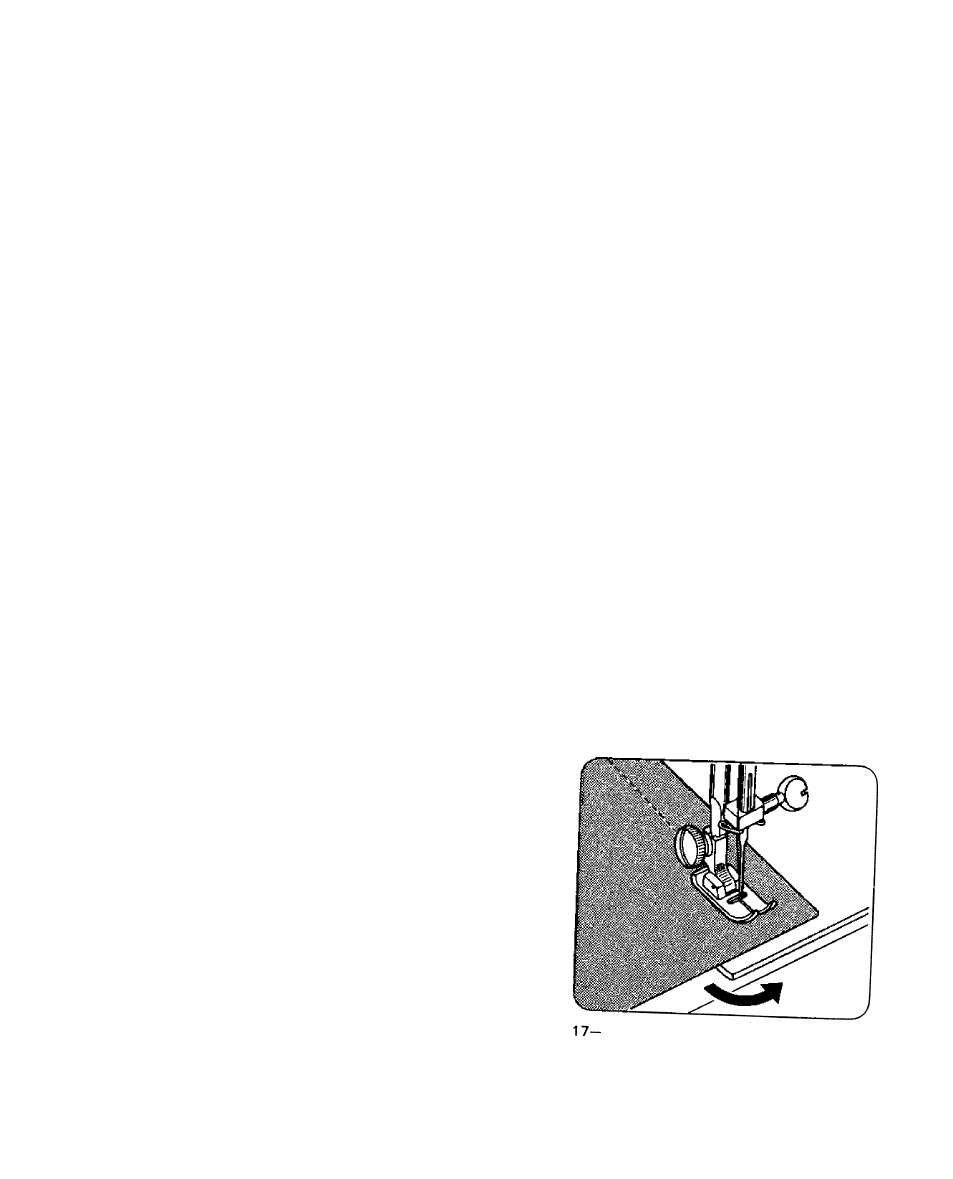
Turning A Square Corner
To turn a square corner 5/8”
from
the
fabric
edge,
stop
stitching with the needle tip
piercing the fabric, when reaching
the cornering guide as shown.
Raise the presser foot, turn
fabric. New stitching line will
align with 5/8" seam guide on
side of needle plate. Lower the
presser foot and begin stitching
in new direction.