SINGER WK-100 User Manual
Page 23
Attention! The text in this document has been recognized automatically. To view the original document, you can use the "Original mode".
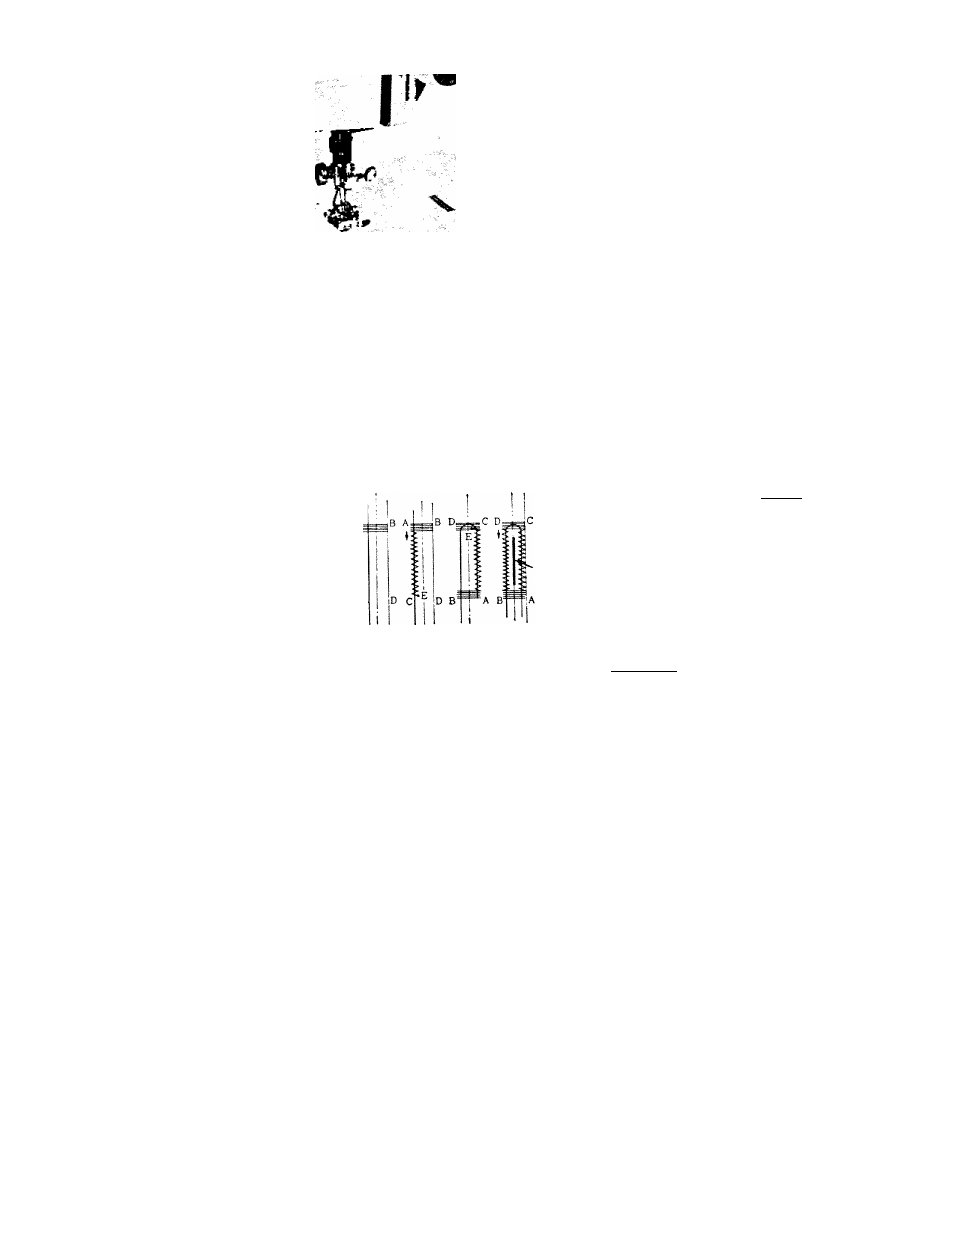
Fig. 55
? - T h r e a d
BA:
-iD C
C u t
2
3
4
5
Fig. 56
1. Attach buttonhole foot, and set stitch
length
indicator
on
smallest
stitch.
(See Page 10)
2. Set zigzag indicator between 1 and
2 and lock into position. (See Paae 12-
Fig. 32)
^
3. Push “DOWN" button to drop fabric
feeders.
4. Place material under the foot so that
when you start sewnug you will sew
from position
A
shown in Fig. 56-« !.
Lower the foot on to the material.
Move the zigzag indicator lever until
the zigzag indicator is under * 4 on
the zigzag indicator plate (See Page
11-Fig. 29). Then sew between .A & B
shown in Fig. 56- # 2 and make 4 or 3
stitches.
5. Raise the fabric feeders to up position.
Release zigzag regulating lever so that
the indicator returns to the position
between 1 and 2.
^
6. Sew from A to C shown in Fig. 56- # 3.
With the needle half way through the
material on the left side of the zig
zag stitch (Fig. 56- # 3E), using lire
needle as a pivot, turn the material in
the opposite direction.
7. Lower the fabric feeders as in step # 3.
Turn the fly wheel toward you by
hand until the needle is at its highest
position. Move the zigzag regulating
lever until the indicator is under # 4.
(See step # 4). Sew from C to D as
shown in Fig. 56- # 4. Release zigzag
regulating lever so that the zigzag
indicator returns to the position between
1 and 2.
8. Raise fabric feeders and sew between
D and B as shown in Fig. 56- ^ 5.
CAUTION : Sew between D and B
carefully, being carefull not to overlap
the two sides of the buttonhole.
9. With the ripper, cut the cloth between
the two sides of the buttonhole. (Fig.
56- # 5,
20