SINGER 192 Spartan User Manual
Page 3
Attention! The text in this document has been recognized automatically. To view the original document, you can use the "Original mode".
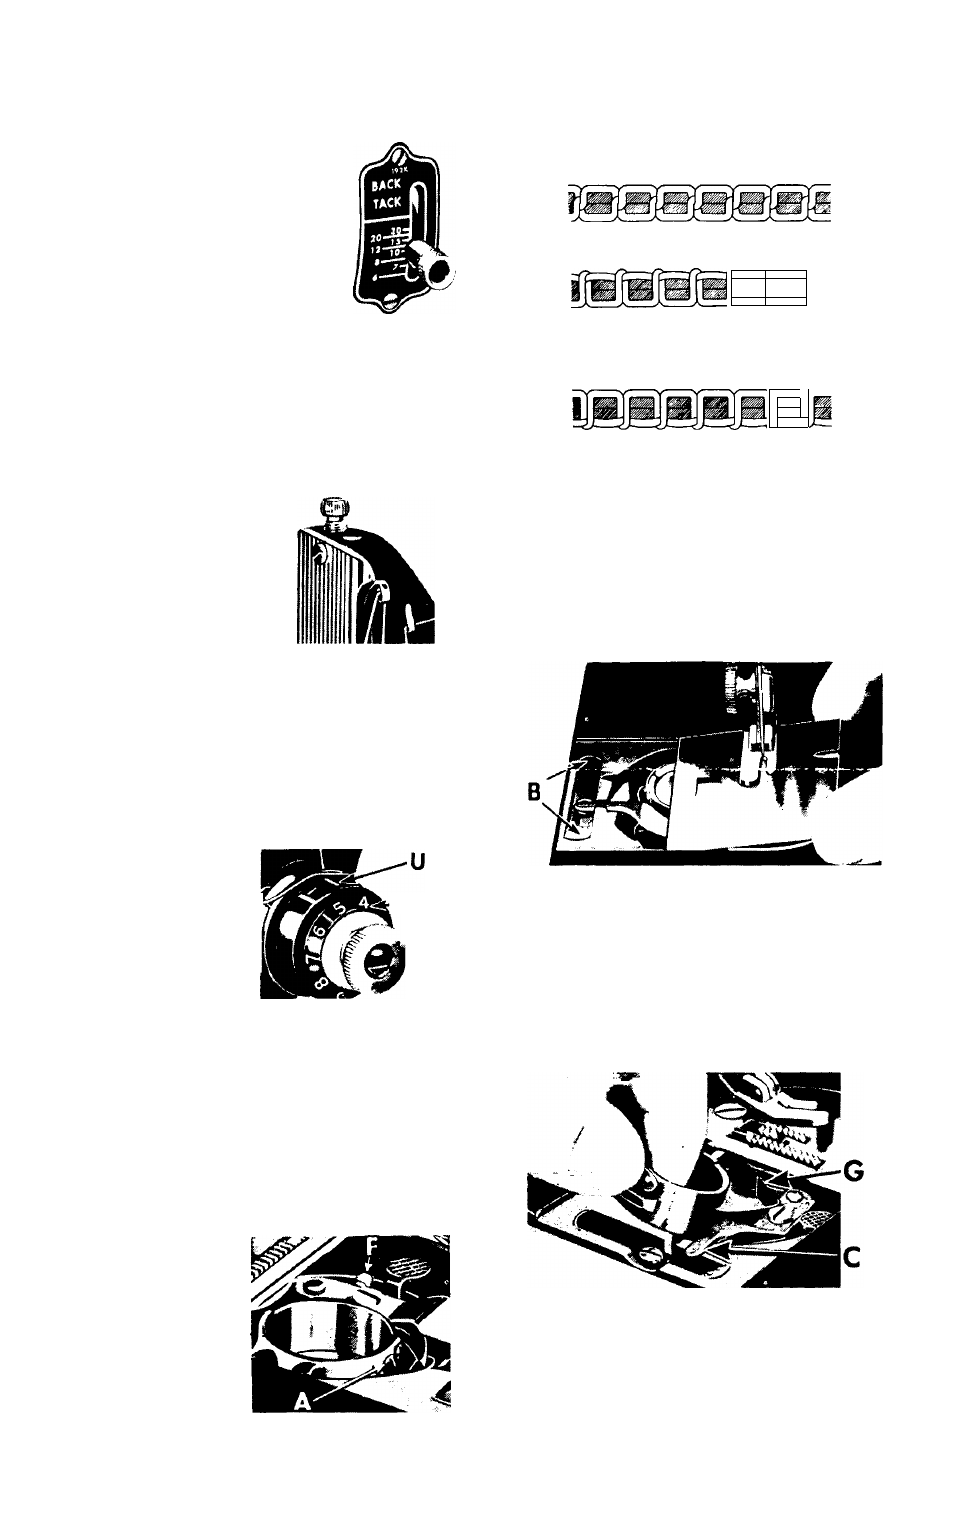
To Regulate Length of Stitch—
Numerals on the indicator
represent
approximate
number of stitches per
inch.
• Turn thumb nut to left.
• Set lever at desired
stitch setting,
• Turn thumb nut to
right until it rests
against
indicator
plate.
F/g. W
To reinforce a seam, raise stitch
indicator lever to its highest posi
tion. The machine will then stitch
in a reverse direction, making it
easy to ’*back tack”
To Regulate Pressure on Presser Foot—
• To d e c r e a s e
pressure,
turn
thumb
screw
up.
• To increase pres
s u r e , t u r n
thumb
screw
down.
F;g. II
For ordinary sewing, pressure of
the presser foot on the material
seldom
requires
changing.
Heavy
materials
require
more
pressure
than
light
materials.
Pressure
should be only heavy enough to
move the work along evenly.
To Regulate Needle Thread Tension —
Numerals on in
dicator
V, Fig,
12, denote dif-
\
__
y
ferent degrees of
tension. When
tension has been
f^W
c o r r e c t l y s e t ,
note number at
l i n e U s o t h a t
this setting may be regained should
the tension be altered for special
work.
• To increase tension, turn thumb
nut
W
to higher number.
• To decrease tension, turn thumb
nut
w
to lower number.
To Regulate Bobbin Thread Tension—
T e n s i o n o n
bobbin
thread
is regulated by
s c r e w
A, F i g .
13, nearest cen
ter of tension
s p r i n g . T u r n
screw
A
over
to right to in
crease
tension;
turn screw to
left to decrease
tension.
A perfectly formed stitch results
when both tensions are balanced so
that the needle and bobbin threads
are drawn equally into the fabric.
Fig. 14. Perfect Sr itching
^ -
"WT^
.
Fig. 15. Iwperject Stitching
Needle thread tension too tight or
Bobbin thread tension too loose.
'Mí
Fig. 16. bnperject Stitching
Bobbin thread tension too tight or
Needle thread tension too loose.
Care and Maintenance of Your
S P A R T A N 1 9 2
When in regular use the machine
should be cleaned periodically.
To Remove and Replace Bobbin Case—
Fig. 17. Slide Plate Removed
Raise needle and presser foot.
Draw slide plate to left.
Remove bobbin from case.
Lift edge of slide plate and draw
it to the right until it is dis
engaged from spring
B.
Fig. n
Fig. 18. Removing Bobbin Case
Lift and move latch
C
to position
shown.
Grasp bobbin case as shown.
Tilt case to left and raise forked
end above bracket
G.
Turn forked end toward you,
then lift out bobbin case.