Bg€iq. jas loo, Fr^ie ffl [s] bt ii a€ ia »ffl ft r, Sli&fii, s5}£z:l4'€ft№?li&si®i5 – SINGER 1375A3 User Manual
Page 10
Attention! The text in this document has been recognized automatically. To view the original document, you can use the "Original mode".
Bg€iQ. jaS lOo
S nFig.ll
a 12 Fig. 12
W::^7L4'I'
b
H4*.
® X = i S l i B F S ' i i ® i i l 5 5 , ? L ? ? T M S ^ h
-laa^iESSi^te, itii
TFSieflEffliafS,
—?Lii.
-•fr^ie ffl [s] Bt ii A€ ia »ffl ft r: #
sli&fii, S5}£z:l4'€ft№?Li&Si®i5.
,E® 12. S.ST'gihm#i«mii»
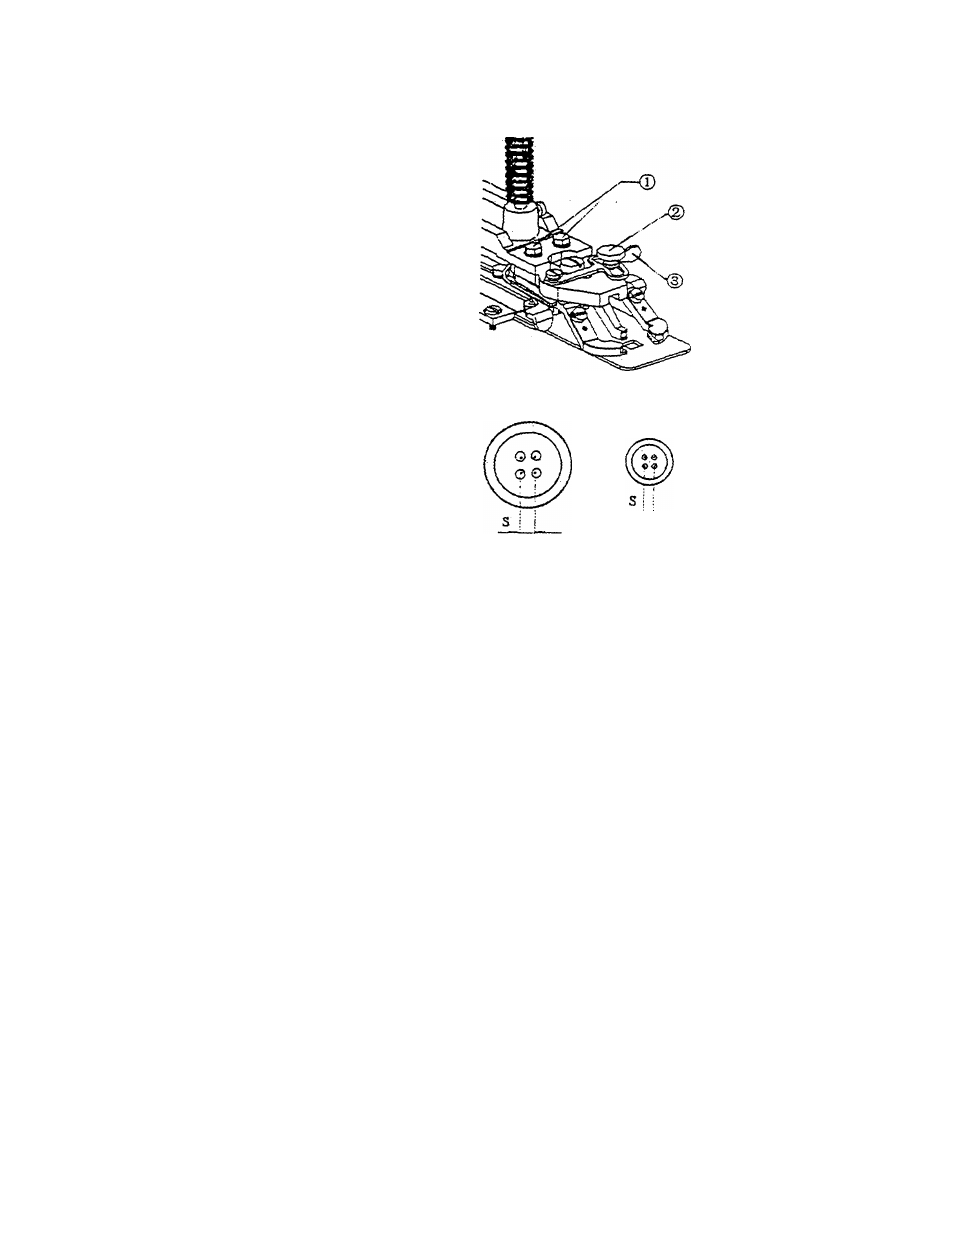
5. Adjusting button clamp (as shown in Fig.ll).
The button clamp is suitable for attaching two or four or bar buttons of 9-26mm in
outside diameter.
To adjust the clamp jaws, loosen screw (2), pull back the button clamp adjusting
plate (3), and adjust the clamp jaws to the desired width, then securely tighten the
screw. The width between clamp jaws with button should be slightly smaller than
width between clamp jaws without button. It is easy for the button to be inserted or
taken out. If the opening of the clamp jaws is not wide enough, it is difficult to insert
button in and at the same time will cause unnecessary wearing of the clamp.
5. €*№iSS(JE@ 11)
*.^€^iSl:iT 9~26mm S-gfl^Higgi-ilCft.
ta □ X A №isif. ssft'siii (2), f f l € * i ® ( 3 ) ,
□ isii sj
6. Threading and thread tension discs (as shown in Fig. 13).
Thread the machine in accordance with the diagram as shown in Fig. 13.Threading
improperly will affect the sewing quality directly.
There are three thread tension discs installed at the top of the machine and each of
-
8
-