Assembly instructions – Sears Lifestyler 142.288040 User Manual
Page 5
Attention! The text in this document has been recognized automatically. To view the original document, you can use the "Original mode".
ASSEMBLY INSTRUCTIONS
ASSEMBLY USING FIGURE 2
TO
7
STEP 1
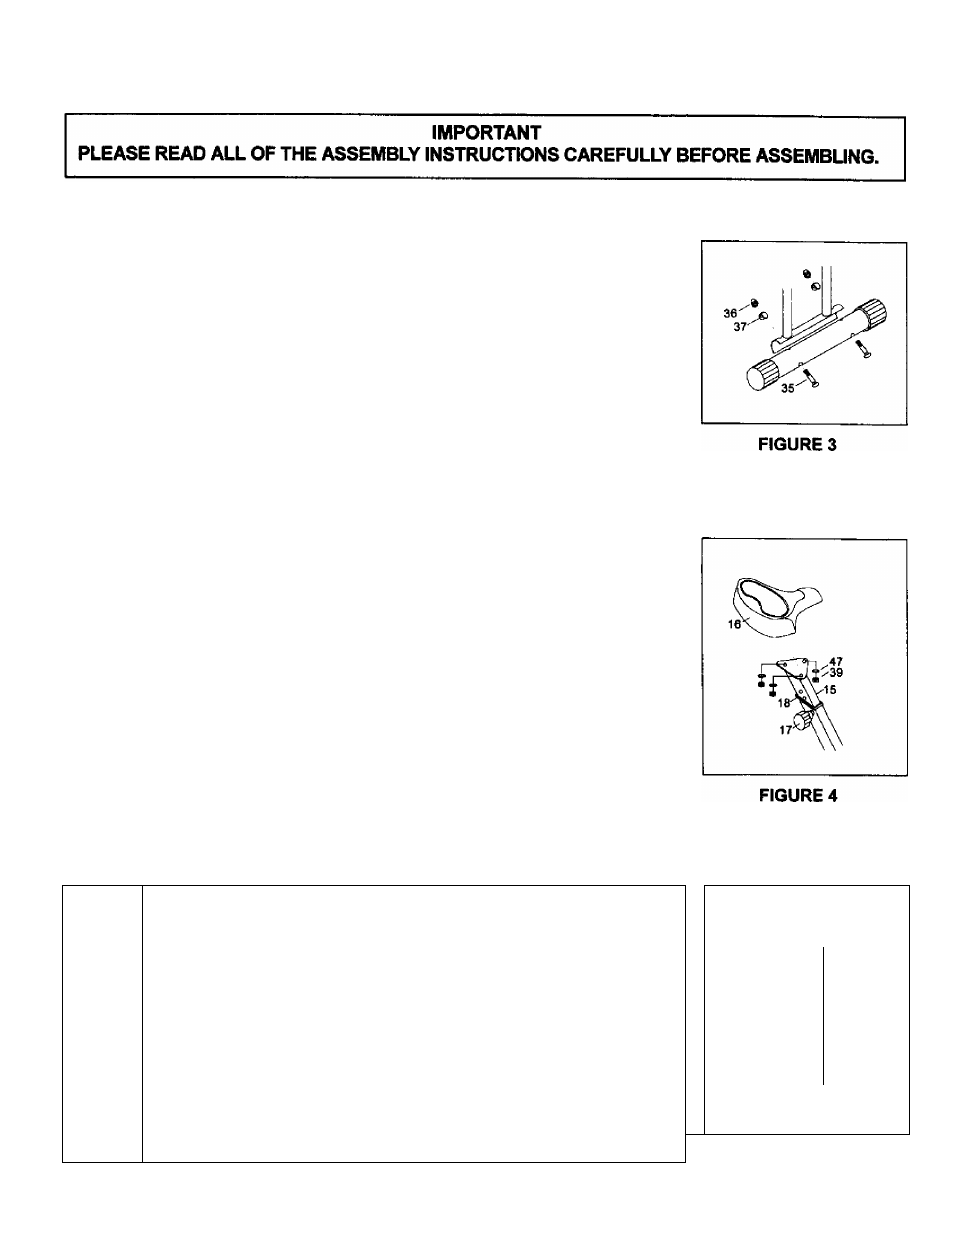
Place the FONT STABILIZER (2) into saddle bracket at the front of the
FRAME (1).
Align the holes in the FRONT STABILIZER (2) with the holes in the
bracket and put 2 CARRIAGE BOLTS (35) through the holes.
Place 2 CURVE WASHERS (37) on the bolts and screw on 2 ACORN
NUTS (36) and tighten.
FIGURE 3
STEP 2
The assembly of REAR STABILIZER (2) is the same as STEP 1,
STEP3
STEP 4
Remove NUTS (39) and WASHERS (48) from studs on bottom of
SEAT (16). Place SEAT (16) onto SEAT POST (15) then replace
WASHERS (46) and NUTS (39). Secure TIGHTLY.
To adjust the seat height to your personal requirements, unscrew and
pull the KNOB (17). Slide the SEAT POST (15) up or down then
push and screw the KNOB (17). See Figure 10 on page 7 for
proper seat adjustment.
FIGURE 4
STEPS
1. The HANDLEBARS (3R and 3L), with the pivot tube to the front
and GRIPS (13) facing outside.
2. Slide the HANDLEBAR AXLE (9) through HANDLEBARS (3R and
3L).
3. Fasten the HANDLEBAR AXLE (9), until it is tight against the
jQ t
BUSHING. The AXLE must be tightened securely.
4. Tighten the PHILLIPS SCREWS (47) on the MAIN FRAME.
NOTE; The BUSHINGS (31) mounted already.
FIGURE 5
FIGURE 5