Important - elec trical grounding instructions, Installation – Sears Microwave Oven User Manual
Page 5
Attention! The text in this document has been recognized automatically. To view the original document, you can use the "Original mode".
IMPORTANT - ELEC
TRICAL
GROUNDING
INSTRUCTIONS
This appliance must be grounded. In the event of an
electrical short circuit, grounding reduces the risk of
electric shock by providing aif’escape wire for the elec
tric current. This appliance is equipped with a cord hav
ing a grounding wire with a grounding plug. The plug
must be plugged into an outlet that is properly installed
and grounded.
WARNING
— Improper use of the grounding plug can
result in a risk of electric shock.
Consult a qualified electrician or Sears Service Depart
ment if the grounding instructions are not completely
understood, or if doubt exists as to whether the
appliance is properly grounded.
A short power-supply cord is provided to re.duce the
risks resulting from becoming entangled in or tripping
over a longer cord.
Longer cord sets or extension cords are available and
may be used if care is exercised in their use.
If a long cord or extension cord is used, (1) the marked
electrical rating of the cord set or extension cord should
be at least as great as the electrical rating of the appli
ance*, (2) the extension cord must be a grounding-
type 3 wire cord, and (3) the longer cord should be
arranged so that it will not drape over the countertop or
tabletop where it can be pulled on by children or
tripped over accidentally. The electrical power cord
must be kept dry and must not be pinched or crushed in
any way.
*NOTE:
This oven draws a 13.5-ampere electrical
current on 120 volts.
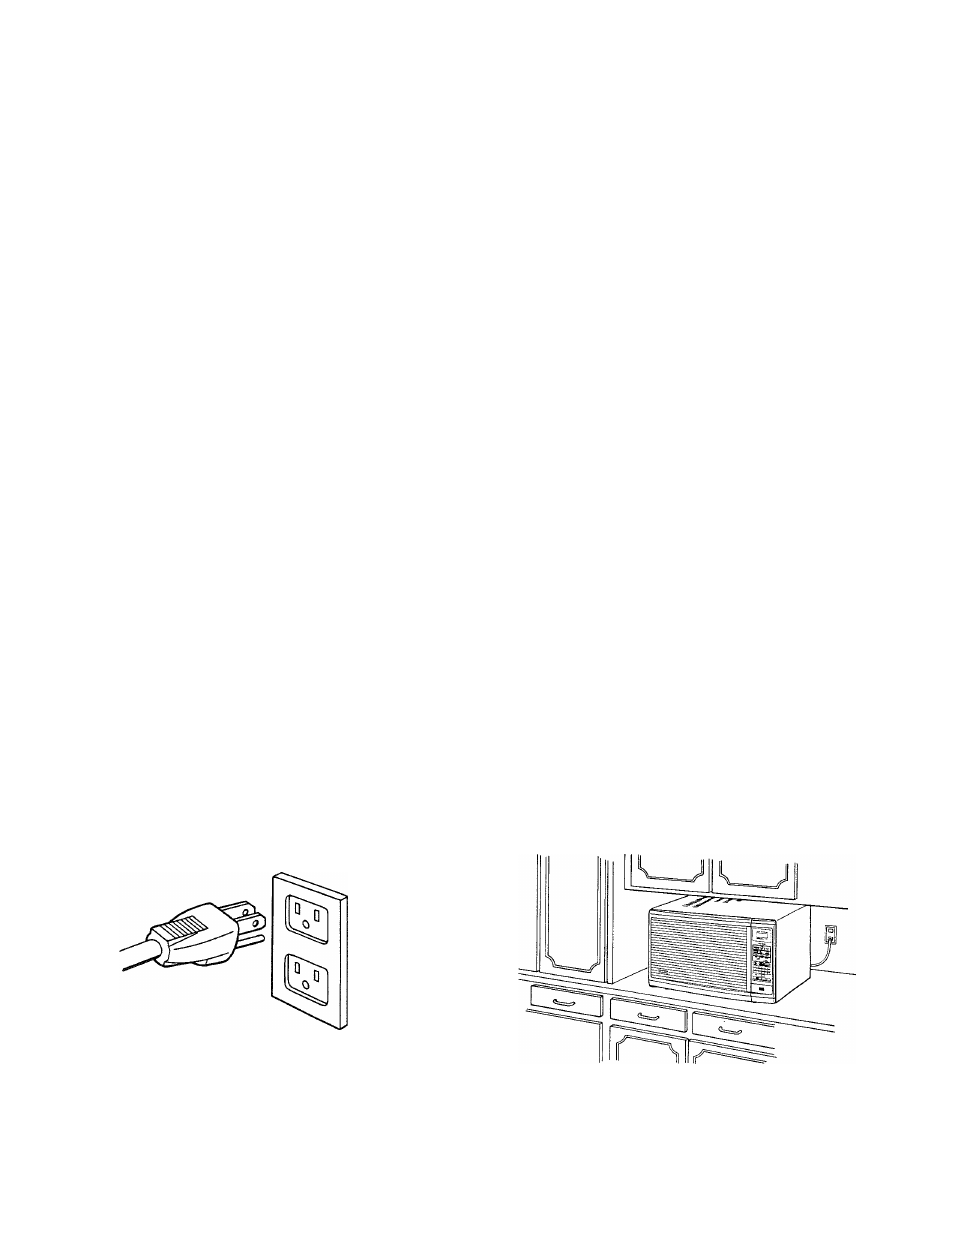
PROPERLY POLARIZED AND
GROUNDED OUTLET
INSTALLATION
Install your oven by following these four simple steps:
Step 1: Remove all packing material and accessories.
Step 2: Place the oven in the level location of your
choice, but make sure there is at least 4 inches
of space on the top of the oven and 5 inches of
space on the both sides of the oven for proper
ventilation.
Top of the oven should be kept clear and the
plastic feet must be kept on the oven so there is
air flow ventilation. The exhaust vents are at
the top of the oven. “DO NOT place any ob
jects such as books, papers, or cooking
accessories over the top of the exhaust
vents.” Blocking the vents can damage
the oven.
Step 3; Plug your oven into a Standard 120 volt/60 Hz
household outlet. Be sure the electrical circuits
is at least 15 amperes and that your microwave/
convection oven is the only appliance on the
circuit.
Step 4: When your microwave/convection oven is
plugged in for the first time or when power re
sumes after a power interruption, the numbers
in.the display window will show “0:00” plus the
hours and minutes that have elapsed since the
oven was plugged in or the power was restored.
This means that the TIME OF DAY clock must
be set. Refer to “Setting Time of Day” below.
NOTE: If your oven does not operate properly, unplug
the oven from the 120 volt/60 Hz household
outlet and then plug it back in.
This unit is not designed for 50 Hz or any
circuit other than a 120 volt/60 Hz AC
circuit.
This oven is not designed for a built-in
use.
Allow 4 inches of space on the top of the oven and
5 inches of space on both sides of oven.
Three-Pronged (Grounding) Plug
SETTING TIME OF DAY
• Touch STOP/CLEAR.
« Touch “ © ” TIME OF DAY PAD.
• Touch numbers indicating the correct time.
® Touch “ © ” TIME OF DAY PAD.