Warning, To check brush, Replace brush – Sears CO1ZARD10UOO-4370537 User Manual
Page 16: Brush assembly
Attention! The text in this document has been recognized automatically. To view the original document, you can use the "Original mode".
R P Ì 1 Q I 4 Q R D \ / i r ^ l K i r 2
. Cf iTl) Vii li .'..lui Cq pC W I Wf I i^
WARNING
Electrica} Shock Or Personal Injury
Hazard
Disconnect electrical supply before
servicing or cleaning the unit.
p£inifl*2St riA QA AAllfH l*2!adilf ill oiläA»
I OllUi\#
vlw »31./ vwMiM lvi«3Mlv Ifl CiHSv
trical shock or personal injury from
cleaner suddenly starting.
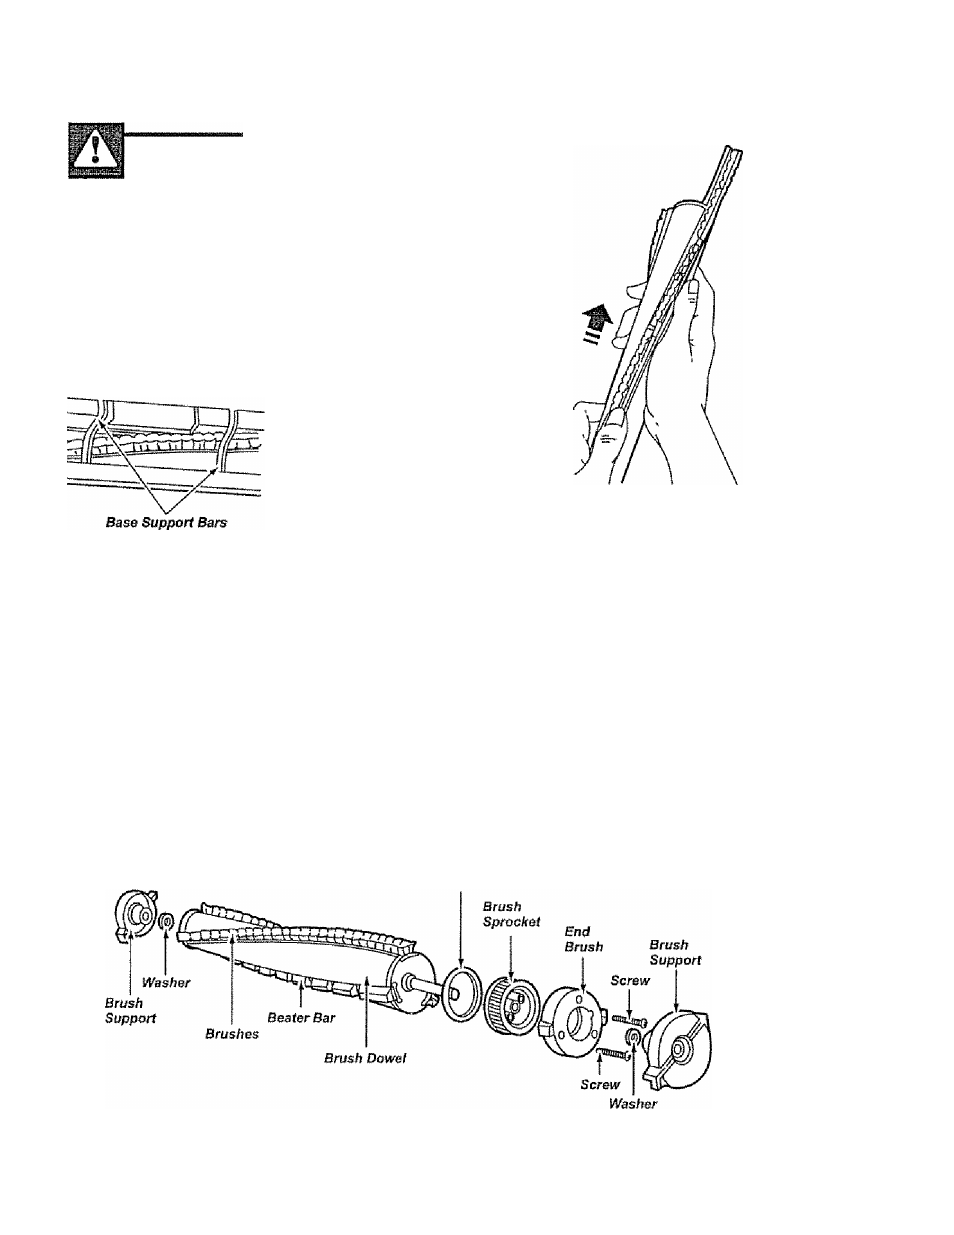
TO CHECK BRUSH:
When brushes
are worn to the
level of the base
support bars,
replace the
brushes,
REPLACE BRUSH:
1. Remove POWER-MATE™ cover, belt and
brush assembly. See To remove belt" in
BELT CHANGING AND BRUSH
CLEANING.
2, Remove brush supports, washers,
screws, end brush, brush sprocket pieces
from ends of brush assembly.
3. Push out worn
brushes. If the
beater bar is
chipped or
gouged,
replace It.
4. Slide new
beater bar and
brushes into slots.
NOTE:
New
brushes and
beater bar may
be easier to install
if they are soaked
in warm water for
a few minutes.
Dry thoroughly
before installing.
5. Reassemble brush assembly. To line up
screw holes in dowel, sprocket and end
brush, be sure beater bar portion of end
brush iines up with beater bar on brush
dowel.
6. Replace belt, brush assembly POWER
MATE™ cover, light bulb and tight cover. See
“To replace belt" in BELT CHANGING AND
BRUSH CLEANING.
BRUSH ASSEMBLY
Brush
Sprocket
flange
16