Attachments, Caution, Attachments on handle – Sears CO1ZARD10UOO-4370537 User Manual
Page 10: Attachments on wands, Attachment use chart
Attention! The text in this document has been recognized automatically. To view the original document, you can use the "Original mode".
ATTACHMENTS
A
CAUTION
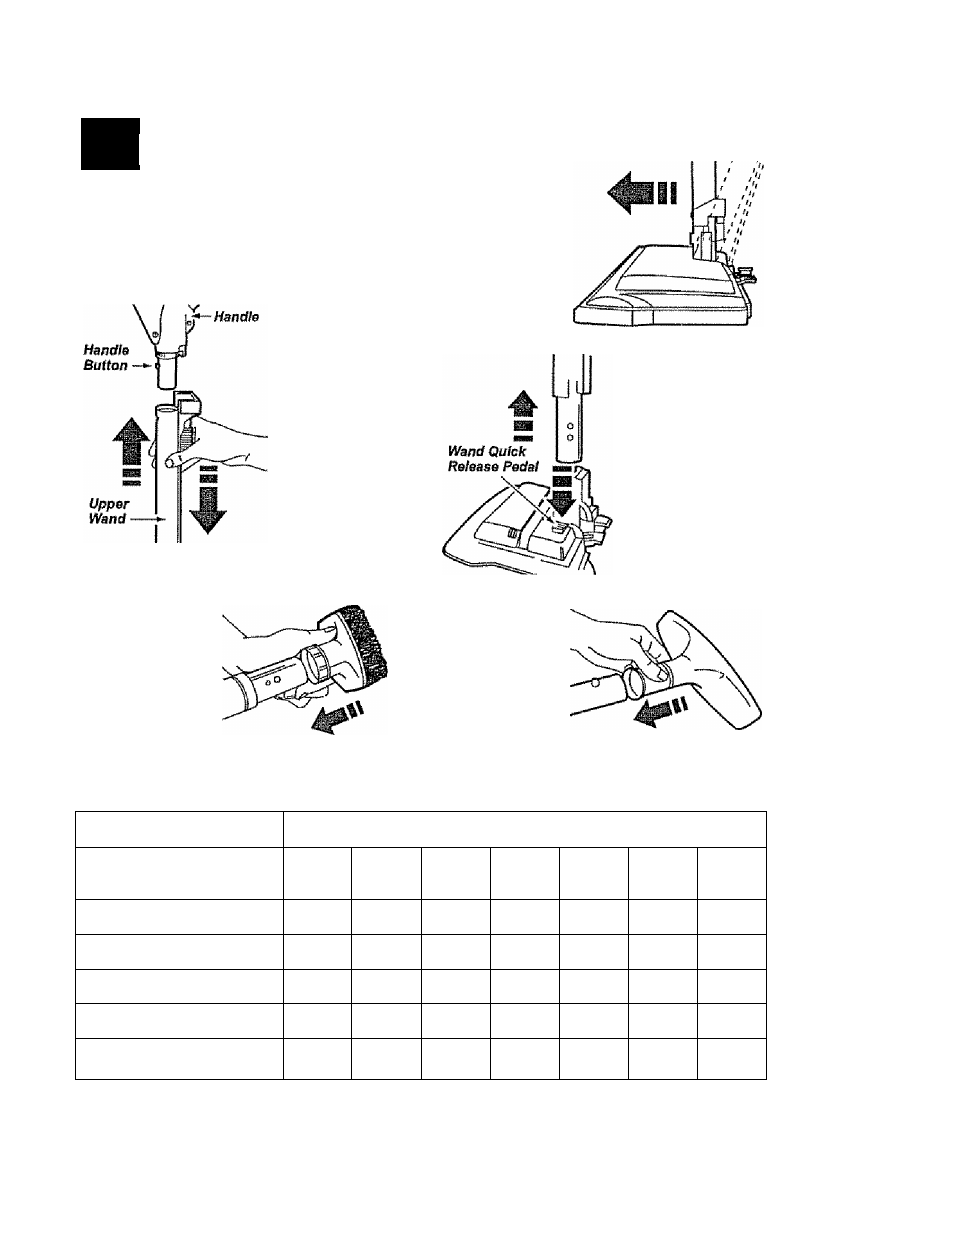
DO NOT attach or remove handle or
wands while cleaner is ON. This
could cause sparking and damage
the electrical contacts.
ATTACHMENTS ON HANDLE
NOTE:
If the
POWER
MATE™ is
attached, turn
cleaner off
before removing
handle from
wands.
1. Press lock
button, then pull
to remove han
dle from wand.
If your model has the optional feature of a
handle release, press it in similarly.
2. Slide attach
ments firmly on
handle as need
ed. See chart
below.
ATTACHMENTS ON WANDS
1. To remove
wands from
POWER
MATE™, lock
wands in
straight-up
position.
2. press wand
release pedal
with foot and
pull the wands
straight up out of
POWER-MATE™.
The POWER
MATE™ plug and
cord do not have to
be removed to use
attachments on the
wands.
3. Put attach
ments on
wands as
needed. See
Chari below.
ATTACHMENT USE CHART
CLEANING AREA
ATTACHMENT
Furniture*
Between
Cushions*
Drapes*
Stairs
Bare
Floors
Carpeted
Floors/Rugs
Wails
DUSTING BRUSH
X
X
X
X
X
FABRIC BRUSH ^
X
X
floor
brush
X
X
X
POWER-MATE™
X**
NOTE: When separating wands, depress iock button comptelety before puiiing wartds apart. If wartd iock button is diffi
cult to depress, push the two wands more tightly together to line up the lock button with the hole Depress lock button
and then pull wands apart.
10