Sears 831.287602 User Manual
Page 5
Attention! The text in this document has been recognized automatically. To view the original document, you can use the "Original mode".
jrftqthe’Frame(ll) w№
11/4“ Be
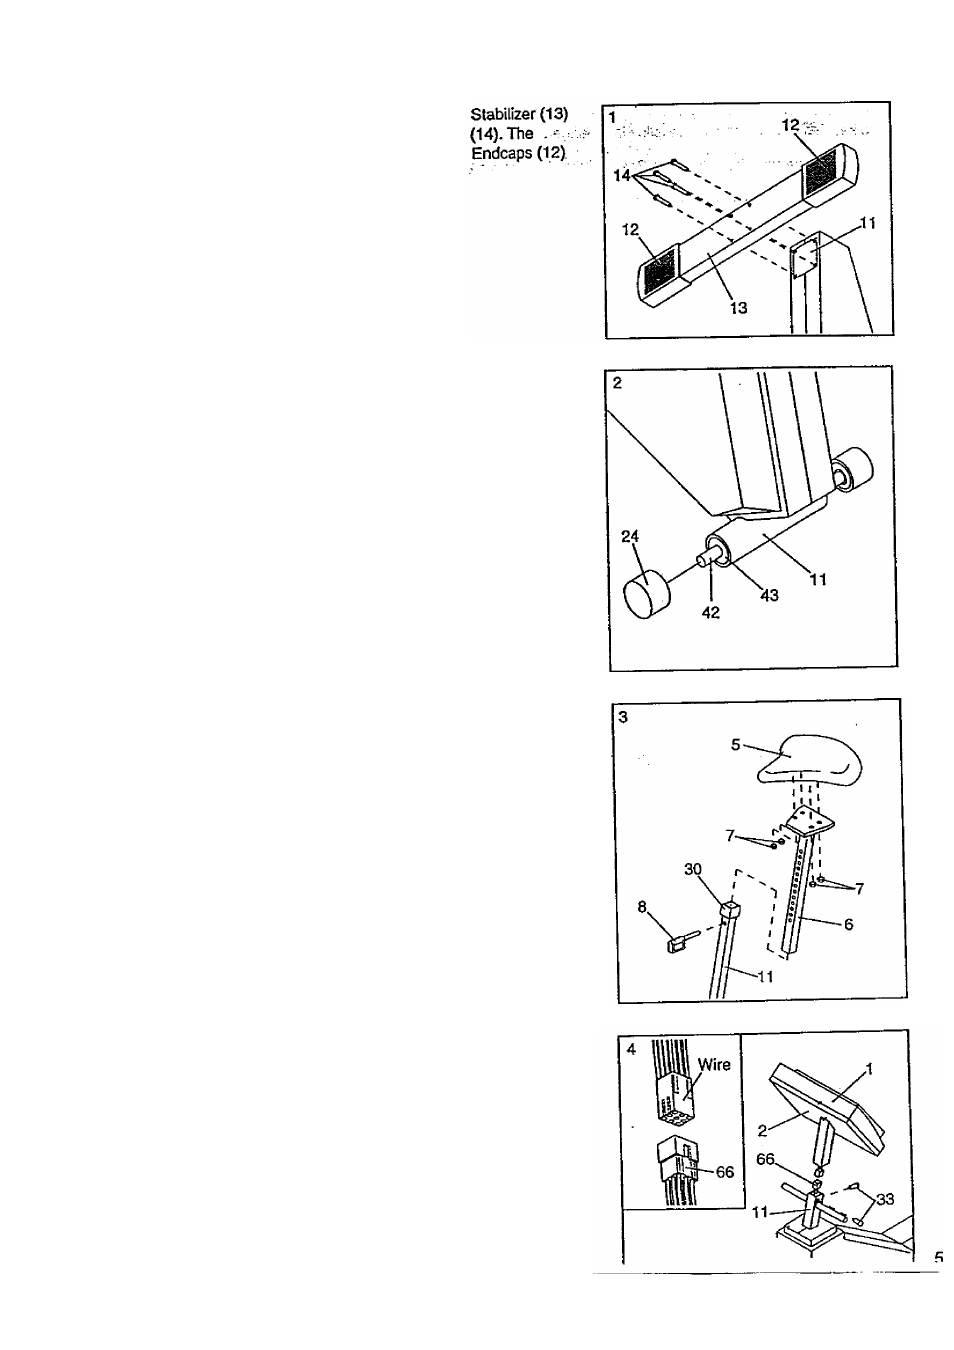
Stabilizer must be turned ^ the ribbed sides of 1
are on the side shown! Lower the exercise bike.
2. Slide the free end of the Roller Axle (42) through the Bushings
(43) in the Frame (11). Press the unattached Roller (24) onto the
end of the Axle, it may be helpful to tap the Roller with a hammer
in order to press it fully onto the Axle.
3. Remove the four 1/4“ Seat Nuts (7) from the underside of the
Seat (5). Remove the Seat Post (6) from the Frame (11). Attach
the Seat to the top of the Seat Post with the four 1/4“ Seat Nuts.
Insert the Seat Post (6) into the Frame (11), adjust the Seat (5) to
the desired height, and insert the Seat Pin (8) through the front of
the Frame and the Seat Post. Slide the Seat Post Collar (30)
down over the Frame. CAUTION: At least two inches of the
Seat Post must be inside of the Frame. The Seat Pin must be
inserted from the front, as shown, if the Seat Pin is inserted
from the back, it may slip out, resulting in injury.
Connect the wire protruding from the Console Mount (2) to the
Wire Harness (66) (see the inset drawing). Make sure that the
wire is turned so it fits easily into the Wire Harness. If the wire is
not turned correctly and is forced into the Wire Harness, the
Console (1) will not function properly.
Slide thè Console Mount (2) onto the Frame (11). CAUTION: Be
careful to avoid pinching your fingers or the Wire Harness
(66). Attach the Console Mount to the Frame with the two 5/16“ x
1/2" Screws (33).