Replacement and care of filters (continued) – Sears QUIET COMFORT 758.14417 User Manual
Page 10
Attention! The text in this document has been recognized automatically. To view the original document, you can use the "Original mode".
Replacement and Care of Filters (continued)
__
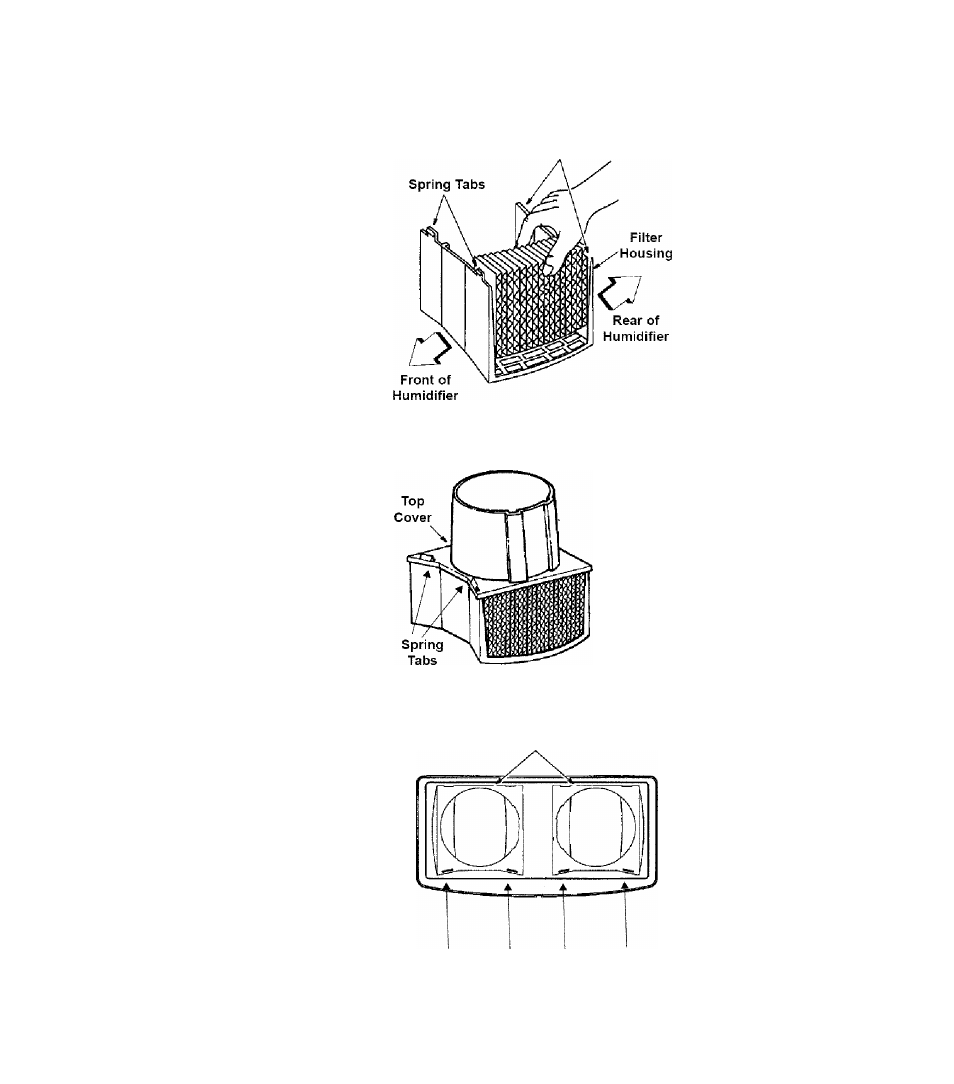
c. Install new filters in the filter housing
track with the glue beads of the wick-
ing pad to the inside of the filter hous
ing.
d. Return the top cover of the filter
housing by installing the cover over
the fixed tabs on the rear of the lower
filter housing and pivoting the cover
down over the top of the filters. Snap
the cover over the two spring tabs.
e. Replace the filter housing in the cab
inet. Note: There is a front and back
orientation. To position the filter
housings correctly:
• Be sure that the spring tabs of filter
housings are towards front of cabi
net.
• Align the lower portion of the filter
assembly over the six ribs located at
the bottom rear of the humidifier cab
inet.
f. Position fan assembly onto the cabi
net. Make sure the fan venturi (low
est cylinder section below the fan) is
placed inside the filter housing.
g. Replace water bottles.
h. Close the pivoting lid.
i. The unit is ready for use or to be
stored away for next season.
NOTE: For correct operation of the filter
housing assembly, filters must be fully con
tained inside the flange of the top cover.
Fixed Tabs
Flat Portion of Filter Housing
Towards Back of Cabinet
Spring Tabs Towards Front of Cabinet
Step 4 e.
10