Assembly – Sears 831 297241 User Manual
Page 6
Attention! The text in this document has been recognized automatically. To view the original document, you can use the "Original mode".
ASSEMBLY
Set the treadmill in a cleared area and remove all packing materials. Do not dispose of the packing materials until
assembly is completed. THE FOLLOWING TOOLS ARE REQUIRED FOR ASSEMBLY: The 7!Z2” alien
wrench
included and your own adjustable wrench
—iPt.
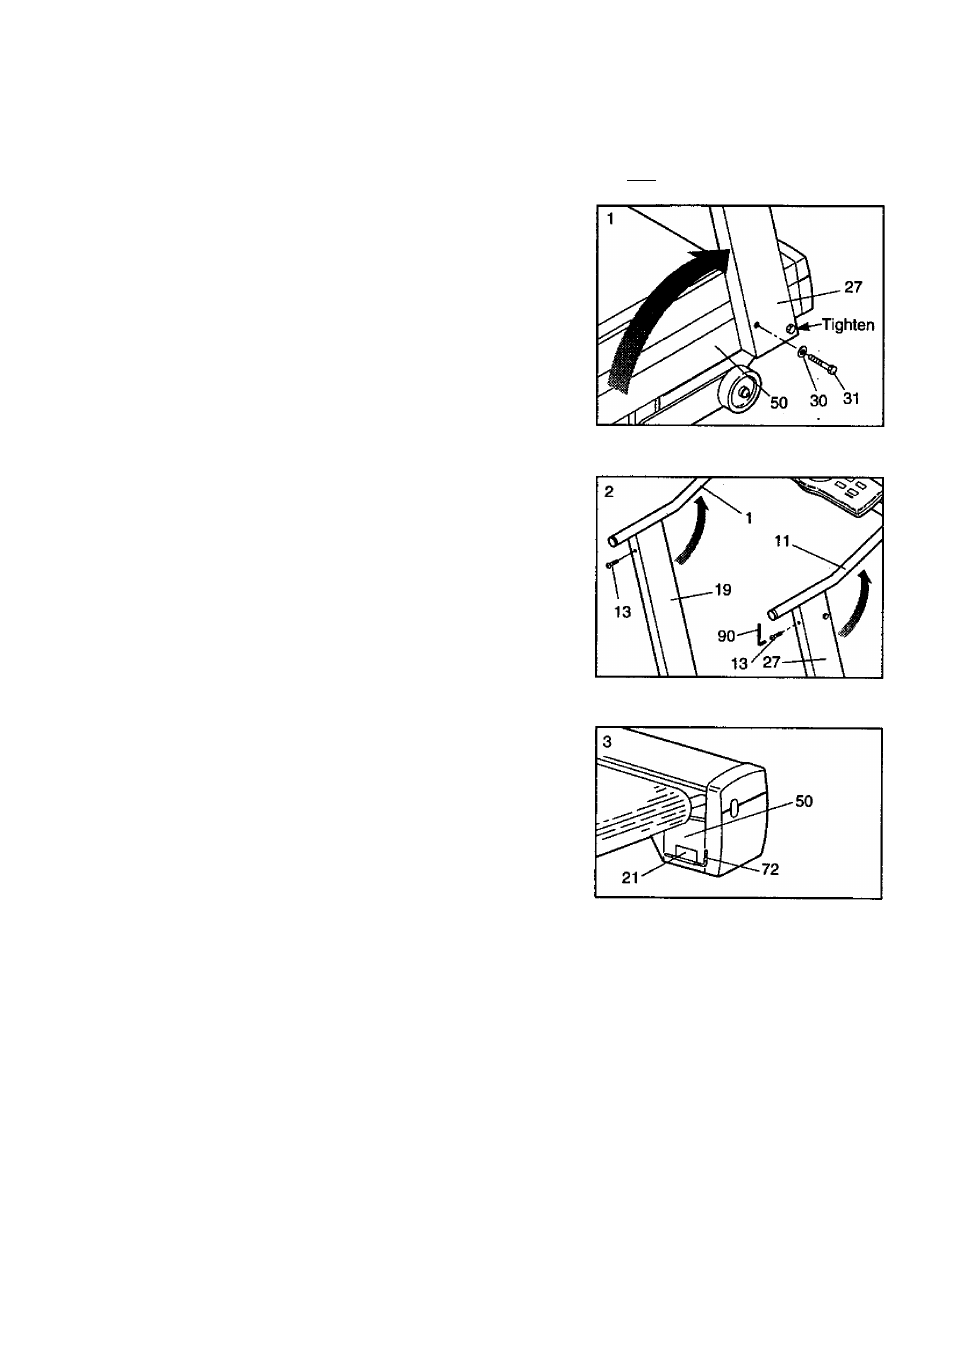
1. With the help of a second person, raise the Right Upright (27)
and Left Upright (not shown) to a vertical position. Align the
hole in the lower end of the Right Upright with the hole in the
side of the Frame (50). Insert a 3/8" x 3" Bolt (31), with an
Upright Washer (30), into the Right Upright and tighten the Bolt
into the Frame. Tighten the Bolt that is already in the Right
Upright.
Attach a Bolt and Washer on the left side in the same manner
(not shown).
2. With the help of a second person, rotate the Left and Right
Handrails ( 1 , 1 1 ) up as shown. Insert two 3/8" x 1 1/4" Bolts
(13) into the Left and Right Uprights (19, 27) and tighten the
Bolts with the 7/32” Allen Wrench (90).
3.
Remove the paper backing from the Wrench Clip (21). Press
the Wrench Clip onto the Frame (50) in the indicated location.
Press the 3/16” Allen Wrench (72) into the Wrench Clip.
Make sure that all parts are tightened before using the treadmill.
Note: To protect the floor, a covering should be placed under
the treadmill.
6