Customer responsibilities, Cleaning, Optional grass bag – Sears 247.37028 User Manual
Page 11: Service and adjustments, Rear trail shield, To adjust cutting height, To adjust handle height
Attention! The text in this document has been recognized automatically. To view the original document, you can use the "Original mode".
CUSTOMER RESPONSIBILITIES
TO REPLACE BLADE (See Figure 9):
• Put blade adapter on motor shaft.
• Fit blade in adapter. Be sure trailing edge of blade
is up towards engine.
•
Assemble bolts, washers, and nuts in the exact
order of removal.
•
Use block of wood to hold blade and tighten bolt
clockwise. The recommended torque for the center
blade bolt is 450-600 in. lbs. The recommended
torque for the two blade adapter bolts is 200-300
in. lbs. Torque wrenches are available at most
Sears stores and through the catalog.
IMPORTANT: THE BOLT USED TO SECURE THE
BLADE TO THE MOTOR SHAFT IS SPECIALLY
HEAT-TREATED. DO NOT SUBSTITUTE.
• Care should be taken to keep the blade balanced.
An unbalanced blade will cause excessive vibration
when running and eventual damage to mower and
motor.
• To check blade balance, drive a nail into a beam or
wall. Leave about one inch of straight nail exposed.
Place center hole of blade over the head of the
nail. If blade is balanced, it should remain in a hori
zontal position. If either end of the blade moves
downward, blade is not balanced. Sharpen the
heavy end until the blade is balanced.
CLEANING
A
WARNING:
DISCONNECT
POWER
SUP
PLY BEFORE CLEANING YOUR MOWER.
A
CAUTION: A LOOSE BLADE CAN BE
DANGEROUS
AND
MAY
MAKE
THE
MOTOR HARD TO START.
Use only a Sears authorized replacement blade to get
the best cutting results.
TO SHARPEN BLADE
NOTE: We do not recommend sharpening the
blade—but if you do, be sure blade is balanced.
• The blade can be sharpened with a file or on a
grinding wheel. Do not attempt to sharpen while on
the mower.
•
Remove any build-up of grass and leaves on or
around motor cover. DO NOT USE WATER.
• Clean the underside of your mower after each use
by turning the mower on its side and scraping to
remove any build-up of grass, leaves, dirt or other
matter. DO NOT USE WATER.
• Occasionally use a dry cloth to wipe mower.
OPTIONAL GRASS BAG
Under normal usage, the grass bag is subject to wear
and should be checked periodically. Be certain any
replacement bag complies with the mower manufac
turer’s specifications.
SERVICE AND ADJUSTMENTS
REAR TRAIL SHIELD
The rear trail shield, attached between the rear
wheels of your mower, is provided to minimize the
possibility that objects will be thrown out the rear of
the mower toward the operator. If the shield becomes
damaged, it should be replaced.
TO ADJUST CUTTING HEIGHT
Refer
to
“CUTTING
HEIGHT
ADJUSTMENT”
in
Operation section of manual.
TO ADJUST HANDLE HEIGHT
Your mower is shipped with the handle in the higher
height position. To lower the handle height, proceed
as follows.
• Remove the upper handle by removing the hand
knobs and oarriage bolts. Lay the upper handle out
of the way, being careful not to bend or kink the
cable.
Remove the hairpin clips from the weld pins on the
handle brackets. Press inward on the legs of the
lower handle and remove it from the mower.
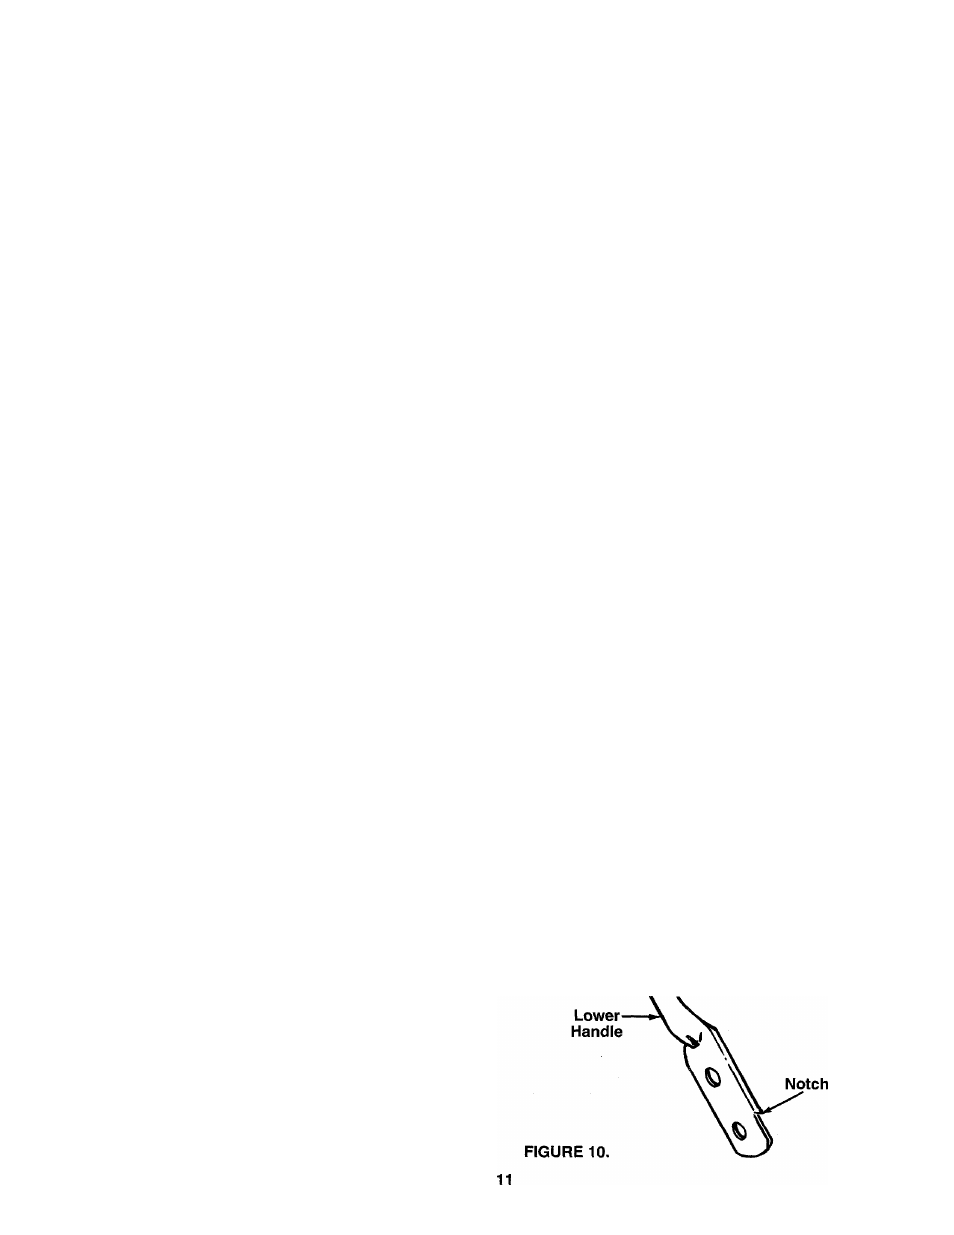
Turn the lower handle around so the notch on the
bottom of the lower handle faces forward as shown
in figure 10. Reassemble, placing the bottom holes
in the handle over the weld pins in the handle
mounting bracket. Place the hairpin clips in the
inner holes in the weld pins.
Reassemble the upper handle.