Installation – Sears KENMORE 661.62442 User Manual
Page 6
Attention! The text in this document has been recognized automatically. To view the original document, you can use the "Original mode".
INSTALLATION
LIFTING COOLER
CAUTION: DO NOT LIFT ON THE LOUVERS.
REMOVE
THE
LOUVERS
BEFORE
LIFTING.
DO NOT LIFT ON THE CENTER OF THE
CABINET FLANGES
Lift at cabinet corners
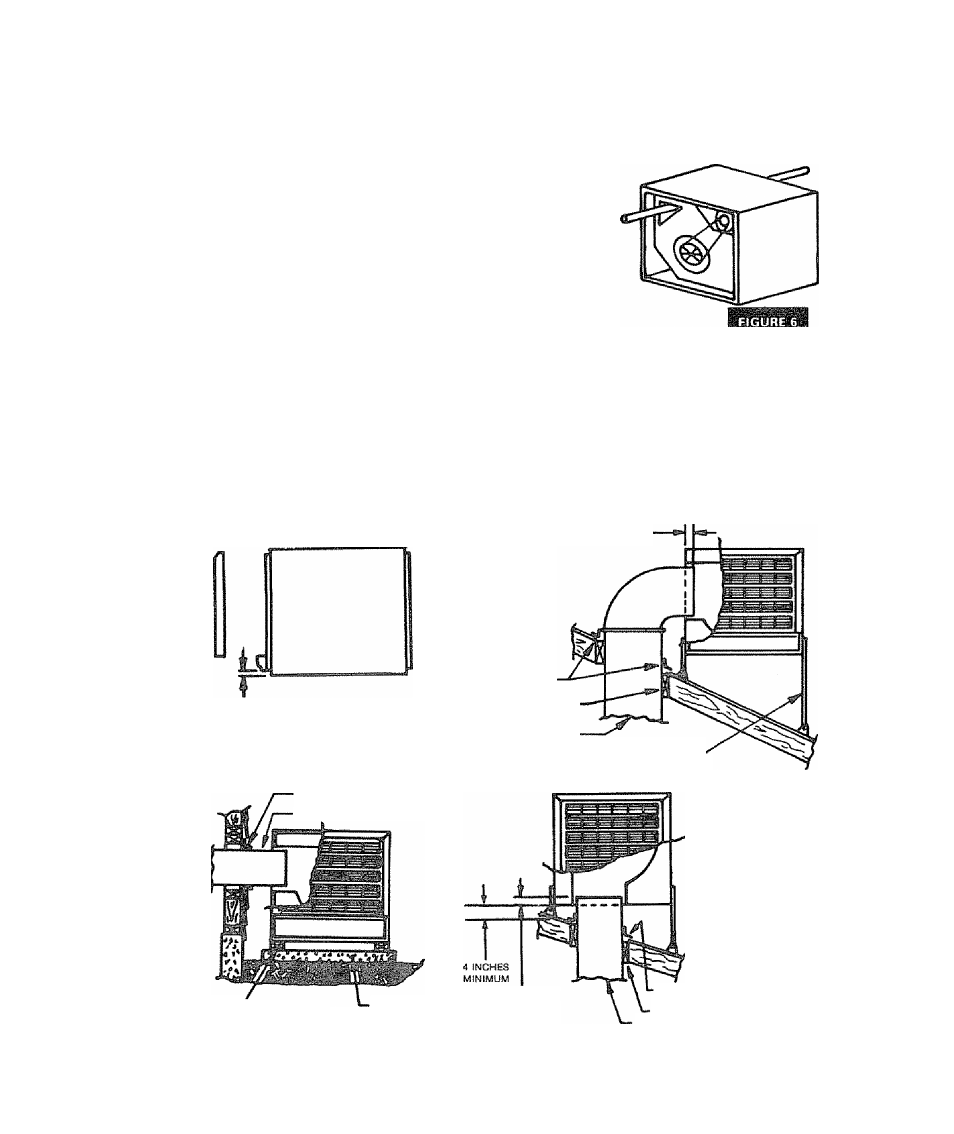
The cooler may be lifted by
putting a bar or strap through
the panel hole and lifting by
means of the bar or strap ¡Fig
6)
MOUNTING COOLER (Fig. 7)
1.
Prepare duct to fit model used See outlet size
specifications on page 3,
2 Cut opening in roof or wall to fit duct opening on
cooler and box in openlrtg
3,
Irtstall duct and secure to boxed-in opening
frame. Allow the two inches to fit into cooler
outlet Allow duct length for cooler bottom to be
4 inches above roof at closet point.
4 Install flashing on roof or wall to prevent water
entry,
5. Measure cooler and lay out mount location.
NOTE: THE BOTTOM EDGE NEARESTTHE AIR
OUTLET MUST FACE UP THE ROOF.
8
.
Mount cooler on stand or pad Cooler must be
level front to back and left to right. Seats roof
stand kits are avallable.
Be sure to securely fasten four corners of cooler
to stand or pad.
Caulk duct to the cooler Caulk the flashing.
2 INCHES
% MAXIMUM HEIGHT FOR
STAND SIDE EDGE TO
ALLOW RESSflVOIR CLEAHANCE
FLASHING
BOXED OPENING
RISER DUCT —
flOOF STAND KIT ■
(PURCHASE SEPARATELY)
FLASHING
■ DUCT
SPACER
ABOUT 1-THICK
PAD
2 INCHES
FLASHING
BOXED OPENING
RISER DUCT