Eh 7, N 11 – Sears 2500 User Manual
Page 7
Attention! The text in this document has been recognized automatically. To view the original document, you can use the "Original mode".
EH 7
Unwind the rest of the tubing. Take care not to kink it.
Run the tubing along flat surfaces to the humidifier. Support the
tubing as needed to avoid contact with furnace.
□
8
Close previously opened faucet. Turn on main water
supply. Place a pail under the end of the tubing. Open the saddle
valve. Flush the line. Make sure there are no leaks along the line
or at the valve. Turn valve off.
EH
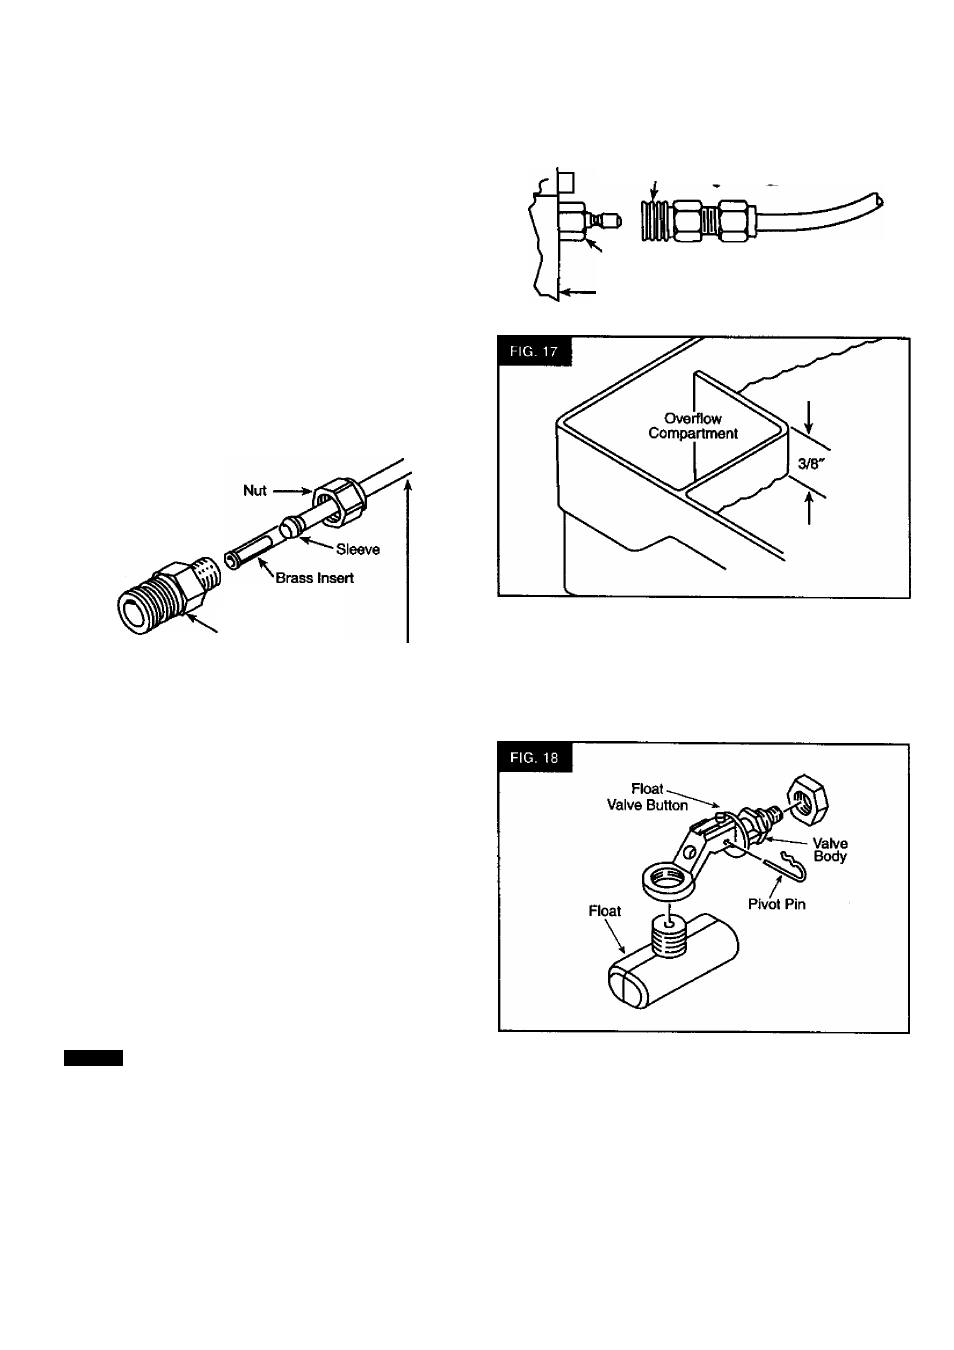
9 Remove the quick disconnect socket, brass compres
sion nut, and brass sleeve from hardware bag (Fig. 14). With water
supply tubing cut to the proper length, slide the brass compres
sion nut and sleeve over the tubing as described in Step 5, Page
6. Slip brass insert into the end of tubing.
QUICK DISCONNECT
ASSEMBLY
Quick Disconnect
Socket
1/4" Plastic
Water Supply
Tubing
□ 10
Insert the tubing end into the quick disconnect socket
as far as it will go and hold it there, thread the brass compression
nut onto the quick disconnect socket, then tighten using two
wrenches, one to hold quick disconnect socket and one to tighten
nut. DO NOT over tighten nut.
n 11
Connect the quick disconnect socket to the plug on the
valve body (Fig. 16).
To connect, pull back sleeve, push socket onto plug, release
sleeve.
To disconnect, pull back sleeve, unlocking quick disconnect and
sealing water supply line, separate from plug.
FIG. 15
\
\
Quick
Disconnect
Plug
Sleeve
'Plug
■Humidifier
□
12
Turn on water supply at saddle valve. Check water level.
Water should be 3/8" below top of overflow compartment wall
(Fig. 17). If adjustment is necessary, disconnect water supply tub
ing, and remove float assembly (Fig. 18). See instructions on bot
tom of float. To raise water level, turn float clockwise. To lower
water level, turn float counterclockwise.
□ 13
Attach front panel. Be sure lip at bottom of front panel
is inside lip at front edge of humidifier case.