Installation, Eh 5 – Sears 2500 User Manual
Page 5
Attention! The text in this document has been recognized automatically. To view the original document, you can use the "Original mode".
Electric Disconnect
□ B
instaii motor bracket on left side. Make sure bracket is
firmly seated (Fig. 6).
Media
Wheel
Large
Diameter
Wire
Support
Small Diameter
Wire Support.
Position Media
Wheel Shaft
Under Dimples
Flexing
Outward.
EH
C
Remove media wheel wire supports from reservoir. In
sert large diameter wire support on left side of reservoir and small
diameter wire support on right side of reservoir. Place media wheel
in wire supports with gear on left side of reservoir. (Flex wire sup
port outward to capture media wheel shaft under dimples.) Fig. 7.
Unit is now converted to a left side motor.
installation
(on sheet metal plenum duct)
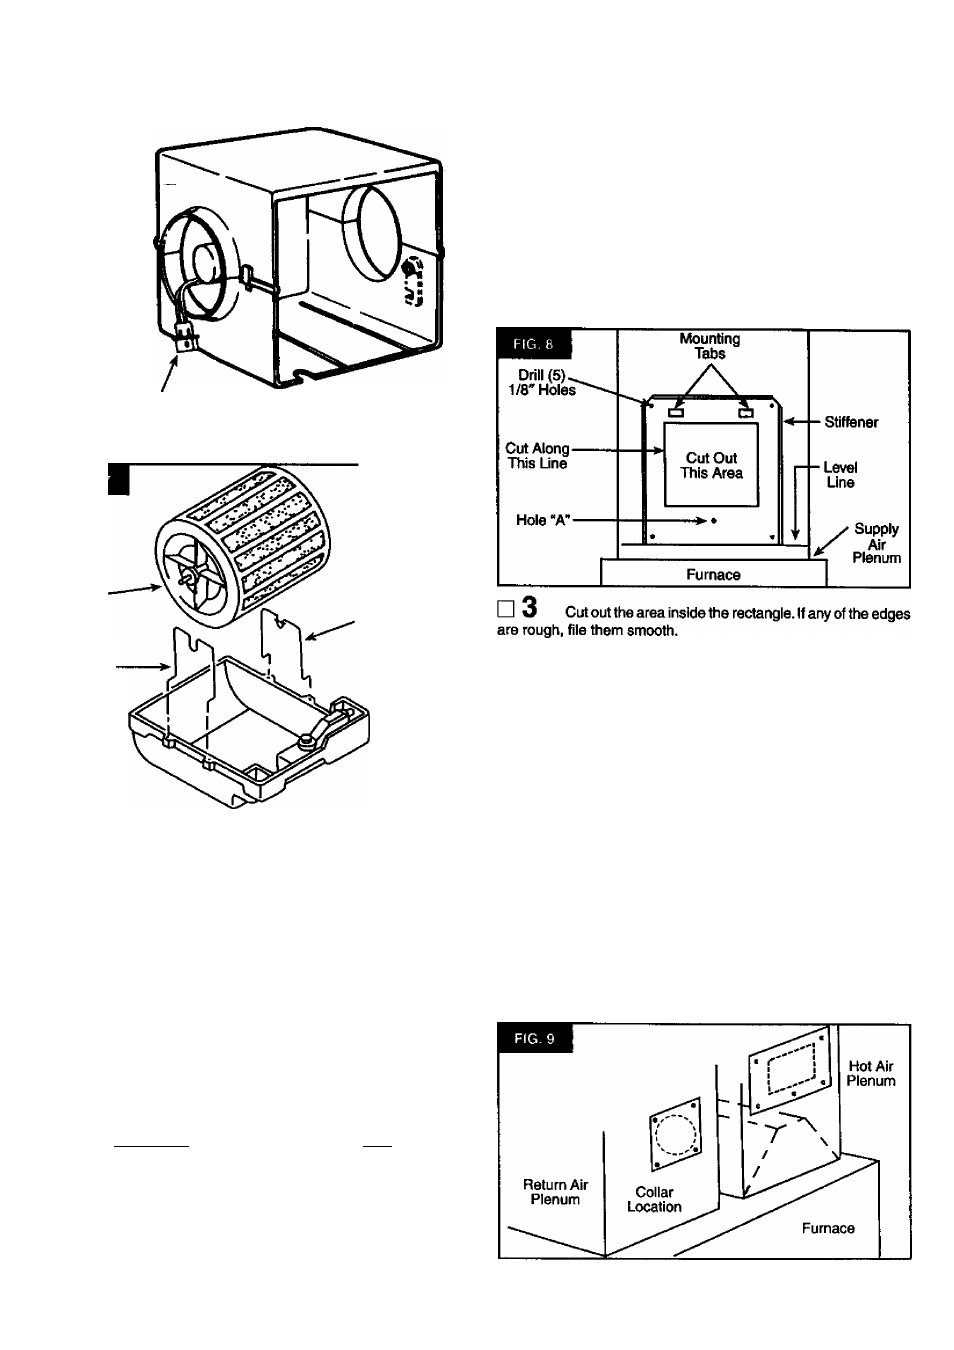
NOTE: Figures 8 & 9 show humidifier installation on supply air
plenum for illustration purposes only. If more convienient,
humidifier may be mounted on return air plenum. If humidifier is
installed on the return air plenum, the flexible hose (round collar
opening) is connected to the supply air plenum.
FIBER PLENUM DUCTS
NOTE: The mounting screws supplied are for standard installa
tion on sheet metal plenum ducts, if you have fiber plenum ducts,
install the humidifier and components with thru-bolts, nuts, and
washers (not supplied). If necessary, reinforce the humidifier
mounting area on fiber ducts with sheet metal and provide addi
tional bracing as required to support the weight of the humidifier
and water. (This fiber duct installation hardware is not supplied
and must be purchased from your local hardware store.)
□
1
Mark a level line on plenum. Hold stiffener against the ple
num with bottom edge on level line and flanges toward you. Mark
the location of all holes Including large rectangular opening in
center on plenum (Fig. 8).
□ 2
Drill or punch a large hole in one corner of rectangle.
This will allow you to insert the tin snips or metal saw.
CAUTION: BE SURE NOT TO DRILL OR CUT INTO AIR
CONDITIONING COIL OR TUBING.
EH
4
Drill the remaining holes marked on the plenum with a
1/8" drill bit.
EH 5
Mount the stiffener with the flanges toward you using
the four corner mounting holes. Do not use Hole “A". Make sure
stiffener is flush with the plenum. Seal around edge with caulking
if necessary (Fig. 8).
EH
G
Hang the humidifier case on the mounting tabs. The
tabs may have to be bent out slightly to mount the case. Secure
the case to the stiffener with a sheet metal screw in hole “A".
NOTE: It is very important that the case is secured. If the
case is not attached with the screw, it could be dropped and
damaged during routine maintenance.
EH
7
Position collar at selected location. Mark center open
ing and (5) holes. Cut out center opening and drill (5) 1/8" holes.