Selecting a location, Inspection, Disassembly – Sears 2500 User Manual
Page 4: Conversion
Attention! The text in this document has been recognized automatically. To view the original document, you can use the "Original mode".
selecting a location
Consider these points as you choose the location for your hu-
midifler.
^
_
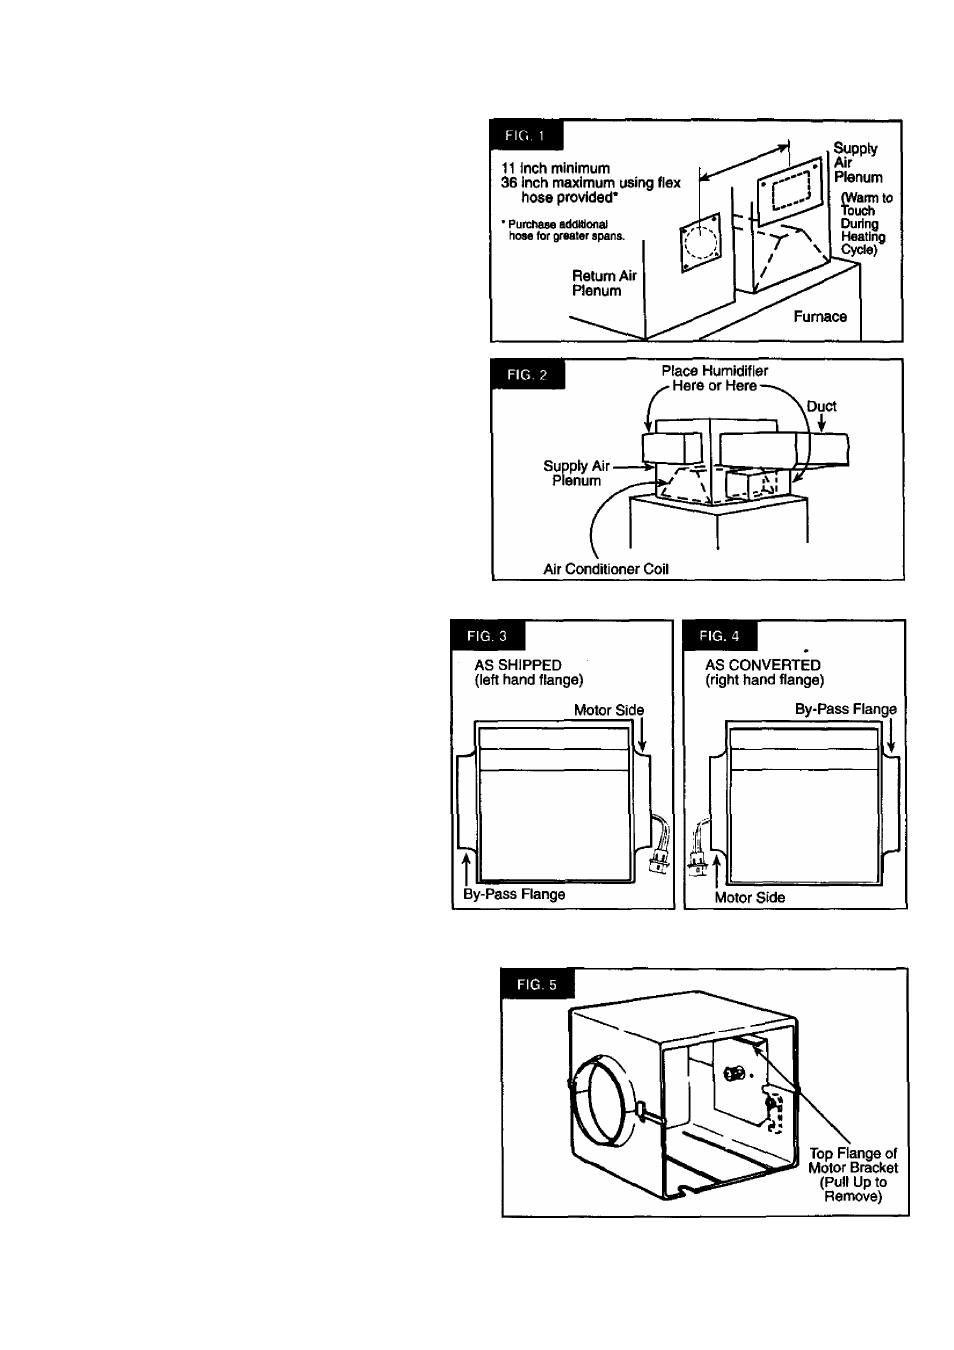
Locate humidifier on supply air plenum (Fig. 1) or return air
plenum, if the humidifier is installed on the return air plenum,
the flexible hose, round opening, is connected to the supply air
plenum.
If furnace is equipped with air conditioning, humidifier should
be mounted above or at slope side of “A” coil to avoid possible
splashing (Fig. 2) of water in reservoir.
Humidifier should be installed so that if the humidifier or any
other connections should leak, the resulting flow of water will
not cause damage. Under no condition is Sears and the manu
facturer to be held liable for any water damage in connection
with this humidifier. Never install humidifier in attic or crawl space
where freezing may occur or leaking will cause water damage.
If holes between supply air plenum and return air plenum must
be located more than 36 inches apart (Fig. 1), standard 6 inch
round pipe and fittings (not supplied) may be used, or an 8 foot
section of flexible tube No. 281152-05 may be purchased
through the Sears parts department. Materials needed for this
type installation are available at Sears.
inspection
This humidifier is assembled with the bypass duct on the left
side (Fig. 3).This is suitable for installation as shown in Fig. 1.
If this is suitable for your installation, remove parts as shown
under Disassembly. Skip conversion steps A, B, and C. Start
your installation with Step 1, F^ge 5.
If you require the motor on the left side (Fig. 4), remove parts
under Disassembly, and start with "A.”
SAFETY GLASSES SHOULD BE WORN TO PREVENT EYE
INJURY WHEN INSTALLING HUMIDIFIER.
disassembly
•
Take off front panel by sliding panel up and pulling out at the
bottom.
•
Remove media wheel and reservoir by sliding reservoir straight
out toward you while raising latch on right hand side.
•
Lift media wheel out of reservoir by flexing wire support
outward to release shaft.
■
conversion
(if required, see "Inspection” above)
Q A From inside pull motor bracket up by top flange (Fig. 5).