Ignition, cooling and exhaust, Systems, B. ignition, cooling, and exhaust systems – Sears 358.356090-3.7/20" User Manual
Page 19
Attention! The text in this document has been recognized automatically. To view the original document, you can use the "Original mode".
2. GUIDE BAR MAINTENANCE
• Conditions which can require guide bar
maintenance:
—saw cuts to one side
—saw has to be forced through a cut
—inadequate supply of oil to bar and
chain.
• Check the condition of the guide bar each
time the chain is sharpened.
A worn guide
bar will damage the chain and make cut
ting more difficult.
• Replace the guide bar when:
—the inside groove of the guide bar rails is
..... worn.
—the guide bar is bent or cracked.
a. Remove the guide bar to service.
b. Clean oil hoies at least once for each
five hours of operation.
.......... c:..-Remove..sawdust...from the.... guide bar
groove periodically with a putty knife or
a wire. Figure43 .
d.
e.
Remove burrs by filing the side edges
of the guide bar grooves square with a
flat file. Figure
44
,
Restore square edges to an uneven rail
top by filing with a flat file. Figure44.
JJEPTH GAUGE TOOL ^
DEPTH GAUGE
Figure 41
Figure 44
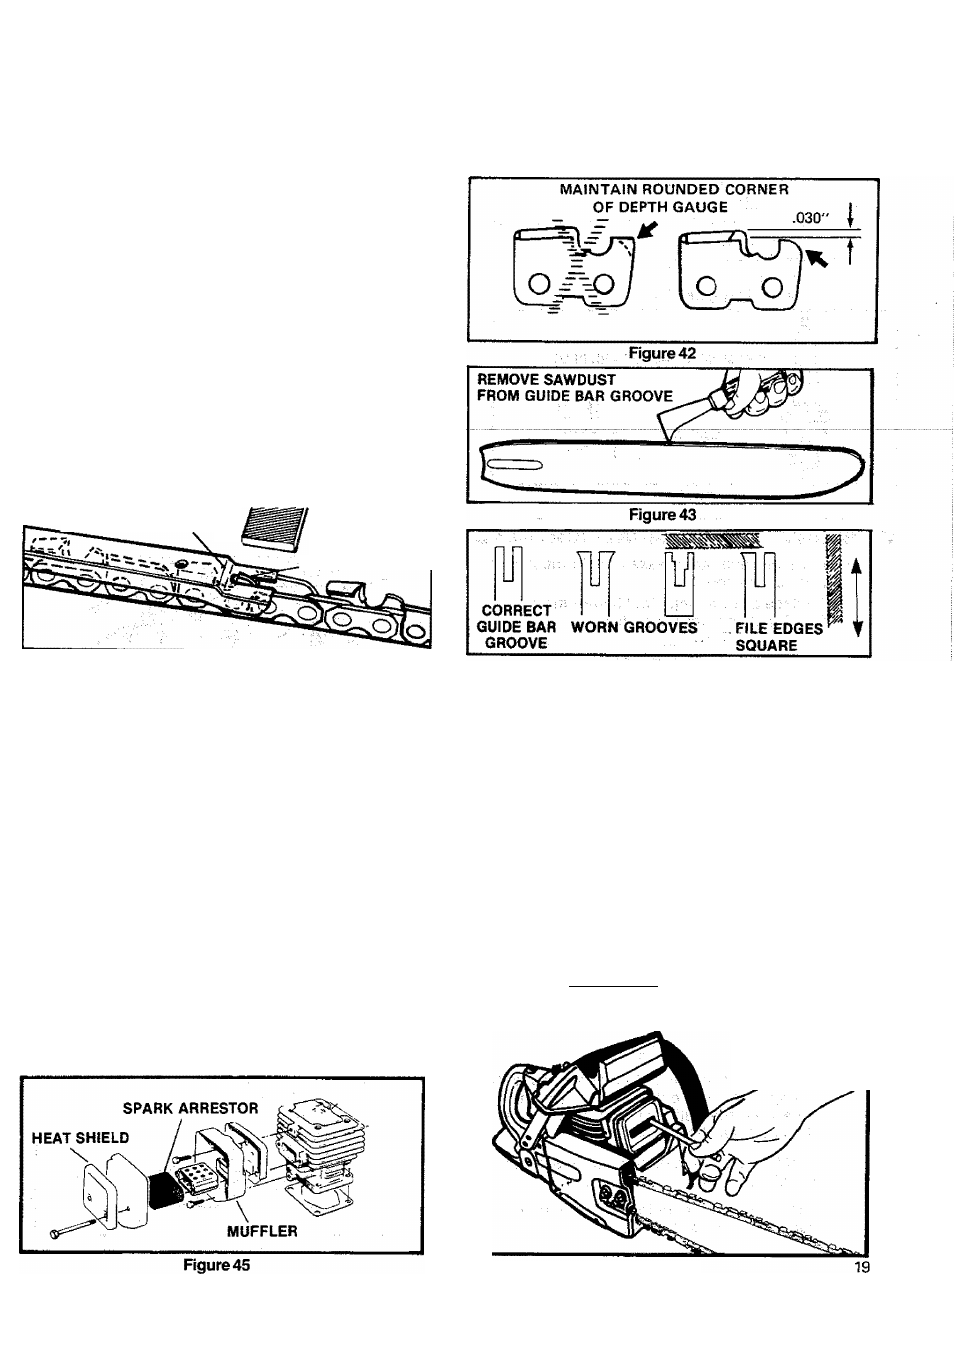
IGNITION, COOLING AND EXHAUST
• Carbon deposits will build up on exhaust
ports, spark arrestor, muffler, and spark plug
as the saw is used. All of these parts should
be cleaned at the same time to prevent
engine damage, overheating, loss of power,
and hard starting. >
• Clean parts:
—as required
—at least once for each 25-30 hours of op
eration
1. COOLING AND EXHAUST SYSTEM
• Carbon build-up on the cooling and ex
haust system can cause the engine to
loose power in a cut.
• Keep the spark arrestor clean at all times.
• Replace the spark arrestor when breaks in
the screen are found.
SYSTEMS
and
items required:
—wire brush
^ ^ ^ ^ ^ ^ ^ ^ ^
—3/8” wrench
—hardwood stick
a. Disconnect the spark plug.
Remove the rnuffler, baffles,
screen. Figure 45.
Pull the starter rope until the piston
moves far enough to close the exhaust
ports. V
Scrape the carbon deposits from the
exhaust ports and surrounding exhaust
chamber using a hardwood stick.
Figure 46.
b.
d.
¡CAUTION:] Do not use a metallic scrap-
SCRAPE CARBON
DEPOSITS FROM
EXHAUST PORTS
Figure 46