Twin Eagles Dine and Breakfast Club LP to NG Conversion User Manual
Page 2
1
1.
Check to make sure that you have the NG Gas Conversion Kit as follows:
a.
For Griddle Plate:
i. PN 15303, Regulator, Natural Gas
(1 pc)
ii. PN 15110-45, Orifice #45
(1 pc)
b.
For S ide Cooker:
i. PN 13313, 0.82 Orifice Center
(2 pcs)
ii. PN 13314, 1.75 Orifice, Outside
(2 pcs)
iii. PN 18351, Label, Conversion, Gas
(1 pc)
2. Griddle
Plate
Conversion
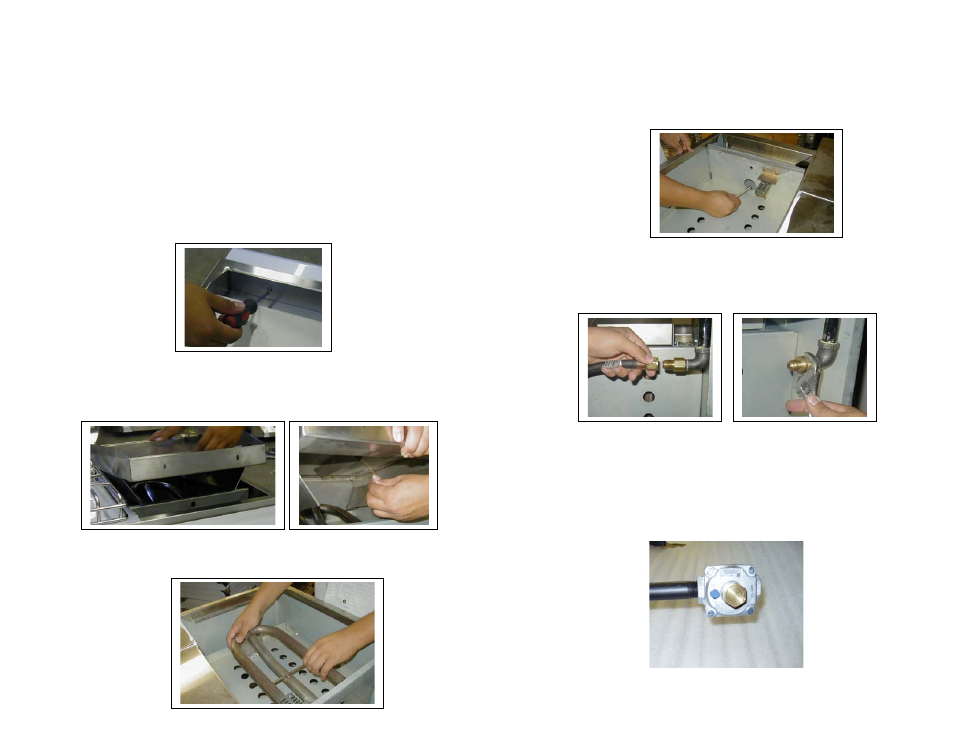
2-1) Remove the grease pan from the front of the Griddle Plate Assembly.
2-2) Remove the screws, located in the front of the Griddle Plate Assembly, as shown.
2-3) Raise the front of Griddle Plate Assembly and make sure the rear portion is resting
on the Griddle Top as shown in the left picture. Pull out the Thermostat Bulb so that you
may remove the Griddle Plate Assembly completely, as shown in the right picture.
2-4) Unscrew the nut used to hold the U-Burner from the back and remove the U-
Burner.
2-5) Replace the orifices #55, used for LP, and replace it with orifice #45, used for
NG. Use a 1/2" Deep Socket and a Socket Wrench to remove and replace the
orifice. Replace Griddle Plate Assembly when finished and re-install the
Thermostat Bulb.
2-6) Remove the LP Hose and Regulator Assembly from the coupling, and remove
the 3/8 Flare x 1/2” FIP coupling by turning the coupling counter-clockwise with
an adjustable wrench.
2-7) Install the factory supplied Natural Gas regulator directly to the manifold and use
pipe sealant approved for natural gas connection. Use a 12” Adjustable Wrench
to turn the regulator and a Pipe Wrench to hold the manifold in place. Warning:
The Natural Gas Regulator is set at 4” of Water Column.