Trending Accessibility Semi-Permanent Removable Threshold User Manual
Page 2
Semi-Permanent Removable Threshold
Installation Instructions
STEP 3 – Using the removable masking tape,
secure the threshold in place taking care not to shift.
Silicone will take 24 hours to dry and become fi rm.
Bathware should not be used during drying time.
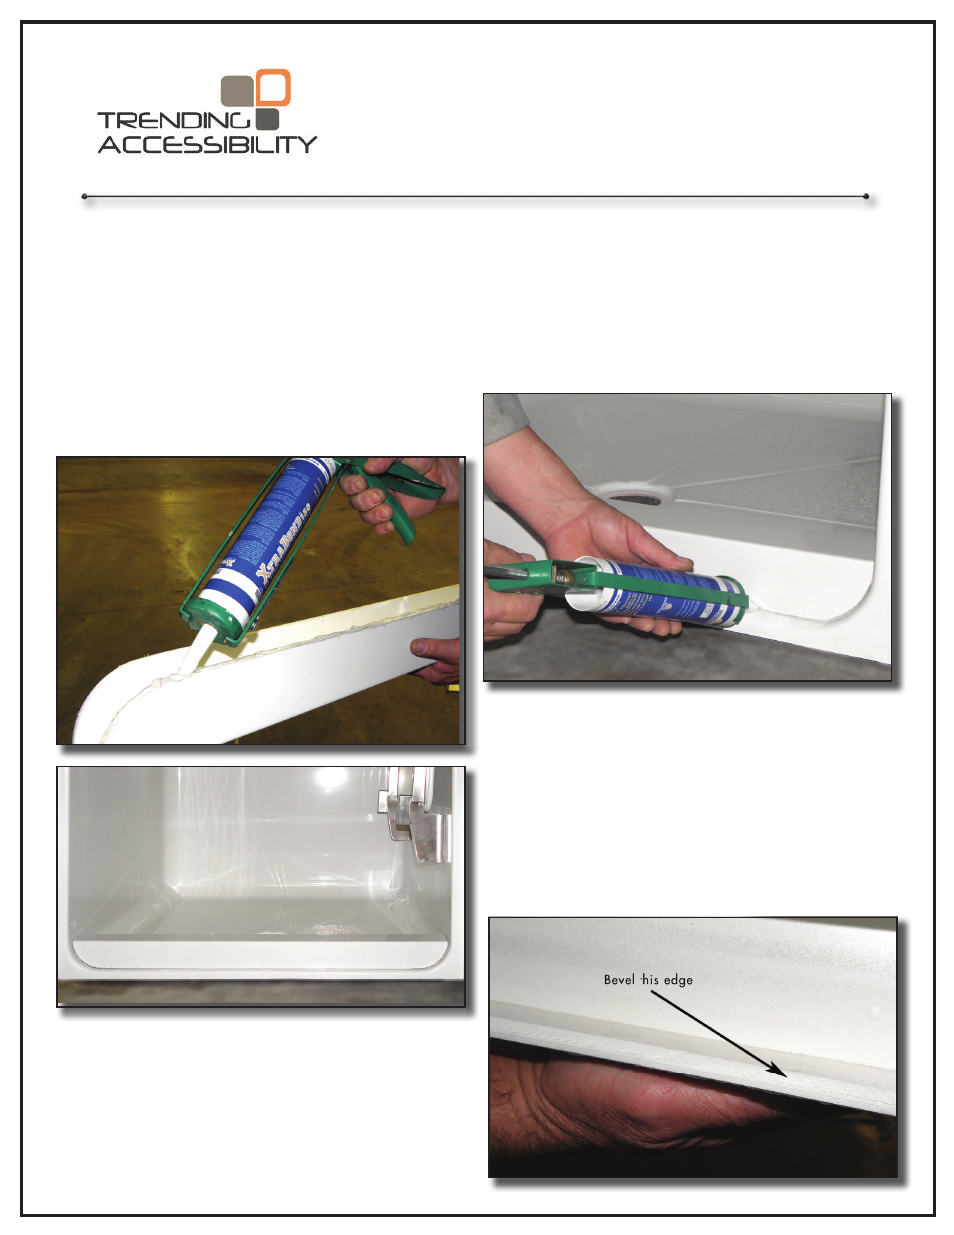
ATTENTION:
On model numbers: A4136 or S4136 – You must
bevel the bottom inside of the threshold to allow it to
seat properly to the shower. (FIG. I)
For shower pans: The threshold will be cut to
length, however the corners will need to be slightly
rounded. (FIG. E)
INSTALLATION OF
SEMI-PERMANENT THRESHOLD
STEP 1- Using a Mildew Resistant bonding
silicone (white), place a bead of caulking around
the underside parameters of the threshold.(FIG. F)
Position threshold into place. (FIG. G) Remove
excess caulking and smooth with wet fi nger or
caulking pallet.
STEP 2- Apply a thin bead of caulking around the
top side of the fi nished threshold to seal between the
shower and threshold. (FIG. H) The silicone used
in Step 1 is to seal and secure into place. Caulk
should be used for a more aesthetically pleasing
look.
(FIG. F)
(FIG. G)
(FIG. H)
(FIG. I)
856-488-9535 www.TrendingAccessibility.com