Toa IR-310BC User Manual
Page 5
5
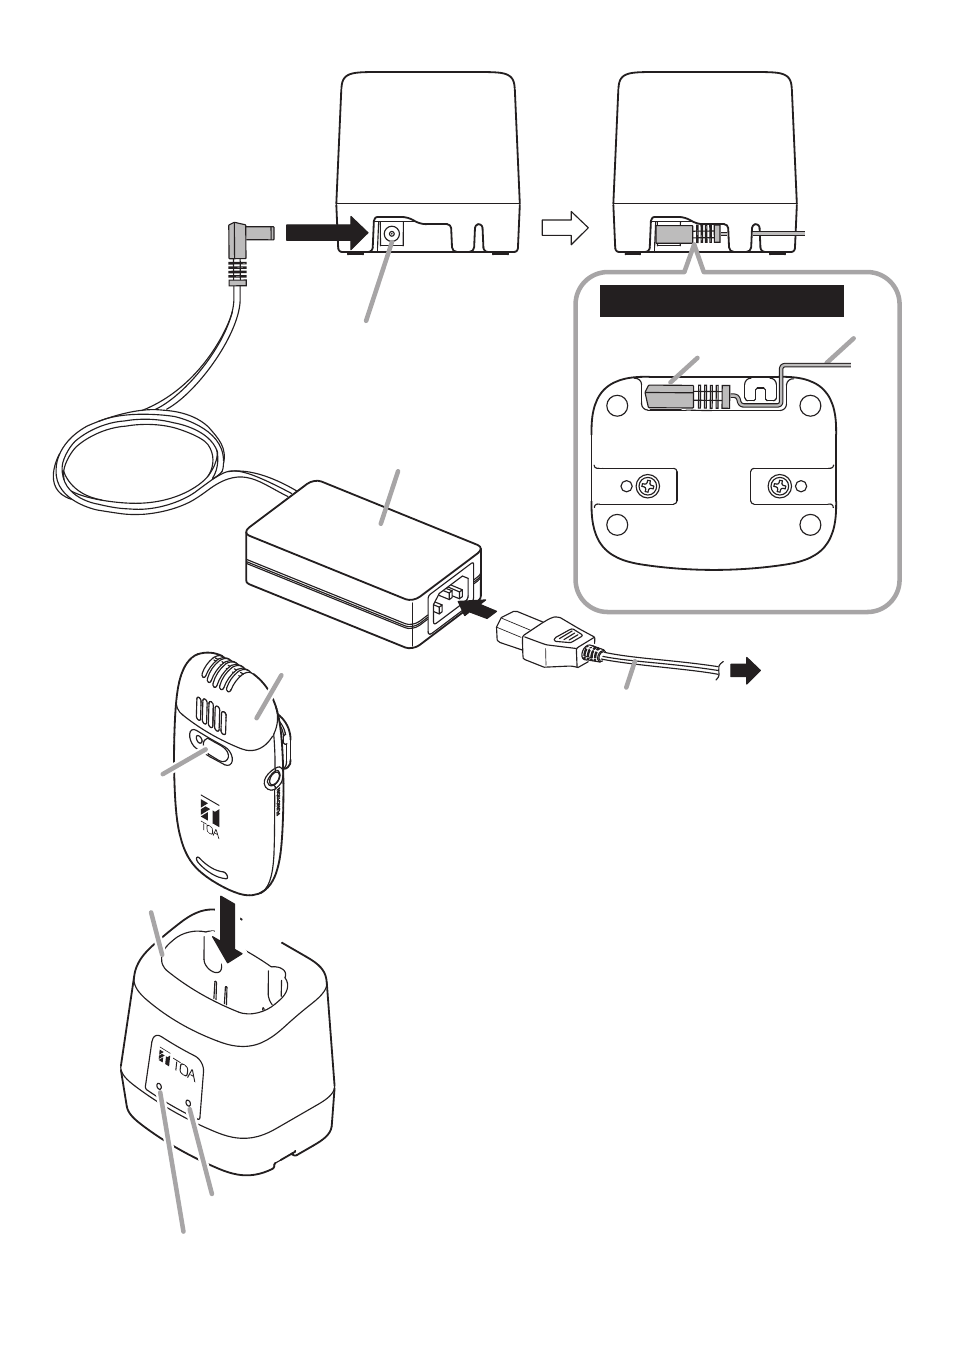
CHARGE
FULL
ON/O
FF
IR-310M
IR-310BC
Power switch
Charging indicator (red)
Full-charge indicator
(green)
4
3
Step 3. Turn off the power of the infrared wireless microphone
to be charged, then insert the IR-200BT rechargeable
battery into the microphone. For proper battery
insertion, refer to the instruction manual enclosed
with the infrared wireless microphone.
Note
Charging cannot be correctly performed if the infrared
wireless microphone’s power switch is set to ON.
Step 4. Insert the infrared wireless microphone fully into the
charger’s microphone receptacle and confirm that
the charging indicator (red) is lit.
Charging takes approximately 3 hours, after which
the full-charge indicator lights green.
Notes
• Insert the IR-310M so that both front sides of
the IR-310M and the IR-310BC face to the same
direction as shown at left.
• The infrared wireless microphone becomes warm
after charging completion, however this is not a
failure.
Supplied power cord
Power input terminal
IR-310BC (rear)
AC adapter plug
Cord
To AC outlet
Supplied AC adapter
Handling the power cord
1
1
2
IR-310BC (bottom)