Toa RS-141 User Manual
Page 3
Note
When using the PA paging function, keep the switch panel as far away from the PA paging speaker as
possible to avoid acoustic feedback.
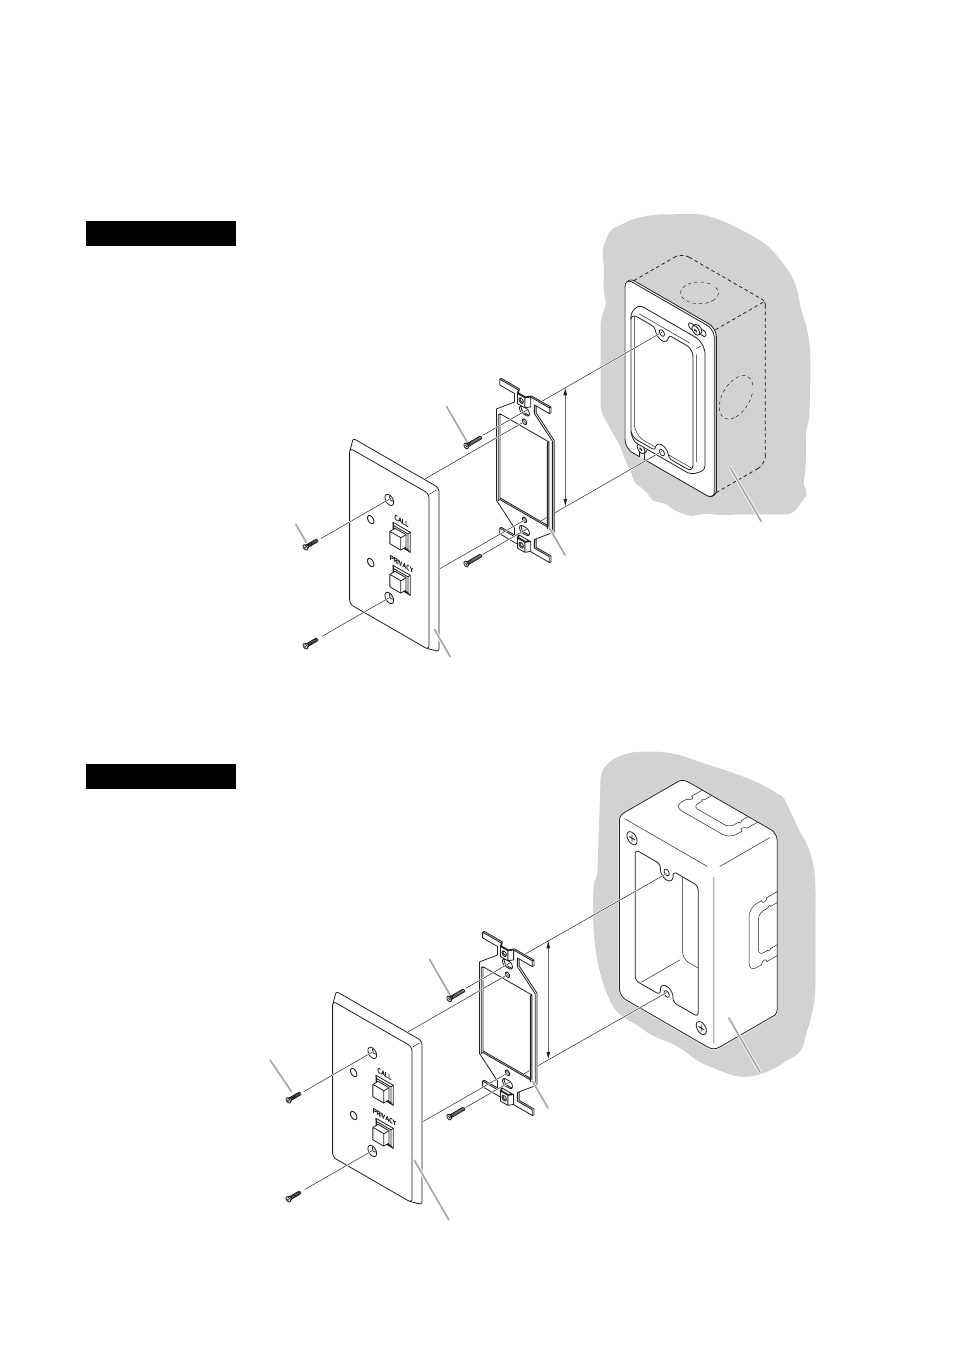
4.1.2. In-wall mounting using an electrical box
Mount the RS-140/143/144 to the YC-801 Flush-mount box mounted in the wall.
83.5 mm
YC-801
Flush-mount box
Wall surface
Mounting bracket
(supplied with the RS-140/143/144)
Machine screw M4 x 30
(supplied with the RS-140/143/144)
UNC No. 6-32 × 18
(supplied with the RS-140/143/144)
Switch panel
(Figure shows RS-140.)
Accessory screws
The RS-140/143/144 comes with 2 types of screws to match
the box screw threads: M4 x 30 and UNC No. 6-32 x 30.
For the electrical box provided with unified threads, use the
UNC No. 6-32 x 30.
4.1.3. On-wall mounting using a wall-mount box
Attach the RS-140/143/144 to the YC-802 Wall-mount box installed on a wall.
83.5 mm
YC-802
Wall-mount box
Wall surface
Mounting bracket
(supplied with the RS-140/143/144)
Machine screw M4 x 30
(supplied with the RS-140/143/144)
UNC No. 6-32 × 18
(supplied with the RS-140/143/144)
Switch panel
(Figure shows RS-140.)
Accessory screws
The RS-140/143/144 comes with 2 types of screws to match
the box screw threads: M4 x 30 and UNC No. 6-32 x 30.
For the electrical box provided with unified threads, use the
UNC No. 6-32 x 30.