Creating remote microphone name labels, Creating remote microphone, Name labels – Toa N-8610RM User Manual
Page 5
5
N-8610RM
IP REMOTE MICROPHONE STATION
Zone 1
Zone 2
Zone 3
Zone 4
Zone 5
Zone 6
Zone 7
Zone 8
Zone 9
Zone 10
N-8610RM
Name label entry slit
Name label entry slit
Name label A
(Created and printed using
the SX-2000 Setting Software)
Name label B
(Created and printed using
the SX-2000 Setting Software)
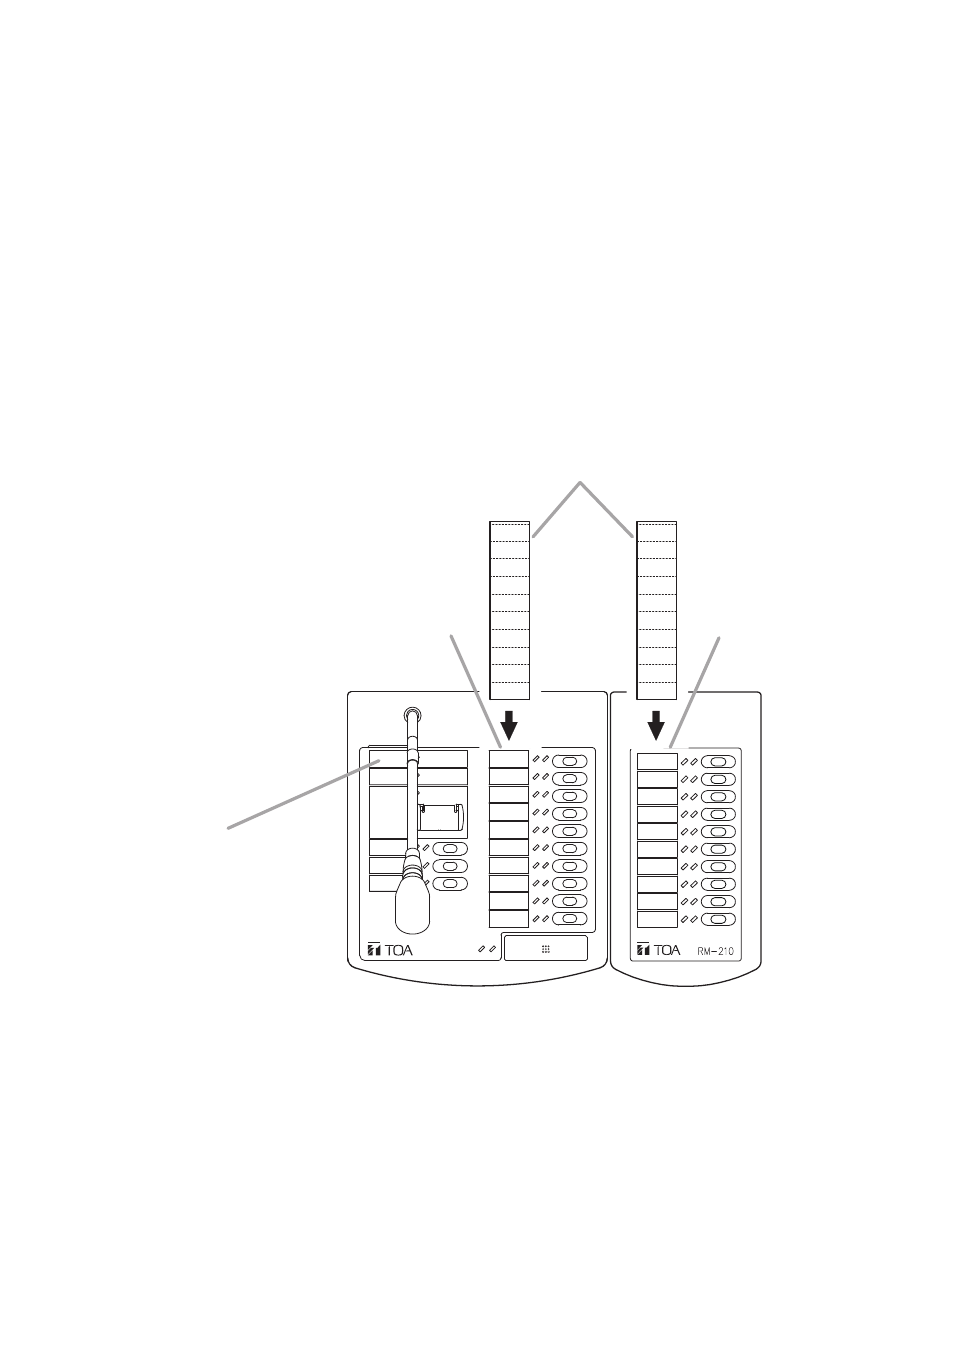
4.3. Creating Remote Microphone Name Labels
4.3.1. Creating name labels using the SX-2000 Setting Software
Using the SX-2000 Setting Software function, assigned names of preset N-8610RM and RM-210 Function keys
can be printed out. Once printed, cut out the printed names with scissors to use them as corresponding name
labels. The paper used for the name label must be under 0.2 mm in thickness.
Note
For creating and printing name labels using the SX-2000 Setting Software, see the "Printing Labels for Remote
Microphones" section in the setting software Instructions supplied with SX-2000 series unit.
4.3.2. Inserting the name label
• Fully insert the name label cut to the instructed size into the label entry slit.
• To remove the label, pull it out of the slit using the tip of knife blade.