Installation, Desk-top installation – Toa N-8610RM User Manual
Page 2
2
4. INSTALLATION
4.1. Desk-Top Installation
4.1.1. N-8610RM expansion with the addition of the RM-210
When adding an RM-210 Remote Microphone Extension to expand the N-8610M, use the RM-210's Extension
cable and included Linkage Bracket to link the 2 units.
Follow the procedures below.
Step 1. Turn over both the N-8610RM and the RM-210, and keep them in close contact with each other.
Step 2. Connect between the RM-210 connection terminal (EXTENSION) on the N-8610RM side and the RM
connection terminal (EXTENSION) on the RM-210 side using the extension cable supplied with the
RM-210.
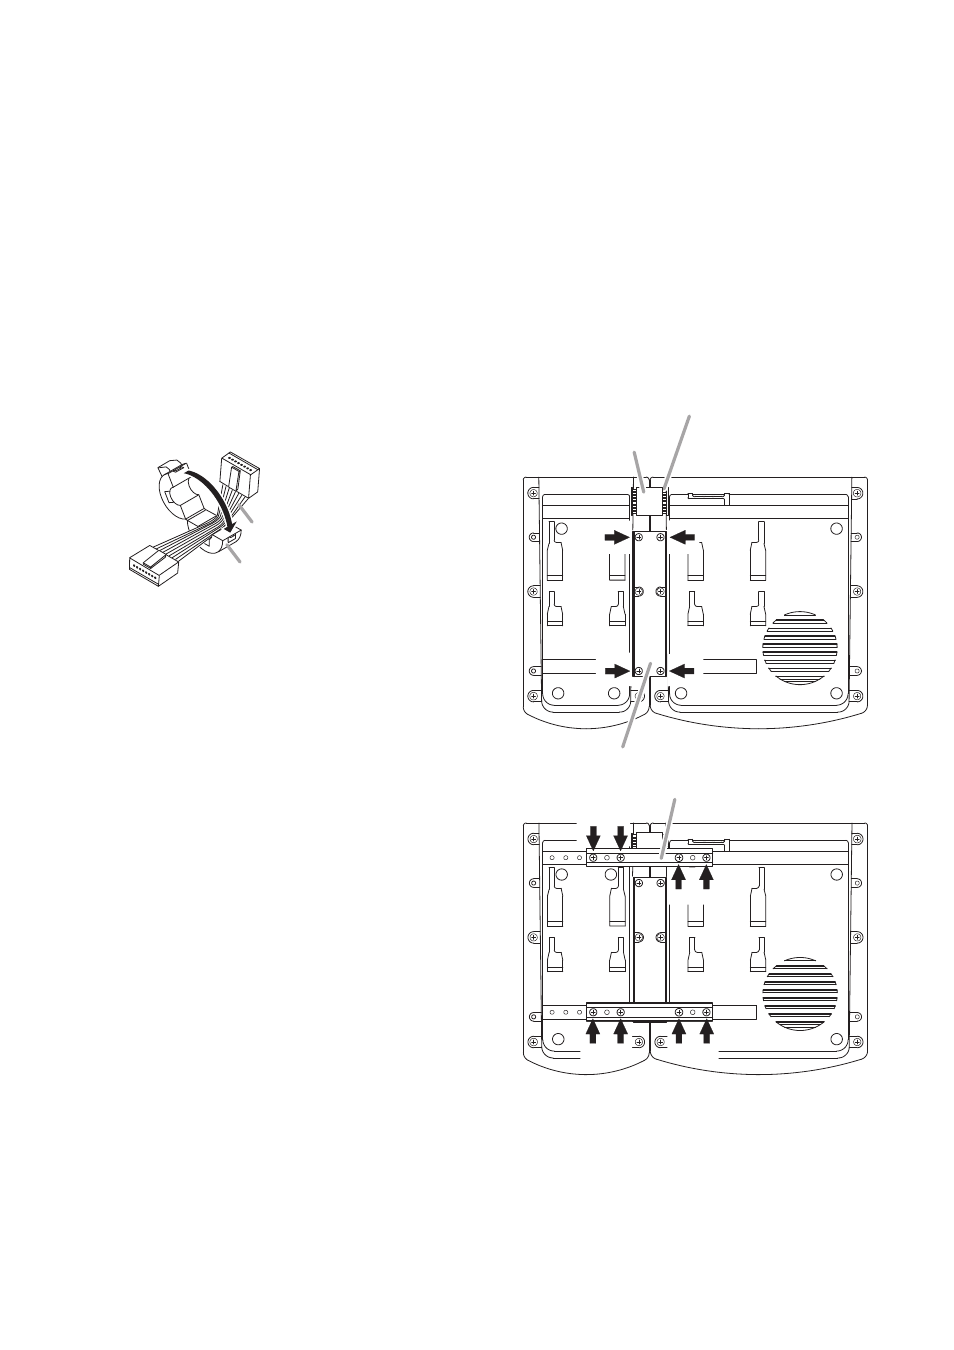
In this case, install the ferrite clamp
supplied with the N-8610RM on the
extension cable as shown below.
Step 3. Link both the N-8610RM and the RM-
210 together using the Linkage Bracket B
supplied with the RM-210.
Secure the bracket with the 4 supplied
screws indicated by arrows.
Step 4. Fix both units securely using the Linkage
Bracket A (2 pieces) supplied with the
RM-210.
Secure them with the 8 supplied screws
indicated by arrows.
Tip
Follow the same procedures when linking
additional RM-210. But you need not install the
ferrite clamp on the extension cable used to
connect between RM-210s.
Notes
• Because the Linkage Bracket A is provided with 2 spare screw holes, use them to link the 2 units if the
designated screw threaded holes are damaged.
• If incorrect or loose connection is found between both units, loosen all the bracket fixing screws to disassemble
the units and then link them again with the screws.
RM-210
N-8610RM
Linkage bracket B
RM-210
N-8610RM
2
Ferrite clamp
(white, supplied with N-8610RM)
Linkage bracket A
Extension cable
(supplied with RM-210)
[Bottom]
[Bottom]
3
4
Extension cable
(supplied with RM-210)
Ferrite clamp
(white, supplied with N-8610RM)