Rack mounting bracket attachment – Toa A-912MK2 User Manual
Page 12
12
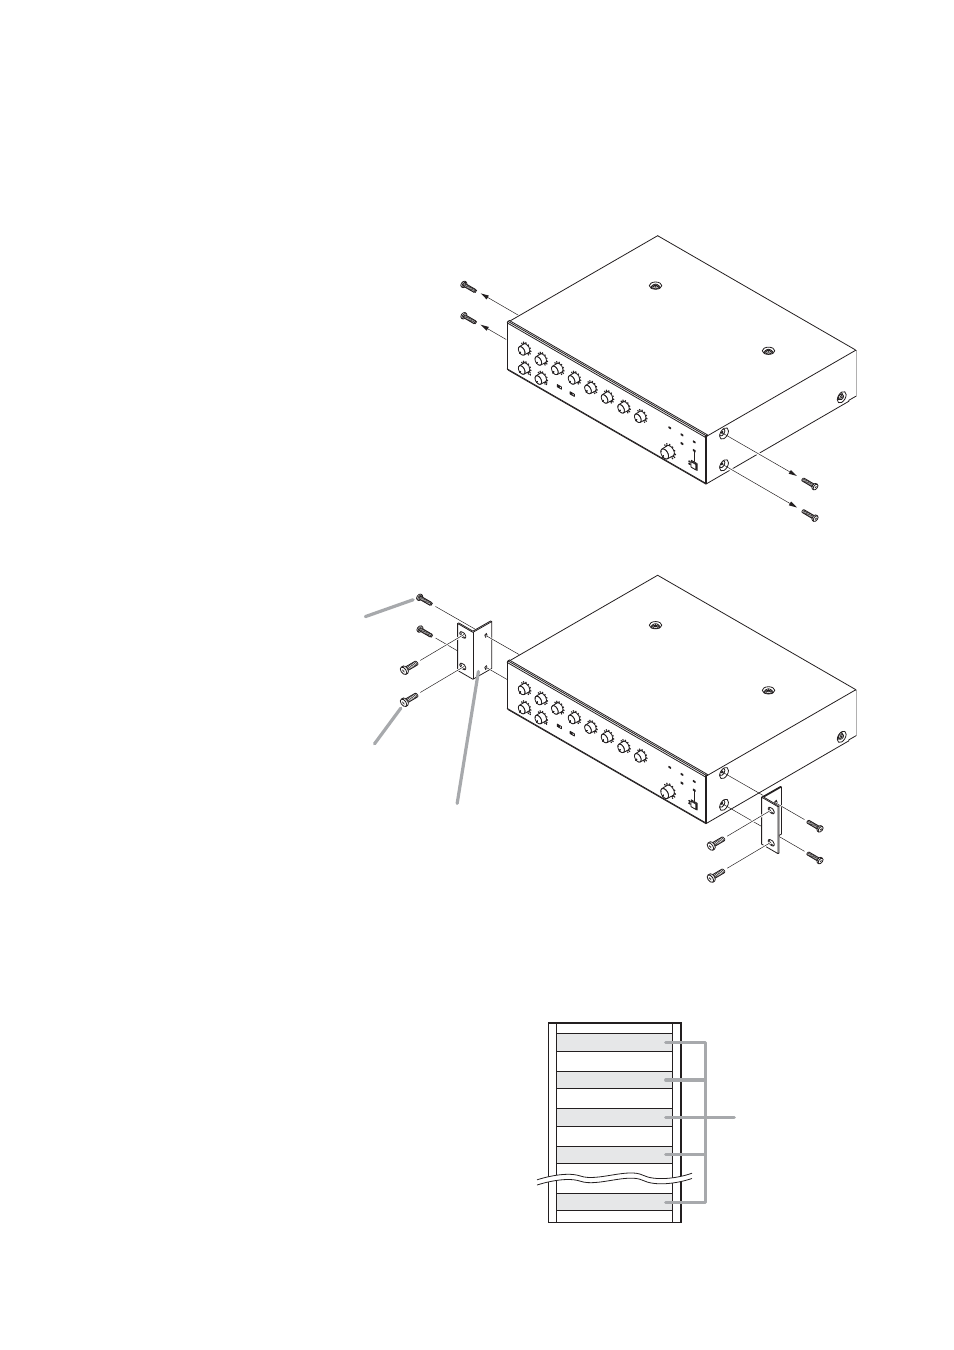
7. RACK MOUNTING BRACKET ATTACHMENT
The unit can be mounted in a standard 19" equipment rack using the optional MB-25B Rack mounting
bracket.
Notes
• Rack mounting screws are not supplied with the unit. Use the screws that are appropriate for the rack.
• When mounting the unit in an equipment rack, the inside
of the rack must be sufficiently ventilated.
To achieve sufficient ventilation, also mount the optional
PF-511 Perforated Panel (1U*):
(1) at the top and the bottom of the rack, and
(2) above and below the unit.
* 1U size = 44.5 mm or 1.75" (reference size)
Amplifier
Amplifier
Amplifier
Perforated Panel
PF-511
(1-unit size)
TO
NE
DE
FEA
T
OFF
ON
LO
W C
UT
OFF
ON
SIG
NAL
NOR
MAL
PRO
TEC
T
ON
OFF
PEA
K
POW
ER
MA
STE
R
INP
UT 8
INP
UT 7
INP
UT 6
INP
UT 5
INP
UT 4
INP
UT 3
INP
UT 2
TRE
BLE
INP
UT 1
BAS
S
TO
NE
DE
FEAT
OFF
ON
LO
W C
UT
OFF
ON
SIG
NAL
NOR
MAL
PRO
TEC
T
ON
OFF
PEA
K
POW
ER
MA
STE
R
INP
UT 8
INP
UT 7
INP
UT 6
INP
UT 5
INP
UT 4
INP
UT 3
INP
UT 2
TRE
BLE
INP
UT 1
BAS
S
Rack mounting screw
Machine screw M4 x 16
(supplied with the rack mounting bracket)
Rack mounting bracket
MB-25B
Step 1. Remove 4 plastic feet on the bottom surface when mounting the unit in a rack.
Step 2. Remove four M4 x 8 screws on both sides of the unit.
The removed screws are not used.
Step 3. Attach the brackets to the amplifier using four M4 x 16 Machine screws supplied with the bracket.