Tp-2c – ThermoProbe TP5-C User Manual
Page 2
09/14/06 LB, 06/07/06, 5/14/06, 01/15/06, 01/11/06, 12/15/05, 11/23/04, 11/16/04, 10/04 LB
• Optional high temperature oil bath at about 150°C/300°F and certified reference thermometer.
*Note for limited calibration: If entire range capability of instrument is not required, the 2 point high adjustment can be made at
a temperature relatively close to the common temperature of the liquid measured and accuracy will be maintained within the
limited range. For example: If liquid product to be measured is commonly less than 38°C (approx. 100°F), then a “high point”
calibration can be made near that temperature. Temperature accuracy above this calibration point cannot be assured.
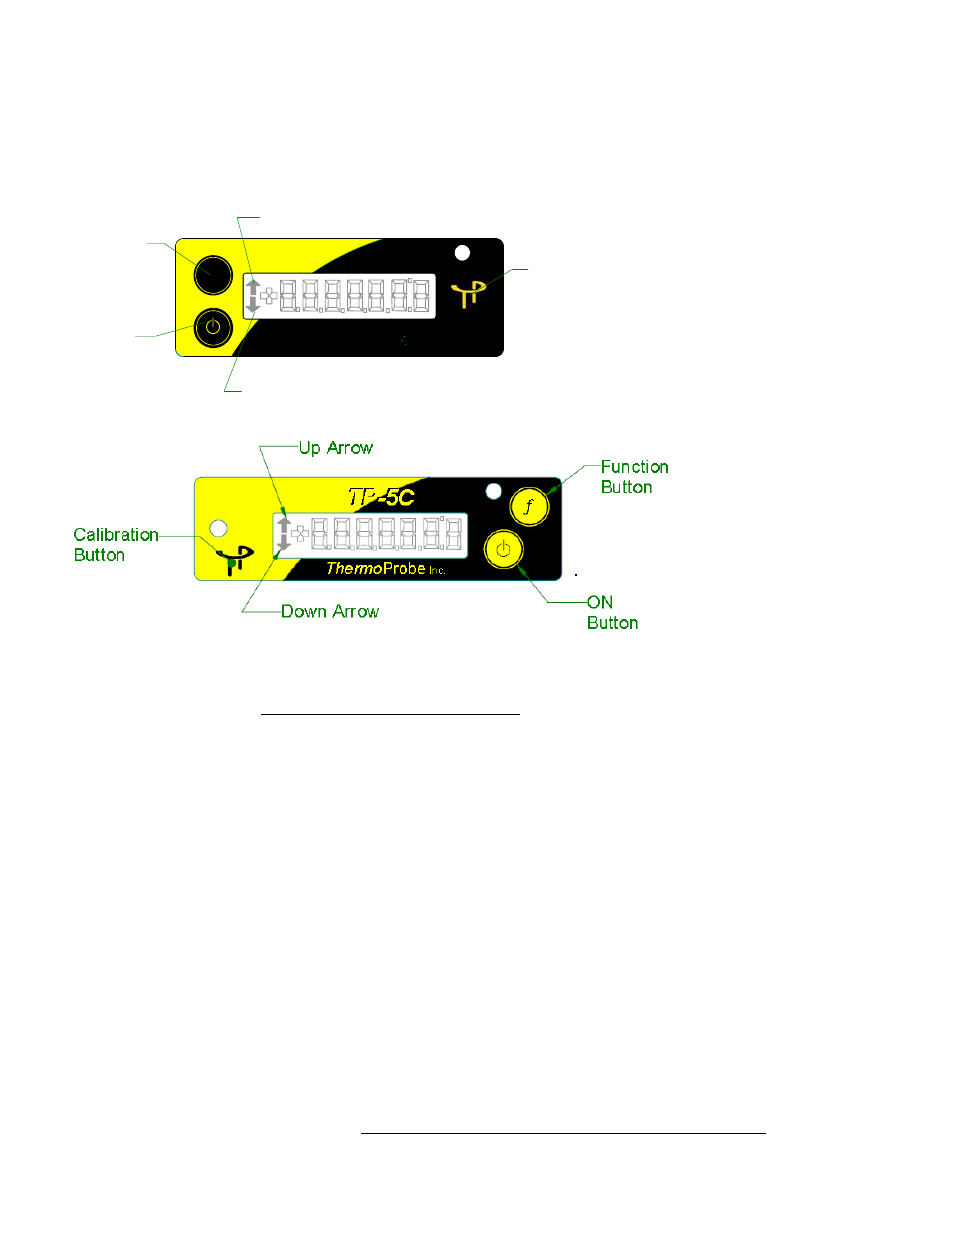
Function
Button
ON
Button
Calibration
Button
Up Arrow
Down Arrow
f
TP-2C
TP-2C
ThermoProbe
Inc.
Calibration Mode
• The calibration mode should only be accessed by qualified personnel with proper equipment, otherwise calibration integrity
may be compromised. Read the following instructions carefully.
• A 2-Point, 3-Point or a 4-point calibration can be performed. A third or fourth point is only necessary when high accuracy is
required at temperatures of 300°F and higher. You must have the proper equipment for every point of calibration.
• Do not attempt to calibrate the instrument if the “
Lo bAtt
” has been displayed since the new calibration values may not be
properly stored to memory.
• The Calibration Mode can be exited in two ways. If the user is not ready to enter the calibration mode as described in Step 1
below, the
CAnCEL
option can be chosen. If a user needs to end a calibration before completing it then STEP 3 below
provides and option to safely exit the operation and revert to previously stored calibration values. .
To calibrate proceed with the following steps:
1. A hidden Calibration Button is located on the front overlay underneath the ThermoProbe logo (see diagram above).
When the instrument is on, first press and hold the “f” Button, and then press and hold the hidden Calibration Button until the
display scrolls through the options
2Pt CAL, 3PtCAL, 4PtCAL, CAnCEL
. When the desired option is displayed, release the
buttons.
2. The device is now in calibration mode.
The last character on the right side of the LCD will now be blinking “
A
” representing the lowest temperature calibration point.
“
b
” = the next higher temperature point
“
C
” = the next higher temperature point (only used in 3-point calibration or 4-point calibration mode)
“
d
” = the highest temperature point (only used in 4-point calibration mode)
While at each temperature calibration point the arrows will flash 3 times when the temperature reading stabilizes.