Installation, Hardware installation – StarTech.com UNIDUPDOCK User Manual
Page 6
Instruction Manual
3
Installation
WARNING: Hard drives require careful handling, especially when being transported. If you are
not careful with your hard disk, lost data may result. Always handle your hard drive and storage
device with caution.
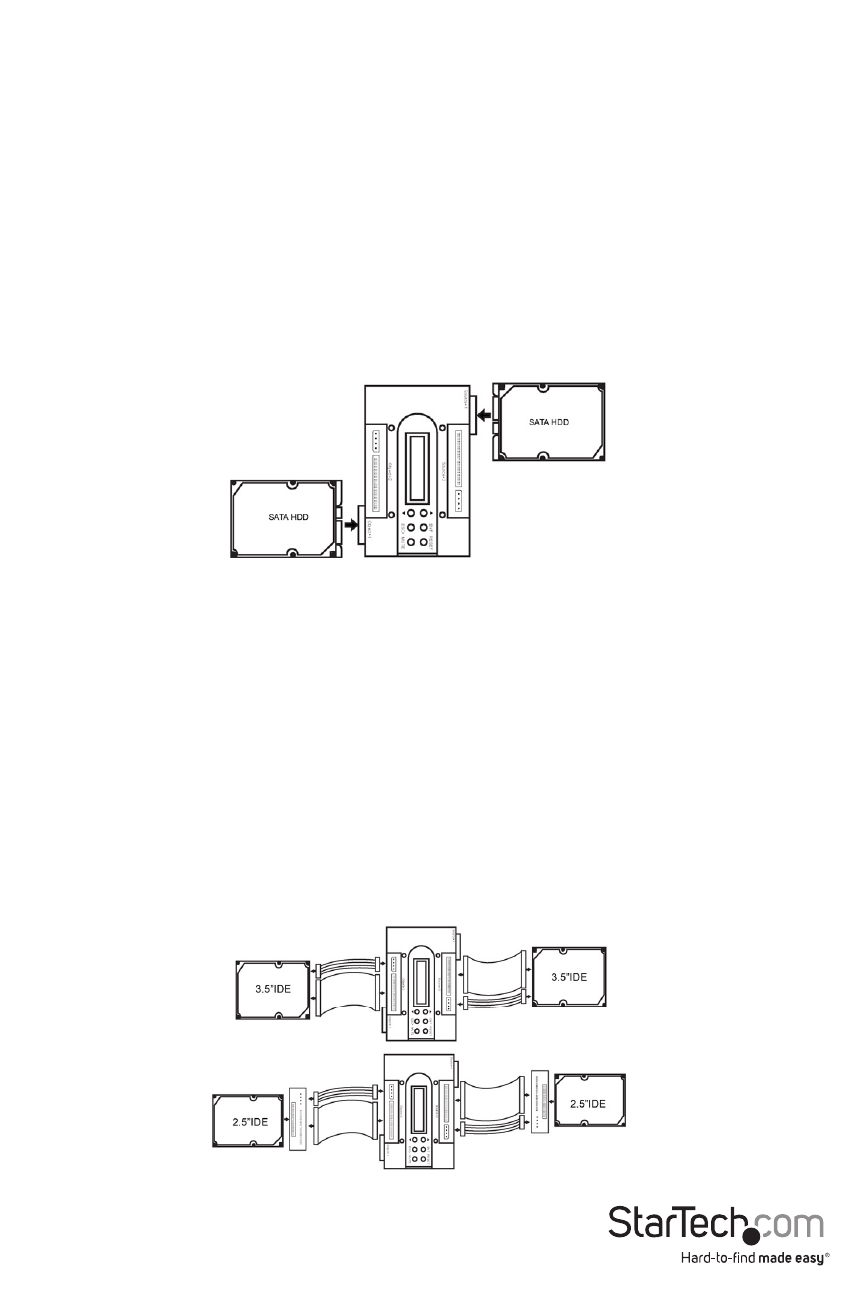
Hardware Installation
1. Plug the universal power adapter into a wall power outlet and into the DC In connector on
the duplicator dock.
2. If using a SATA hard drive as the source disk, gently slide the hard drive into the 7+15 SATA
connector labeled Source-1 on the duplicator dock. Skip to step 6.
3. If using an
IDE hard drive as the source disk, connect the IDE ribbon cable (included) to the 40-pin
connector labeled Source-2. The connector is keyed to fit only one way.
4. Connect the LP4 molex cable (included) into the 4-pin connector next to the 40-pin IDE
connector. The connector is keyed to fit only one way.
5. The jumper settings on IDE hard drives must be set to either ‘master’ or ‘cable select’. Refer
to hard drive manufacture if unsure how to set.
6. Connect the IDE hard drive to the ribbon cable and LP4 molex connector. If connecting a
2.5” IDE hard drive, attach the 40 to 44-pin adapter to the end of the ribbon cable and LP4
cable, then connect the hard drive to the adapter.
NOTE: Only one Source disk and one Destination disk can be installed at a time. Only
connect a SATA or an IDE hard drive, not both.